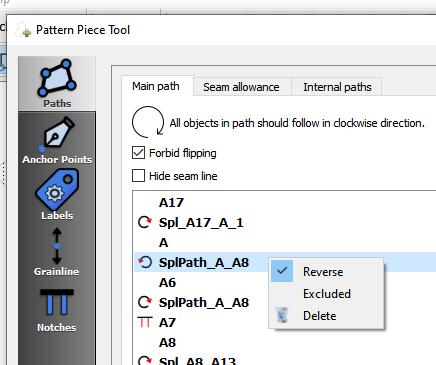
Yeah… whenever a piece is doing funky things, check the direction of the curves. Or check to make sure you’ve included a curve in the path. If you missed something, you can always add a node (a point or curve [segment] ) to a path. In the Paths->Main Path list you can then include (and move) the new node to the proper order. You can also designate your notches here, but thats another whole topic.
Sure.
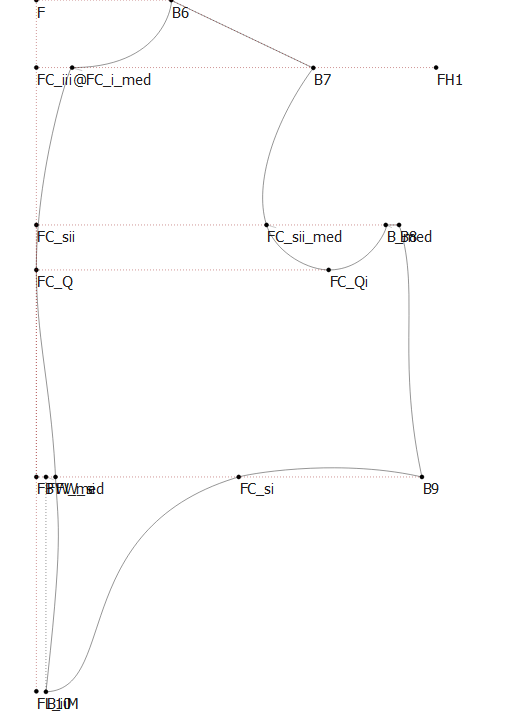
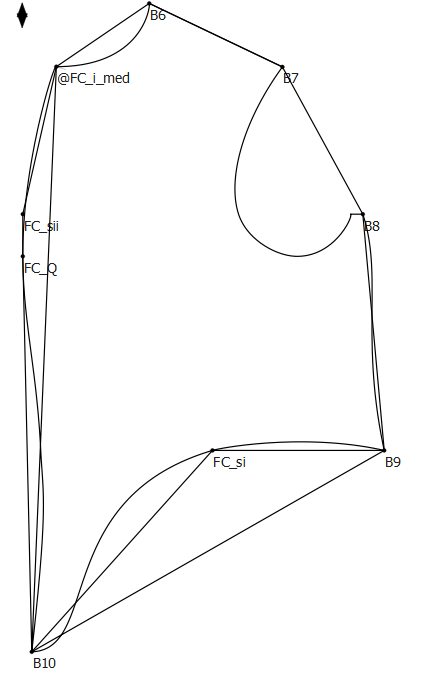
Like I said I noticed the squashed grainline in your screencap… the app defaults to 1, which at 100% zoom the grainline is just long enough to show the 2 arrow heads - which look like a Diamond. So anyhow, in order to keep the grainlines in place, you can designate points from a draft as “anchor points” (fornerly known as pins). The points can be existing points, or more likely you will create points in open spaces of pieces you create. To create an anchor point you use the anchor point (AP) tool in the Piece drawer of the toolbox.
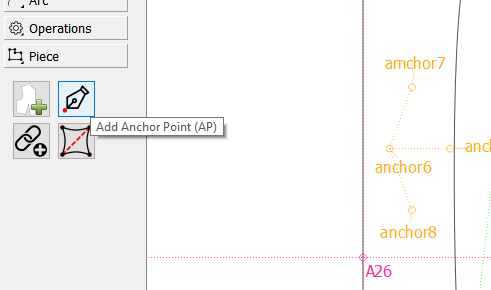
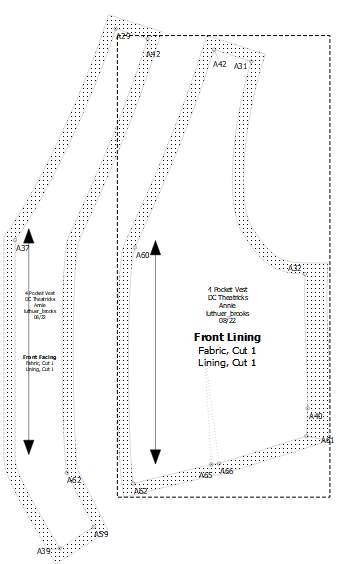
As you can see in the pic, I created 3 anchors for the front facing anchor6,7, and 8… anchor6 for the grainline, and 7& 8 for the labels. I now also like to color the anchors so I can more easily identify them from other points.
To add an anchor, click the anchor tool, then select a point in your draft block to designate it as an anchor point. Once you click on a point, a dialog pops up asking which (previously created) pattern piece you want to add the anchor to. Now when you go (back?) to piece mode and edit a piece’s properties, you can configure it’s grainline. Note: Once you designate a point as an anchor, you can’t delete the point in a draft block, until you delete the anchor point reference in the Pattern Piece dialog → Anchor Points…
Or as the case may be from each piece you may have added the anchor to.
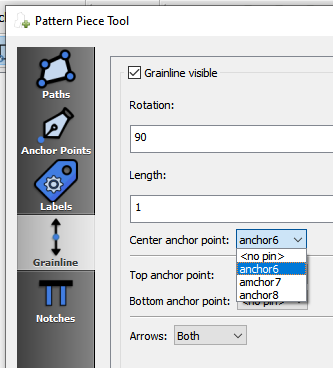
You can check whether a grainline is visible on that piece or not. You can set the rotation of the grainline - which can be a formula - with 0 deg being at 3 O’clock, 90 at 12, and so forth counterclockwise to 360 (same as 0). You can set the length - which currently defaults to 1, which IMO is always too short. Again the length can be a formula. Now you have two options to anchor the grainline, around it’s center point OR between 2 anchors. If you choose 2 anchor points, it over rides the rotation and length. Using 2 anchors could be useful if you create them along your seamline, say top and bottom, where it makes it easier to line up on stripes or plaids. You can also set whether to display 1 or 2 arrow heads. 1 being useful if you want to indicate a 1 way fabric.
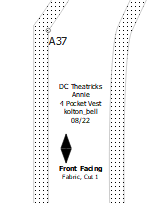
Once you apply the settings, and if it’s anchored, the grainline ( and / or labels) will now stay anchored with the piece, and will generally stay within the piece, regardless of the measurement sizes applied to a pattern. In fact labels will resize the font size to fit. So, referring back to the 1st pic, this is what it produces… I changed the length to to illustrate what the “default” grainline looks like.
I should also note that once you have enabled a grainline (or label), you can click on it, and interactively resize and rotate it. Excluding a grainline or label that uses 2 anchors, as the rotation and length (as well as width with a label) is locked to the anchor points.