When you start a project there is a point on the screen. You click on it and you start to add lines.
All lines have to be linked to each other? Or can you draw independent lines? (By adding that point wherever you want on the screen.)
How?
When you start a project there is a point on the screen. You click on it and you start to add lines.
All lines have to be linked to each other? Or can you draw independent lines? (By adding that point wherever you want on the screen.)
How?
Since Seamly is a parametric drafting environment, it would be counter-productive to draw independent lines. If you are making an independent item, create a New Draft Block. It is a bit aggravating at first, but it’s what empowers Seamly to render patterns to any measurement, so it’s well worth the learning curve. If you just want to hand-draw every variation, but on computer, I understand that Inkscape has a plugin for that.
It might be helpful to think of it as establishing juncture-points for lines, rather than as drawing lines. The displayed lines are just to make it more apparent which points the points are related to, & may be set to invisible.

How can I create a new Draft Block?
It’s the first option in the Tools menu, prominently located on the toolbars, (assuming that you haven’t closed the Pattern Toolbar,) & the keyboard shortcut is ctrl-shift-N
There are various tutorials on the Wiki - the link is at the top of this page. Other than that, I did a step-by-step tutorial in 2017 using Winifred Aldrich’s book - Metric Pattern Cutting for Women’s Wear.
Lesson 1 - Notes.pdf (1.9 MB)
This is pretty aged now and a few things have changed, but not so many that you won’t be able to follow it. ![]()
You have to think of each draft block as a tree… all branches (tools) lead back to the trunk (base point). Trees don’t have independent branches just hanging in thin air. Like @Pneumarian stated… given the parametric nature of the program, it has to work this way, where each new tool (point) is tied to a previous tool.
As an aside, because you will experience this as well… tools have no knowledge of tools created in the future. That is tools created after any other tool will not be available to use in formulas. So you have to keep this in mind as you create a pattern, and the order in which some tools are created.
How do I, or can I, put a new point on an existing line? For example, I want to draw a curve that begins at the 1.5" mark on a line.
Welcome to Seamly @KimM!
You’ll want to use the Point at Distance along Line tool, directly diagonal to the arrow in the Point toolbox, (The Midpoint between 2 Points tool just above/next to the arrow is identical, merely defaulting the formula to CurrentLength/2.) It is also quite handy for extending a line, such as adding a shoulder to waist point to a line started with a point at the shoulder to bust measurement.
If you want to put a point along a curve, you will use either Point along Curve or Point along Spline in the Curve toolbox. However, if you want to place the point along a curve at a certain distance past a point placed at the intersection of curve & tangent you’re out of luck, unless something changed when I wasn’t paying proper attention.
Thanks! I see it; I understand, but I can’t make it draw. I will have to watch some tutorials. I am drawing a pattern for something much simpler than clothing. It is the top band of a tote bag. The band has curves where the straps are attached and I would like to make precise patterns for the different sizes.
For any of the tools there are tooltips in the statusbar… just follow what it tells you to select. In the case of Point Along Line you first select the starting (1st) point. A rubberband visualization will be drawn on screen until you select the ending (2nd) point. A dialog will pop up, and you can enter the length (distance from from the 1st selected point) that you want the new point along the line. The length can be an absolute value or a formula. There is a special case tool “Midpoint” that automatically places a point at the midpoint of a line between 2 points. The 2 selected points can be any 2 points… they don’t have to belong to the same tool. It should also be noted that the length can be zero or greater than the length between the 2 points, which will place the new point beyond one of the points.
BTW… the same sort of tool exists for a Point Along Curve, with the difference being you just have to select a curve, and not a 1st and 2nd point.
& that it can’t go past the curve!
![]()
Hmmm… don’t think I’ve ever tried that or if it applies to curves and arcs?
And actually I meant to say “less than zero” for the length.
Oh boy, now I’d be asking, “Where is the status bar with the tool tips?” Could someone please tell me that much? And I really hate to say it, but I have been frustrated enough with this program, trying to draw a simple bag pattern piece that I drew it in MS Word instead. That’s how simple it was. I did want to start with something simple, so that in the future I could make a pattern for something else. sigh
It’s at the bottom of the screen. The tips appear on the lefthand side. (Many web browsers will also show you the URL of a link your cursor is hovering over in this location.) When you first load Seamly, it will be stating, “Create new pattern piece to start working.”
You may find several tutorials by clicking through to Seamly’s wiki & scrolling down to where the list of tutorials lies in the center column. There is also a list of video channels just below that, which also contain many tutorials. Several of them are old Valentina tutorials, but the basics are still the same. I haven’t watched them all, but I’ll recommend the videos by Minimalist Machinist for English speakers as both somewhat recently done & easy to follow.
I hope that helps! ![]()
![]()
At the bottom of the app screen - like most apps have including Word.
In Seamly2D when you choose most tools a tool tip appears in the status bar, which will guide you as to what steps to take for that tool. such as the basic Point at distance and angle tool:
First step… select a point -which when starting a new Pattern on the 1st Draft block is always point A.
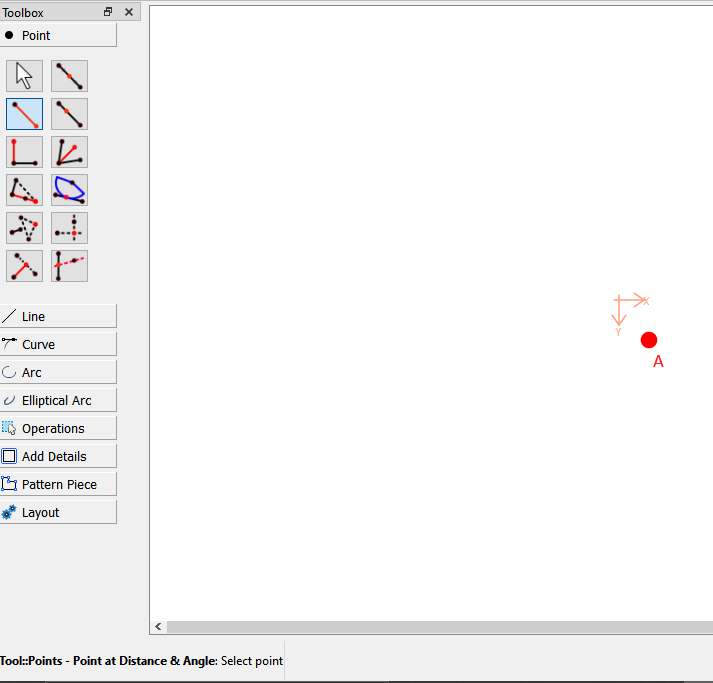
Once a point is selected a line is displayed showing the length and angle as you move the mouse. Note: You don’t have ot be exact here as you can edit the dialog once you click (or press ENTER) where you roughly want the the 2nd point to be.

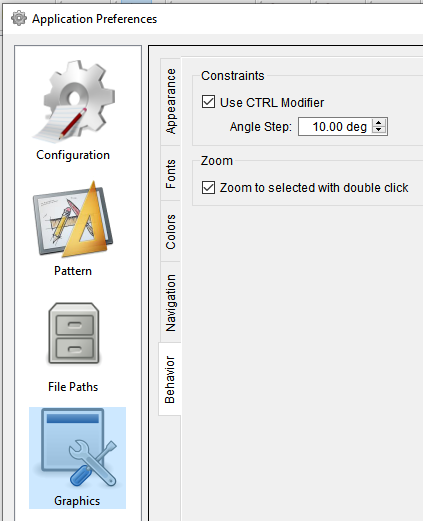
BTW - as noted in the tooltip - if you hold the SHIFT key while moving the mouse, the angle will be constrained to the steps set in the preferences. For example I have mine set at 10 deg.
Yes, but in Word you can’t load an individual measurement file and have the pattern adjust to the measurements, and I doubt you could draw a 3 piece suit in Word. You have to understand that Seamly2D is not your typical drawing or CAD program. It is a parametric drafting program, where each tool is created based on formulas and are connected to existing tools in some ways.
I can understand your frustration as someone who has 40+ years of engineering, drafting, CAD, pattern making, and software programming skills, and I was a bit lost when trying to use the app for the 1st time. Once I watched a video of a user who made a simple panty pattern the “AHA” light went on.
Thank you @Douglas and @Pneumarian. I will get to Wiki again at some point this winter. I will take note of the Status Bar more closely; whenever I noticed something there, it only showed the angle and length, never a tip.
Actually we should have asked what build ver / date your Seamly2D is… I made a bunch of changes / additions to the status bar tooltips a few versions ago… so what you’re seeing may not reflect the most current release. BTW, I should note that the app currently has 2 status bars, which is not normal - not my doing. I’ve made more changes to the status bar area in an update I’m working on… most notable is the 2 bars will be combined into one, with the mouse coordinate widgets moved to the right side of the bar with the tooltips remaining on the left. While not a major visual difference, it’s more to conform to the standard way to code the Qt statusbar.
