Hi, I am trying to follow a manual drafting plan and translating all the steps to seamly, there is one part that I am stuck on and wonder if anyone can point me to the right tool/method.
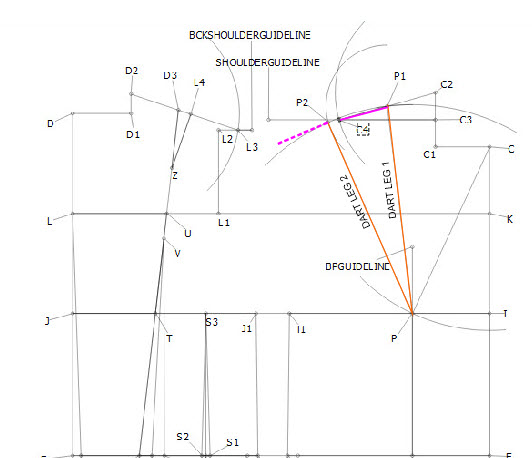
The manual instructions tell me to fold the dart legs - and once folded in, to then draw in the remainder of the shoulder line -(I have highlighted them in orange on my picture) however I can’t ‘fold’ out the dart on seamly. The pink solid line needs to be moved and be the right angle and length - indicated by the pink dotted line.
I have tried a number of things , but no luck - can anyone help?
You can use the Rotate tool to rotate P1 & b4 (?it’s a bit faded so I’m hoping I have this correct) from axis P using the formula LineAngle P-P2 - (minus) LineAngle P-P1. This will place P1a1 on top of P2. Then you can draw a line from P2 to b4a1 (which will become the shoulder tip).
Hi Grace - I am still having trouble - It only appears to move the dart leg from p.
I am using the rotate objects tool - is that correct?
I am basically trying to move the pink solid line at P1 - to be the pink dotted line at P2 - so that I have the perfect angle to make the shoulder line - once the dart is folded in of course - so I need to move the solid pink line over to P2 -
Am I using the correct tool?
Many thanks for your time
I’m even less sure what’s going on here than @Grace is, but I’ll see if I can help.
If you rotate Line_P1_b4 by AngleLine_P_P2-AngleLine_P_P1, (using P as the rotation point) when the dart is stitched, the shoulder line will be straight. If you do not yet have a Line_P_P1 or a Line_P_P2 you’ll need to draw them first with the line tool, you can make the lines invisible, dotted in various manners, or solid to taste.
I hope that helps! If not, please keep asking until we figure out what’s going on!
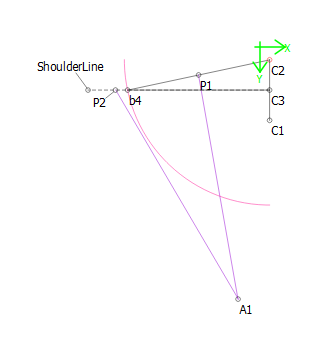
Ok, here I have set up the basic scenario (a few things not included):
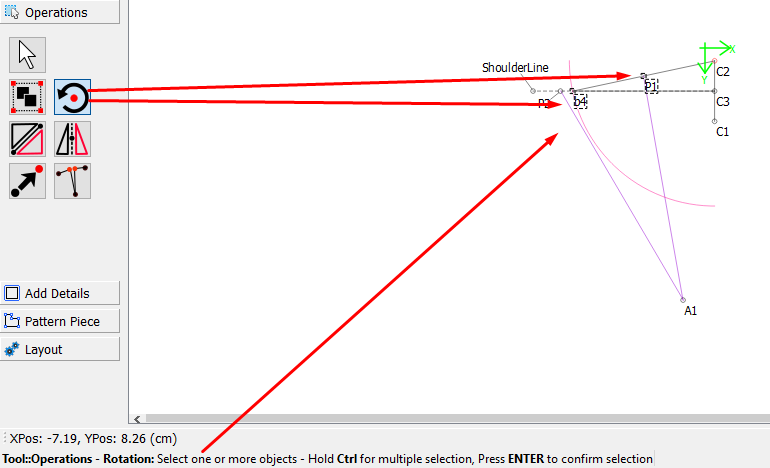
Now I’m going to use the rotate tool:
The help in the bottom left of the screen says to select the objects that you wish to rotate, while holding down the Ctrl key and then press Enter.
In this case, I am only selecting b4 & P1.
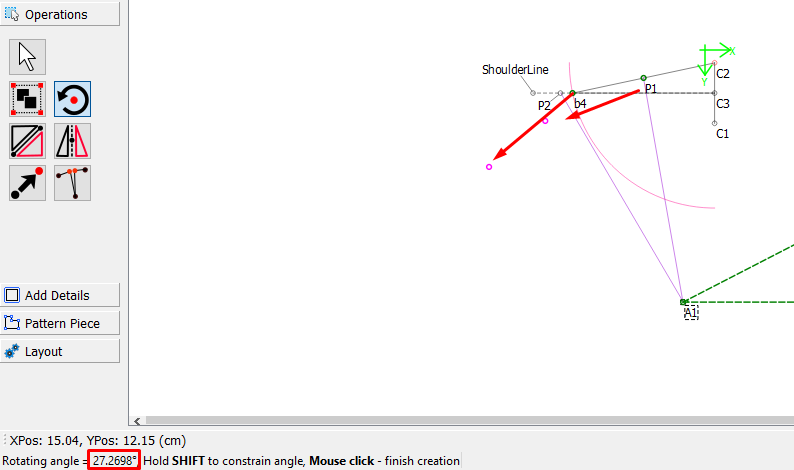
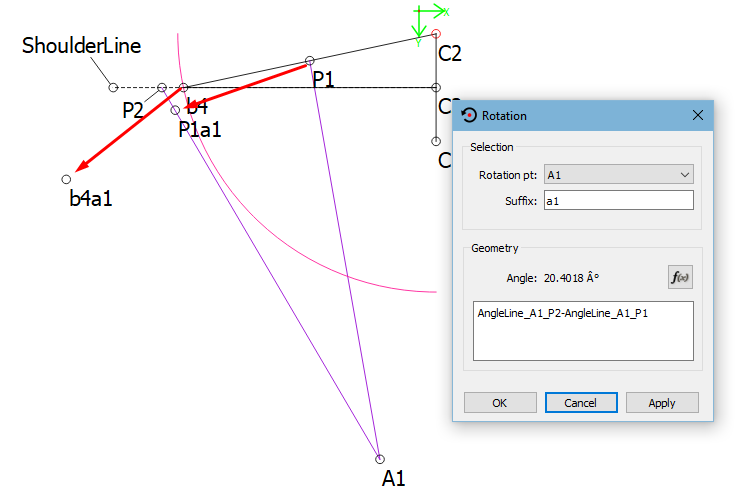
I then move the selection to more-or-less the place that I want it to be & click the mouse button (see help in bottom left):
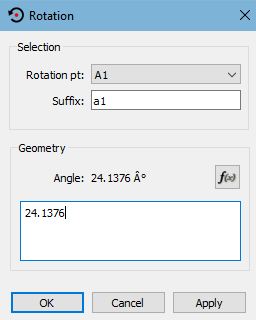
And this box pops up:
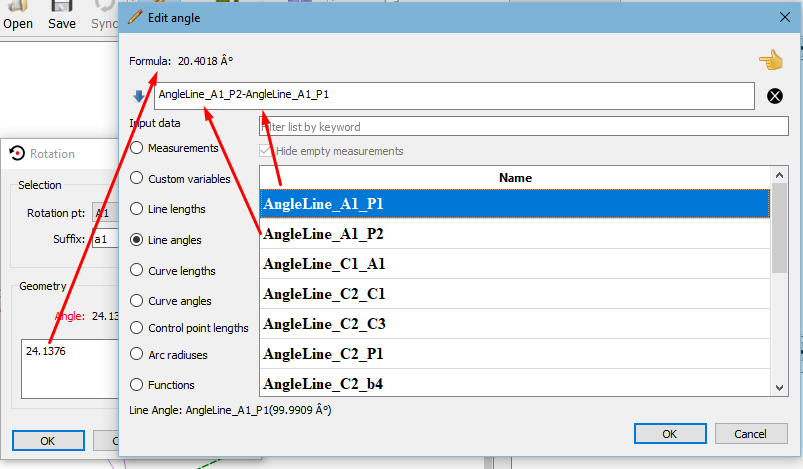
Since the angle really isn’t correct, I’ll need to change that by putting in the formula, so I click on the f(x) button and select the line angles that I need:
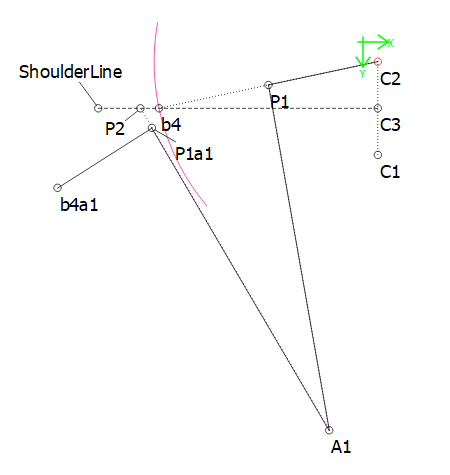
And this is my result:
As you can see, P1 has moved onto the line A1 to P2 and now has a1 added to the label & the P1 has also moved by the same distance and also has a1 added to the label.
Now all I need to do is to draw in the new lines:
Just for neatness, I’ve made the arc shorter & more centered over the shoulder line & changed some of the lines to dots or dashes. The actual shoulder line and dart legs, I’ve done a solid line in black so that I can see which points to select when I do the details for the pattern pieces later.