Bonjour,
J’aimerai connaitre la technique parfaite et qui donne un angle à 90 ° parfait de la courbe par rapport à la ligne de coté. Je cherche à faire un angle parfait de ma courbe F1b1b2 -G1 avec un équerrage de 1 cm. Quelle est la formule de l’angle? Merci pour votre aide.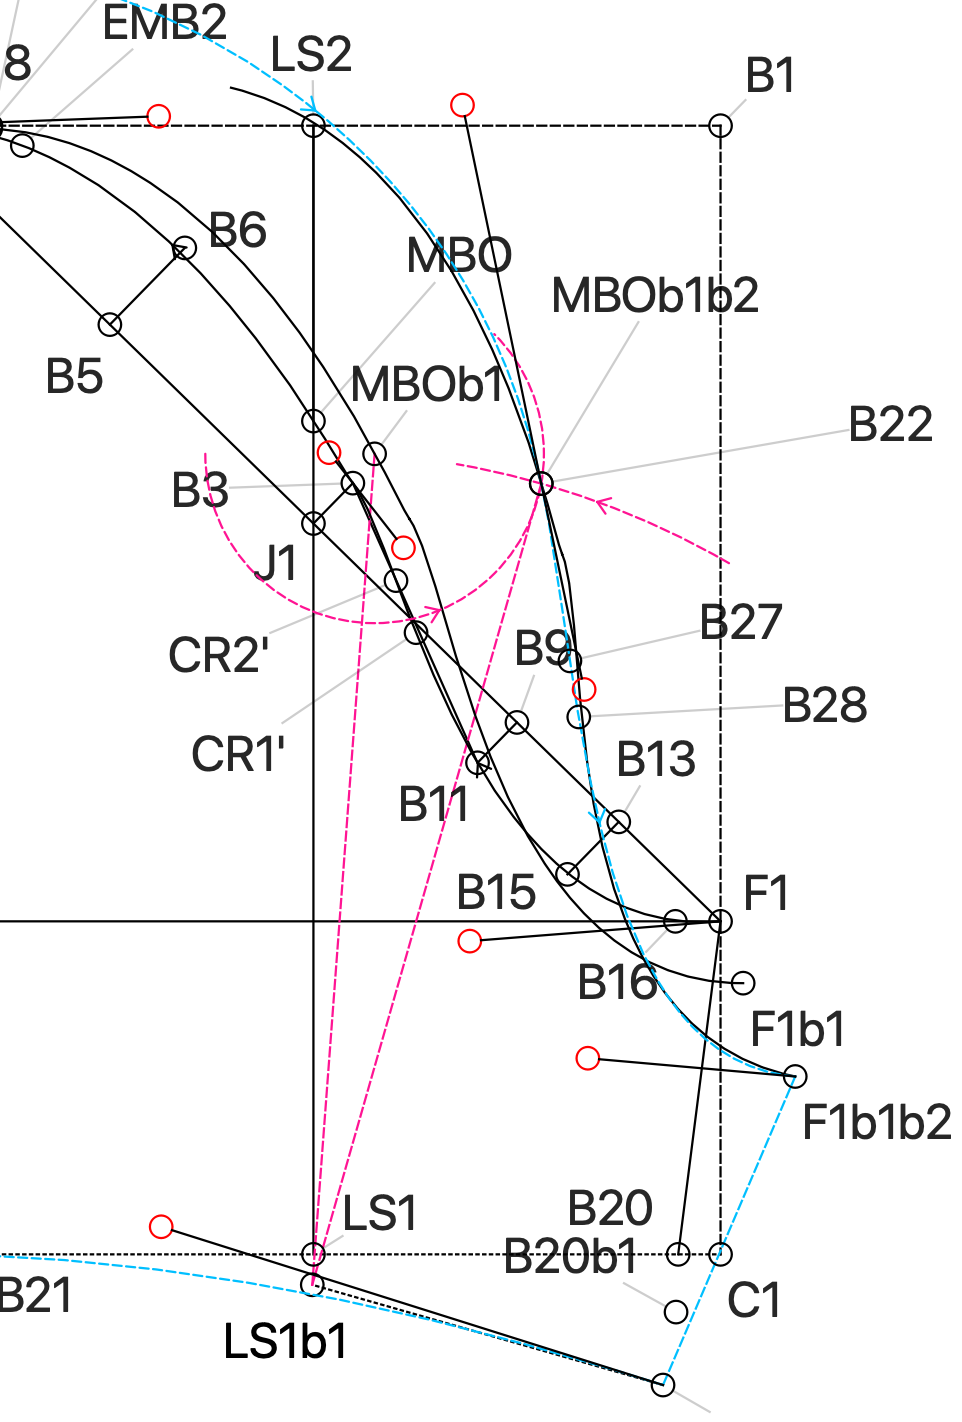
2 Likes
To get the perfect 90° angle, use the formula Line Angle B20b1b2 to F1b1b2 -90° and the length can be Line Length B20b1b2 to LS1b1 divided by 2. This should produce a very nice curve.
Pour obtenir l’angle parfait à 90 °, utilisez la formule Angle de ligne B20b1b2 à F1b1b2 -90 ° et la longueur peut être de Longueur de ligne B20b1b2 à LS1b1 divisé par 2. Cela devrait produire une très belle courbe.
2 Likes
Bonjour,
Je n’ai pas compris et je mets un nouveau patron car j’ai le même problème.
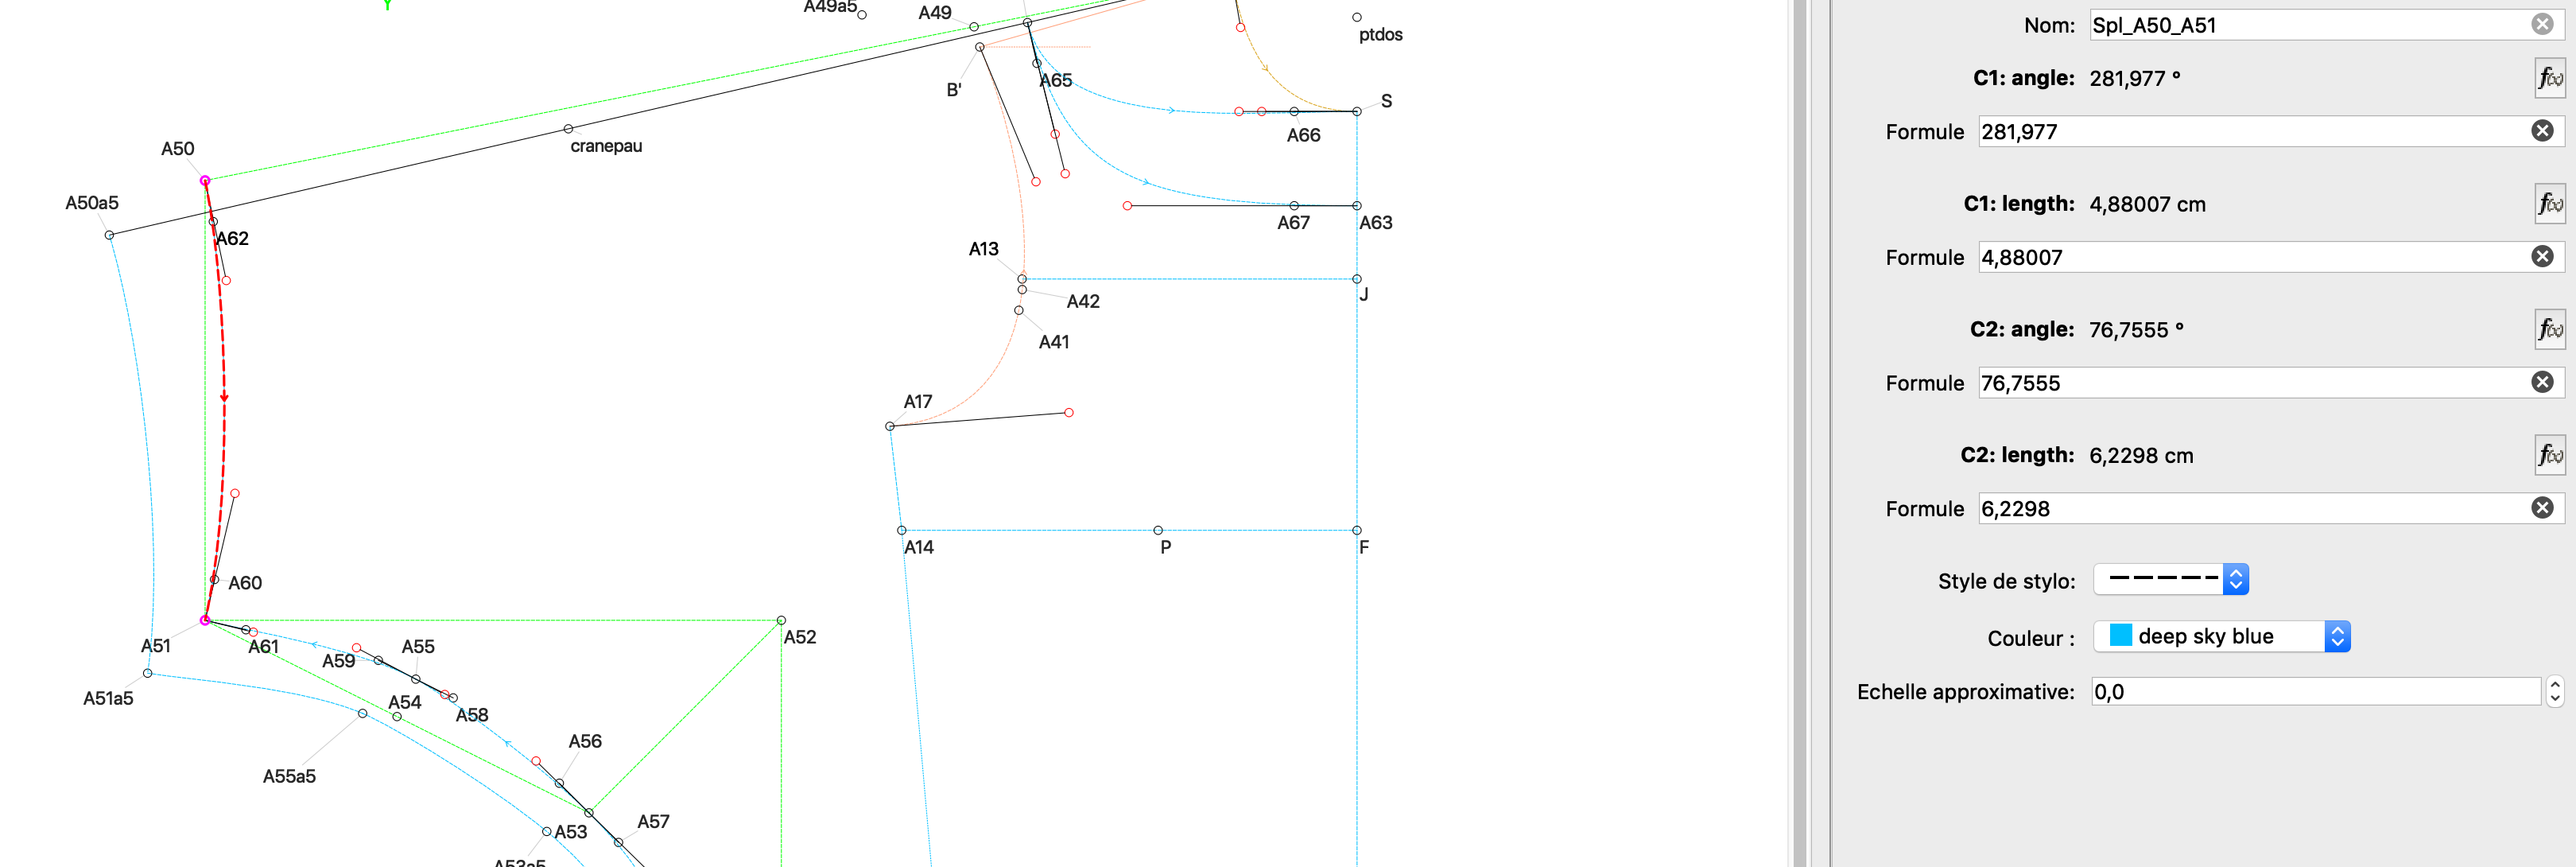
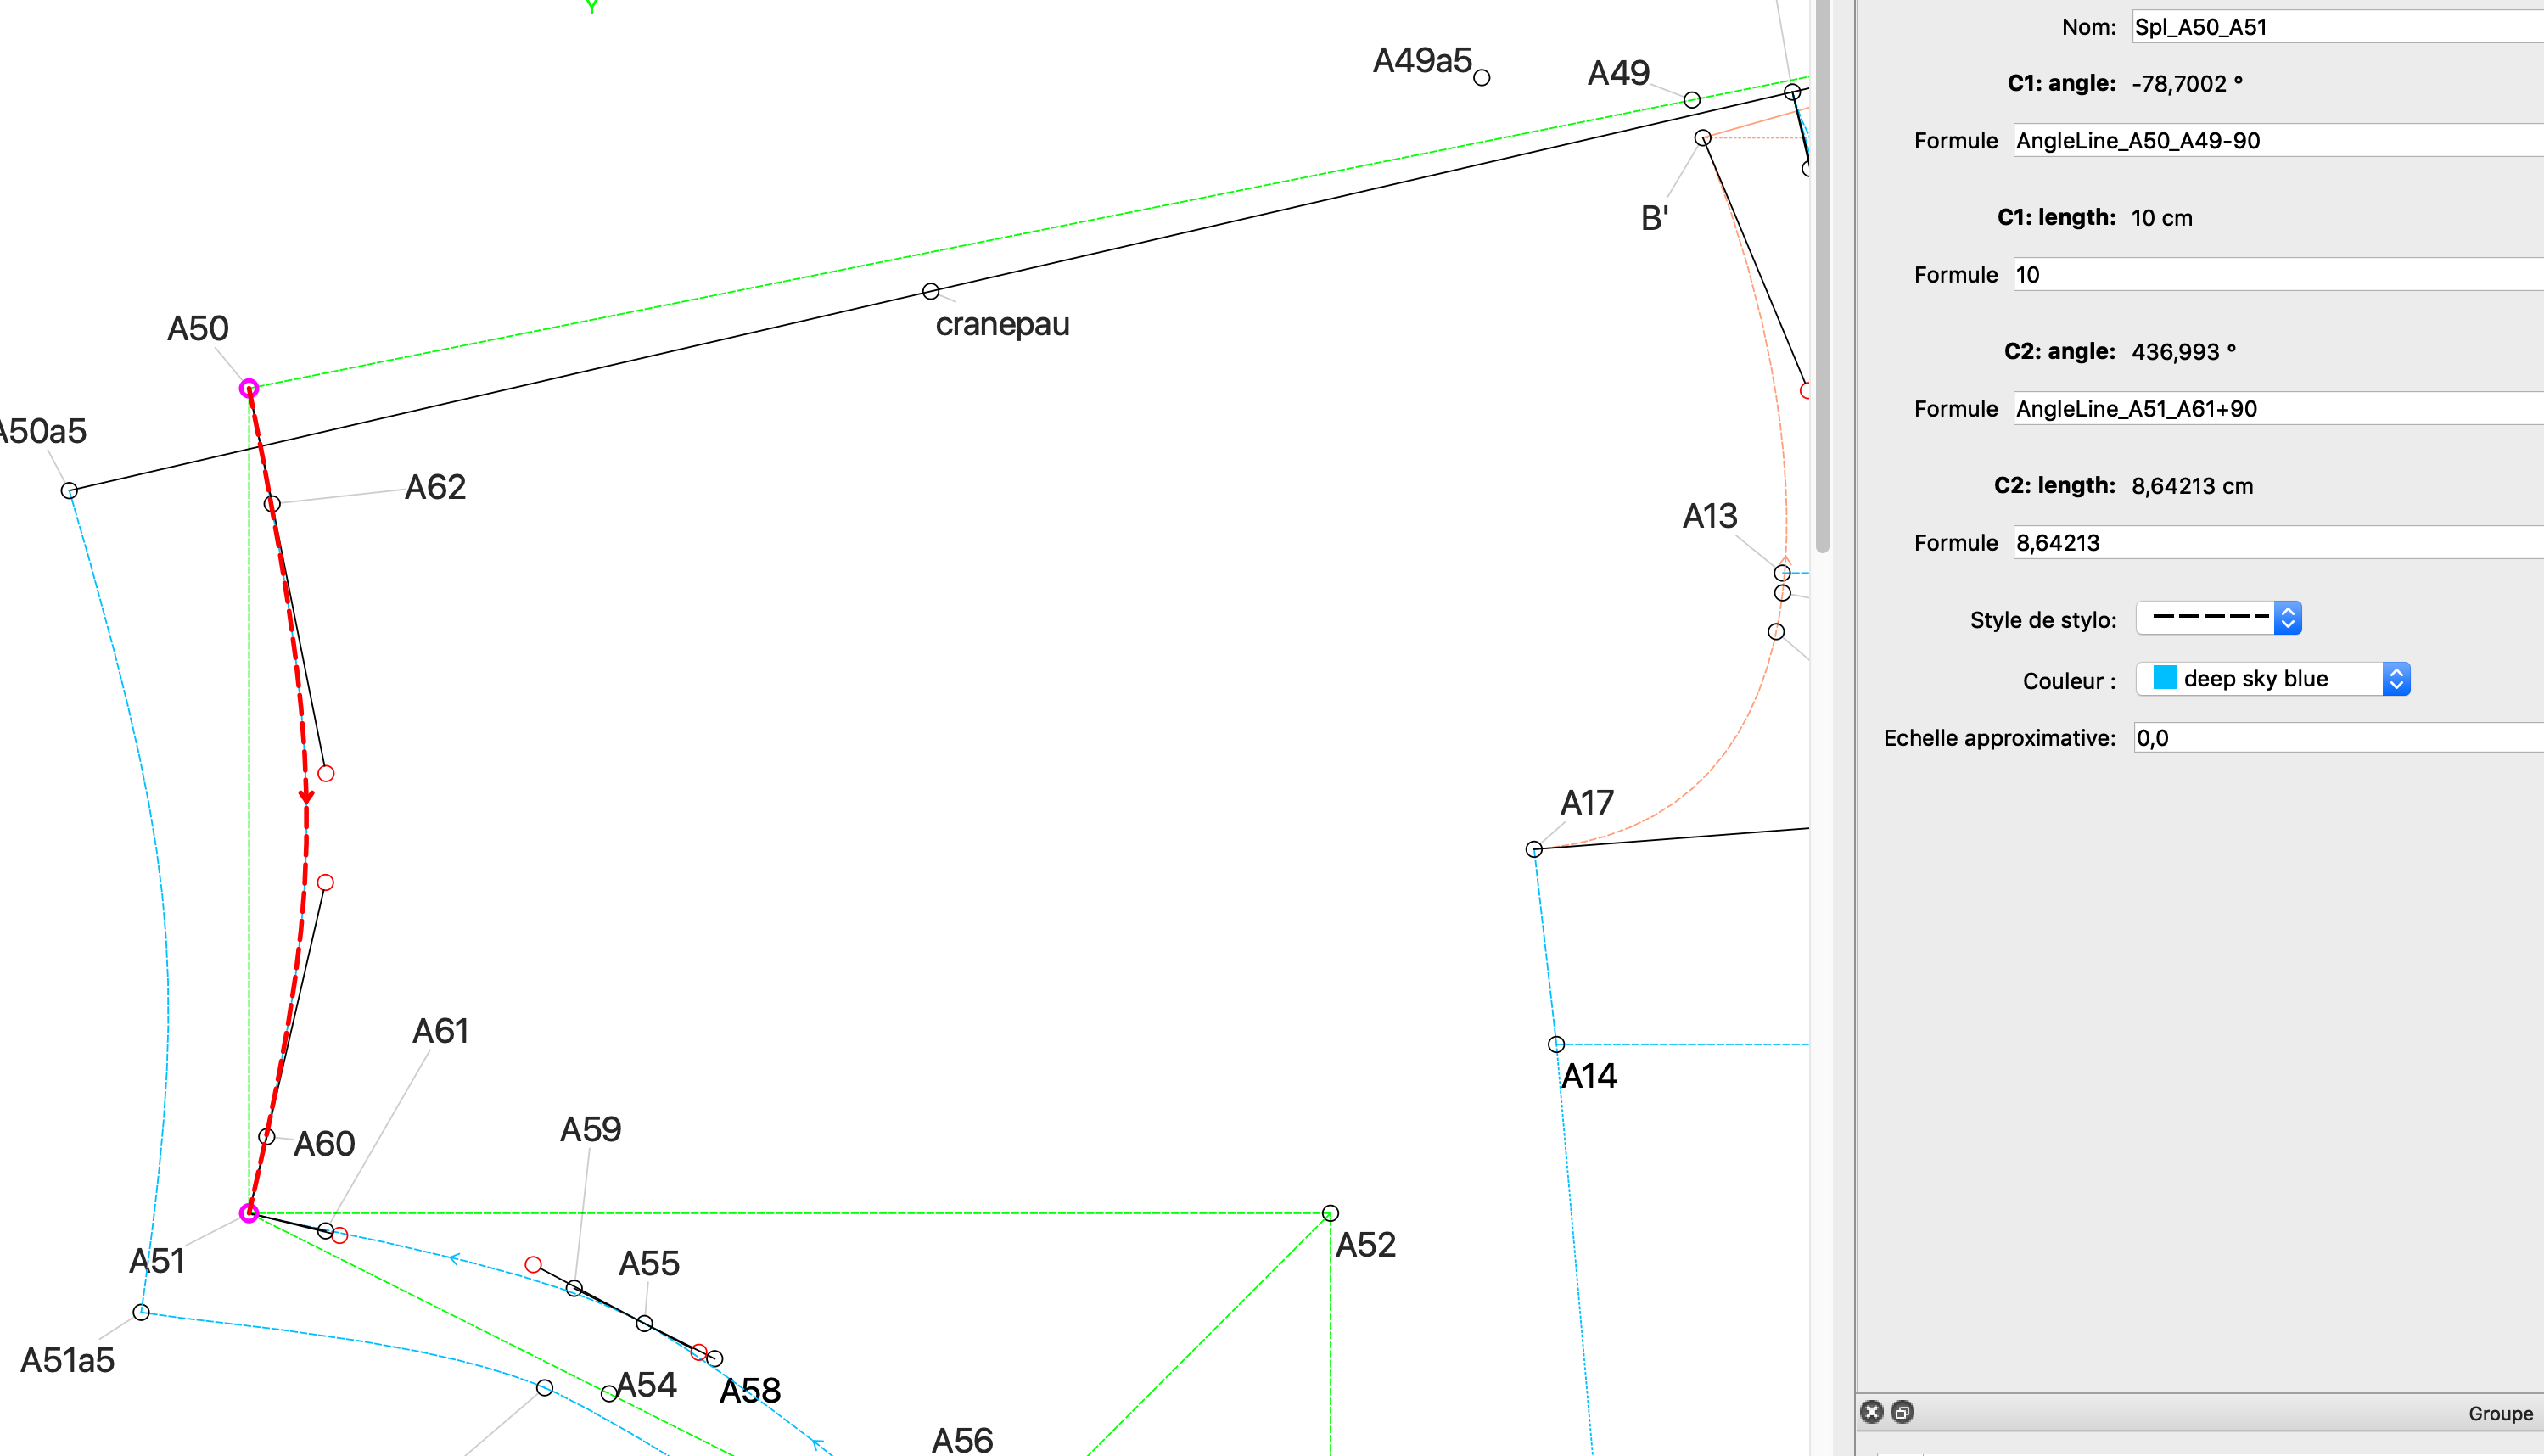
Je n’ai pas compris et je mets un nouveau patron car j’ai le même problème. Je veux que ma courbe A50-A51 soit à 90° de A61-A51 et deA49-A50. Je ne sais pas ce que je dois mettre dans option. Merci pour votre aide.
I did not understand and I put a new pattern because I have the same problem. I want my curve A50-A51 to be 90 ° from A61-A51 and A49-A50. I don’t know what to put in option. Thanks for your help.
1 Like
You need to tell the pattern to use the formula by clicking on the Fx formula option next to the item that you wish to change:
This will bring up the formula menu where you will be able to choose Line Angles and select the line that you would like to use for the angle.
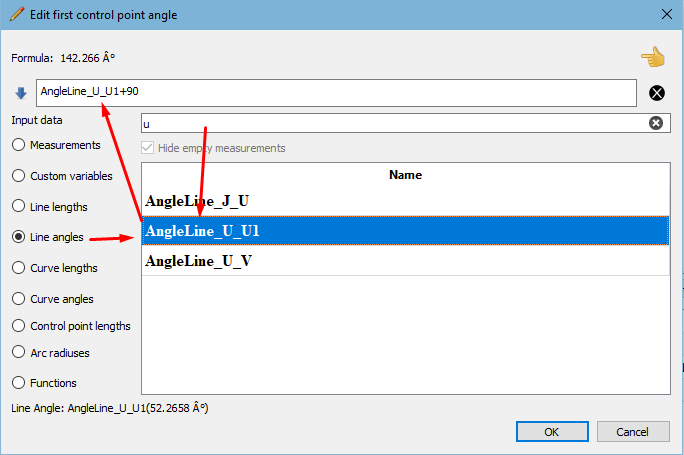
Click the Fx, Select Line Angles, (I normally put something into the search box to narrow down my choices), then select the line that you wish to use and add or subtract 90 degrees, as required to get the exact right angle.
Repeat this process in all the Tool Options using Line Lengths for the curve handle lengths, until you have a formula in each of the boxes that will automatically calculate the angles and curves when you load larger or smaller size measurement files.
Things may look slightly different on your computer because (if I’m not mistaken) I think that you’re using Valentina, but the process is the same.
3 Likes
Hello Grace, I did as you told me but it doesn’t seem to work, the angles aren’t 90 °. I have been looking for the solution all morning but I cannot find it.
Bonjour Grace, J’ai fait comme vous m’avez dit mais cela ne semble pas fonctionner, les angles ne sont pas à 90°. Je cherche la solution toute la matinée mais je ne trouve pas.
1 Like
If you send me the pattern and measurement file, then I can have a look for you, please.
3 Likes
Merci infiniment Grace 
1 Like
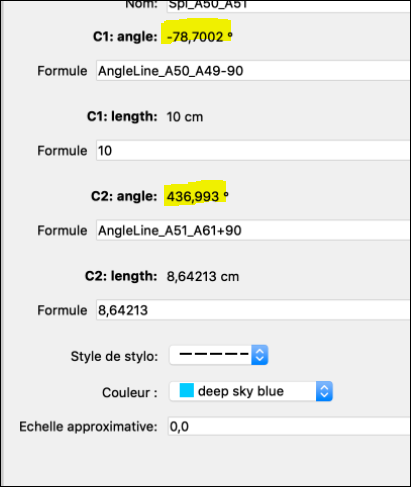
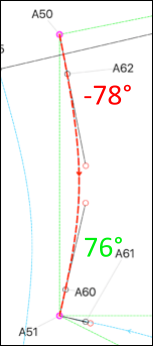
Visuellement, les angles de contrôle semblent être perpendiculaires aux lignes. L’angle répertorié dans la boîte de dialogue peut être l’angle absolu de la poignée de contrôle dans le diagramme, et non le résultat de la formule relative à la ligne. Dans ce cas, cela devrait être corrigé.
La première manette de contrôle semble être à un angle de -78 degrés. La boîte de dialogue doit afficher 90 degrés, le résultat de la formule, et non l’angle absolu tel qu’il est dessiné sur le canevas. Le 2ème angle de contrôle semble être à un angle de 36 degrés. Pourquoi ajoute-t-il un 360 degrés? Cela doit certainement être corrigé!
Visually, the control angles appear to be perpendicular to the lines. The angle listed in the dialog box may be the control handle’s absolute angle in the diagram, not the result of the formula which is relative to the line. In which case this should be fixed.
The 1st control handle appears to be at angle -78 degrees. The dialog should show 90 degrees, the result of the formula, not the absolute angle as it’s drawn on the canvas.
The 2nd control angle appears to be at angle 76 degrees, (436 - 360 = 76). Why does it add a full 360 degrees? This definitely needs to be fixed!

3 Likes
Easy fix. Put a function in the dialogtools to normalize angle input in the dialogs between ±0-360 deg.
4 Likes
Merci mais je ne comprends pas comment faire?
Thanks but I don’t understand how to do it? Can you help me?
2 Likes
Salut @Emmababi, Ceci est un correctif de code, vous ne devriez rien faire. Le logiciel fonctionne correctement, mais les informations affichées dans la fenêtre de dialogue est trompeur.
Hi @Emmababi, This is a code fix, there’s nothing you should do. The software is working properly, but the information displayed in the dialog window is misleading.
3 Likes
I was a bit confused here, the result of the 1st control handle formula should be 282, not -78. (0 < 278 < 360 is true, 0 < -78 < 360 is not true ) The result of the 2nd control handle formula should be 76, not 436 (0 < 76 < 360 is true, 0 < 436 < 360 is not true) So as @Douglas says, we need to code in a simple modulo function based on 360.
3 Likes
Yes a simple function using fmod()… as we need a double (qreal) return value.
Could I assume we just need positive angle values between 0 and 360? And not deal with negative angles? For ex: -90 is the same as 270.
3 Likes
Yep. No negative values displayed in the dialog just to keep things consistent. 0 < degree < 360
2 Likes
0 ≤ degree ≤ 360, right? 

3 Likes
Well that definitely makes it easier… just need to figure out exactly where to insert it. ![]()
double normaliseAngle(double x)
{
    x = fmod(x,360);
    if (x < 0)
        x += 360;
    return x;
}
3 Likes