I’ve been using seamly for a few weeks and its a great software.
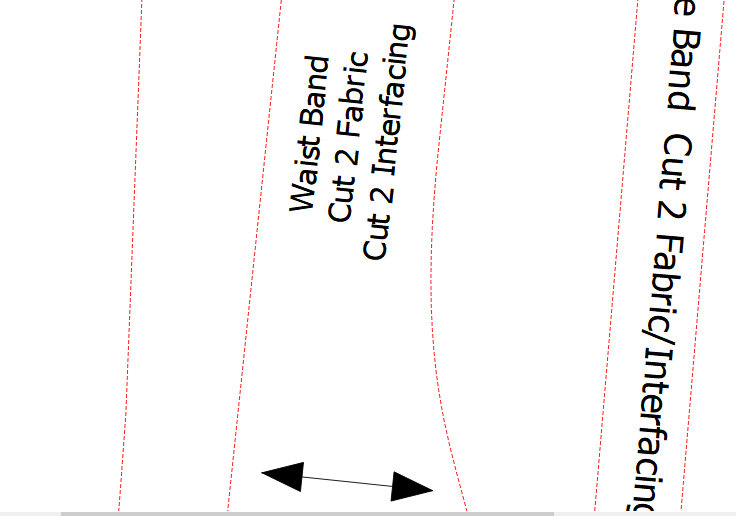
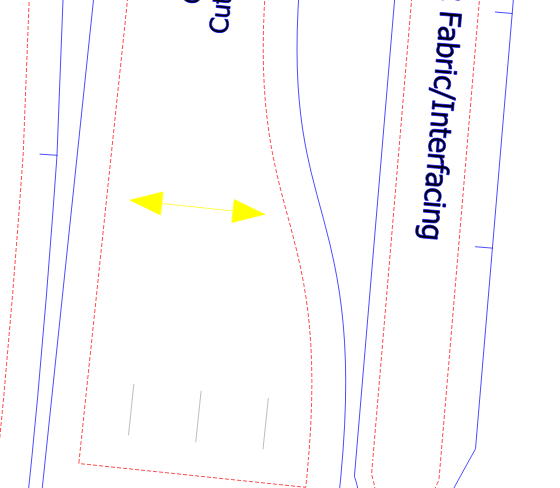
However, when I’m exporting (SVG to affinity designer) the pattern pieces, both the outline and seam lines are solid. I’m making layered multi-size patterns, so it gets really confusing. Up till now, I’ve been using them without the main path showing and using different dashed lines for the cut line to differentiate the sizes. But I want to start adding seamlines (that are different to the cut line).
The two lines can’t be ungrouped and so I can’t change the appearance.
Update: the only way I can think of is exporting without seam allowance, then adding seam allowance and exporting without the main path. This will definitely slow things down though.
TL;DR Is there a way I can get the seam line to look different to the cutting line when exporting SVG?
Not within Seamly2D, but it is certainly a good idea that I can look into implementing.
Let me ask… would we want to be able to set the lineType for either of the cut or seam line? Or would a simple toggle of the seam line to use a solid or dashed line suffice? Or even easier yet… just make the seam lines dashed? Then there’s the question of whether the pattern is to save the linetype, or whether it would just be user preferences? The former being way more involved to implement.
Thank you for replying. Sorry I didn’t get a notification or I would have replied earlier.
That would be amazing. For me personally, I’d like the seam line dashed and having an option to change the cut/solid line to different dashed lines and different colours would be amazing, but not sure how hard that will be to implement. It would really help with multisize layered patterns that I make.
If thats not possible then would you be able to separate the cut line and seam line so I can edit them separately outside of seamly2d?
I took a quick look at the code last night… it shouldn’t be that hard to be able to change the seam and/or cut line… if not embedding the linetype’s in the pattern as that requires a bunch more code.
Currently the seam and cut line paths are combined into one graphics item… and then the linetype (ie the Qt penstyle) is hard coded to solid. Since a qgraphicsitem has it’s own pen and brush, what I can do is separate the paths into a seam line graphics item and a cut line graphics item and set each item with it’s own pen with a given linetype. What and how those linetype’s are set could be done in any number of ways. Probably the easiest would be a user pref setting for each line. That way a user could pick what ever linetype they want for each path.
Yes. There’s already a check if there’s a seam allowance… so in the method to set the seam allowance (cut) line… if it’s turned off, it would be set to solid (or it could be another pref?) otherwise it would be set to the preferred linetype.
After I made the last post I had an AHA… OMG moment on the drive home from work. Since other attributes of a QPen is the color and line weight, not only could we change the linetype, but the color and line weight as well! The color in particular has been a long standing issue. For some users, using certain plotter / cutters, one may need to set the “cut” lines to a specific color so the cutter knows which lines to cut. After more thought, this also answers another issue I ran into before, but didn’t understand the code well enough at the time… since the “notches” are paths included in the seam and / or cut lines - those could be separated as well, having their own pen line type, line weight, and color. Add to that, the labels and grainline could also have their own linetype and color as they too are just more paths in qgraphicsitem’s… where a pattern piece is more or less a linked list a qgraphicsitem’s.
Woo Hoo.
This also gives me a clue as to how to colorize different sizes if / when I can create a nesting module .
That sounds amazing!! I’m so glad you have figured a way to make it work. Look forward to having it implemented hopefully. Do you have a time-frame for it?
I’m going to try this weekend to get a basic implementation of changing the line type and color as a proof of concept that I’m on the right track with the layout code. I’m optimistic, but guarded at the same time just knowing from experience there might be something in the code I’m not seeing… so what appears easy with programming this app is far from it.
After that I will look at expanding the feature to satisfy several existing feature issues regarding semantic colors for the seam & cut lines, notches, internals, drill points, etc. The idea being that we want to be able to define pen “styles” for various elements to work with the DXF-AAMA format and/or various (laser?) cutters. For example… a cutline pen might be defined as red, solid, hairline which would be a common setting for some laser cutters to cut. You would define a pen for all your type of (DXF layer) elements, and instead of having to set the color, linetype, linewidth each time… you just select the style from a drop down list. Same idea as setting a font style in Word. If you want a cut line… select “Cut line”… seam line select “Seam line”… fold line - “Fold line”… etc.
Hi,
not sure if you already received that hint, but I had the same question a couple of weeks ago, and learned that e.g. within inkscape with Ctrl+Shift+K you can (I think it’s called) uncombine the seam and cutting line That information was a game changer for me Hope that helps until there is a more permanent solution from out of Seamly2d.
I’m actually using Affinity Designer and I can’t ungroup in that. I’ve used inkscape briefly before but I’m so used to Affinity.
At the moment I’m just exporting with seam line (no path) and then seperately without seam line.
Yay! Can’t wait to see what happens.
I’ve done a bit of coding before and wish I could contribute but don’t think I’ll be able to get my head around it.
Hope it works out, so excited!
Ah ok, I am not familiar with affinity, but Google suggested “Divide” option…? You could also open your svg file, ungroup the pattern pieces and uncombine both lines, save it and then open in affinity for any further fine tuning. Just an idea
I’ve been working with the code for nearly 3 1/2 years and still trying to wrap my head around parts of it. LOL
Again, I think this should be relatively easy to be able set a pen for the various paths in a pattern piece in a layout… as it appears that the pen gets set once (on 1 file) for all the path items in a layout and the path creation is isolated to 2 files (a source & header).
Unlike for ex: dealing with adding a new tool, which is hooked into many areas of the code… the tool dialog, the tool code, the tool geometry, the tool visualization, the icons, preferences, the pattern schema, the draft scene, the piece scene, the layout scene, undo / redo commands, menu items, shortcuts, the tool box & tool buttons, the property manager, the group manager, the history, the variables table, the status bar, toolbars, etc, etc.
On the right track… got the main and seam allowance… or seam & cut lines if you will -separated, and was able to (hardcode) set the pen color and linetype for the main path. Yippe!
As usual just having to decipher the spaghetti code or as it were the inconsistent naming conventions of variables, classes, methods. Some times it’s the mainPath… elsewhere it’s the contourPath. It’s like too many cooks in the kitchen… or in one head? Add to that it’s sort of a confusing issue as to what do you call it (in the code) when it could be the seam line OR the cut line - depending on whether the the seam allowance is built in. Not to mention that I have to eventually figure out how to add a negative seam allowance to get the seam line IF the seam allowance is built in.
Also I am at a loss as to why the code was not written from the start to set a pen for pattern pieces… because of course I will have to go and fix the display of pattern pieces in the “piece” mode to show the (user selected) pen style for the pattern piece paths.
Well… here we go. Got most all the graphic items set to their own pen. Need to separate out the notches, and add some preference settings. Then repeat for the pattern pieces in the piece mode.
Always thought it was going to be harder to implement. I still have to get it displaying in the piece mode, but I’m already familiar with the seam allowance & notch code for the Pattern Piece tooI so I don;t expect any surprises there. I did do an SVG export and not only did the color and line type translate correctly. the seam and cut lines are now separate objects (layers) in the svg - as they should be.
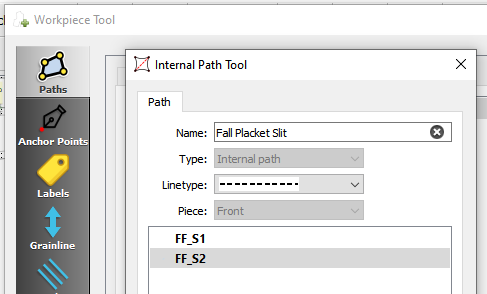
I started work yesterday on updating the Pattern preferences dialog… for now I’m just adding a color drop down for notches, and adding Seam & Cut line drop downs for color and linetype.Oddly the “internal” paths have their own class with a linetype used in the piece & layout… so I could add a color drop down here:
But again that gets into having to change up the pattern schema. Could make it easy for now and just add a “default” internal path color in the prefs, and at some point in the future add a color drop dropdown in the above dialog so that one could set any given internal path to a specified color. The reason that would be handy is that some internal paths may just be placement lines, where others may be internal cutouts - where color matters as to what gets cut. Although that could also be handled by extending the path Type’s to include an Internal Path and Internal Cut Path… where you could just define a (default) color for each one.
You might be getting an idea how easily the scope of “changing the seam line appearance” can quickly expand…LOL
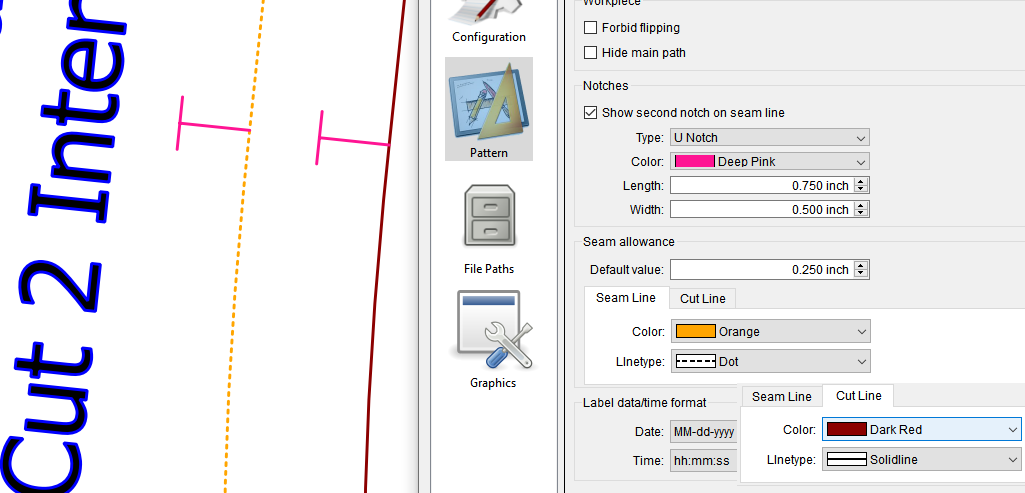
Prefs for the notch color, seam line & cut line color | linetype working. For now I put the seam line & cut line attributes in a Tab widget to save space.
We could do that… a pen has 3 basic attributes - color, line type, and line width. There’s a few others, but not as important.
Currently the app uses just “hairline” as the width, or basically the minimum width. I can easily add the width to the piece and layout (and any subsequent print / export) modes.
My understanding is the width can be useful if using a lazer cutter as the output.
That being said - note that this will only be global settings for pattern pieces in piece and layout mode. In the future I can look at each piece having it’s own pen settings for the various paths (graphic items).


 will it also possible to change the stroke width of cutting and seamline? Thank you so much for your work !