I did upload an explanation of how I use multisizes and why on my blog yesterday: www.graces.co.za if you’d like to have a look. It’s not really a tutorial, just how I use it & why.
2 Likes
Just keep in mind that changes to app UI are likely to occur - at least for a little while longer - that may render a video somewhat outdated.
That being said… there will be lots of changes and new features that having new updated videos would be much welcomed.
Edit: I have the perfect video we really need… “Getting Started”. A new user in another topic asked how do they start making a pattern. That’s what’s really needed - a simple video that explains how to start a new pattern, the concept of the draft blocks, how to use some of the basic point tools, how to create a pattern piece, and how to create a layout from the pieces.
A second video could then introduce using formulas and measurements.
6 Likes
Thank you Douglas, I was worried about UI changes too, especially since my laptop is an elderly lady… an intro video is probably a good vantage point.
2 Likes
Cool, thanks for the link! Once I have more time I’ll look into your use of militarize patterns, since I use that a lot and don’t know a lot of people who do as well.
Edit: ummm… multisize patterns 
2 Likes
Oh, i meant tracing a new pattern piece from the Basic Block, this is the expression I was taught in German analogue pattern making back in the day (I.e. „auskopieren“).
3 Likes
i would like to learn how to create my own plus size slopers/blocks to use
4 Likes
Just a note - the multisize feature is hardcoded in the pattern format and relates only to men’s sizes from a Russian patternmaking book. So… needless to say the architecture of this feature must be ripped out and started again from scratch. The way this should work is completely different than the way it currently works.
So I advise against publishing info about Seamly multisize because it’s so crazy wrong and confusing. Many people who use Seamly are learning Seamly at the same time that they’re learning patternmaking. Teaching our current horrible multisize feature will teach them something they have to unlearn, which is harder than learning it to begin with. The concepts they will need to know about properly creating multisized patterns will be forever messed up. Just my two cents on this issue …
ANd any patterns made with multisize at this time might not be supported in the future because we can’t map a set of contradictory rules based on false assumptions that users have to “work around” to get it to meet their needs (current Seamly multisize) over to a set of logical rules (future Seamly multisize). So use the current multisize feature with this in mind. If at all possible please, I beg you, wait for the fix for multisize feature. In the meantime just create a measurement file for each of your sizes. We will be able to convert all of those measurement files into a single multisize file, that’s doable. Can’t say that we will be able to guarantee conversion upgrade of a pattern that has the incorrect multisize feature embedded in it.
6 Likes
thanks Susan, that’s good to know! I’ve been using the multisize feature with a grain of salt in the sense that while width and length changes can be formulated, the sizing notation is non-changeable for now and you have to cross-check the measurements of your file to pick your desired size. I’ll keep it in mind.
3 Likes
Hello,
A video on the construction of parametric curves. I’m so so lost.
1 Like
hola a todos; estoy preparando unos videos tutoriales en español para enseñar el manejo de seamly2d y seamlyMe, basandome en el aprendizaje basico de patrones que es hacer patrones desde 0. sustituir las reglas , lapiz ,papel ,mesa grande y mucho espacio por un ordenador y los recursos de seamly2d. me esta llevando bastante trabajo y voy lenta. va ha cambiar mucho la interfaz o tambien va a cambiar algunas funciones , es para esperar un poquito para hacer los videos.
gracias a todos por vuestro trabajo.
3 Likes
hola acabo de descargar la ultima versión con la nueva interfaz, que realizare los tutoriales con la nueva interfaz.
gracias por todo.
2 Likes
Por fin he conseguido terminar los primeros tutoriales en español de Seamly2d. Los he querido empezar desde 0 para los que no saben hacer patrones y tambien para los que no saben digitalizar patrones o utilizar software de diseño. Os dejo el enlace de Youtube Curso de patronaje digital con seamly2d ¿qué es seamly 2d? - YouTube comparto las miniaturas de los dos primeros videos tutoriales.
Intentare todas las semanas un nuevo video tutorial acompañado de ejercicios y practicas para aprender a usar seamly2d.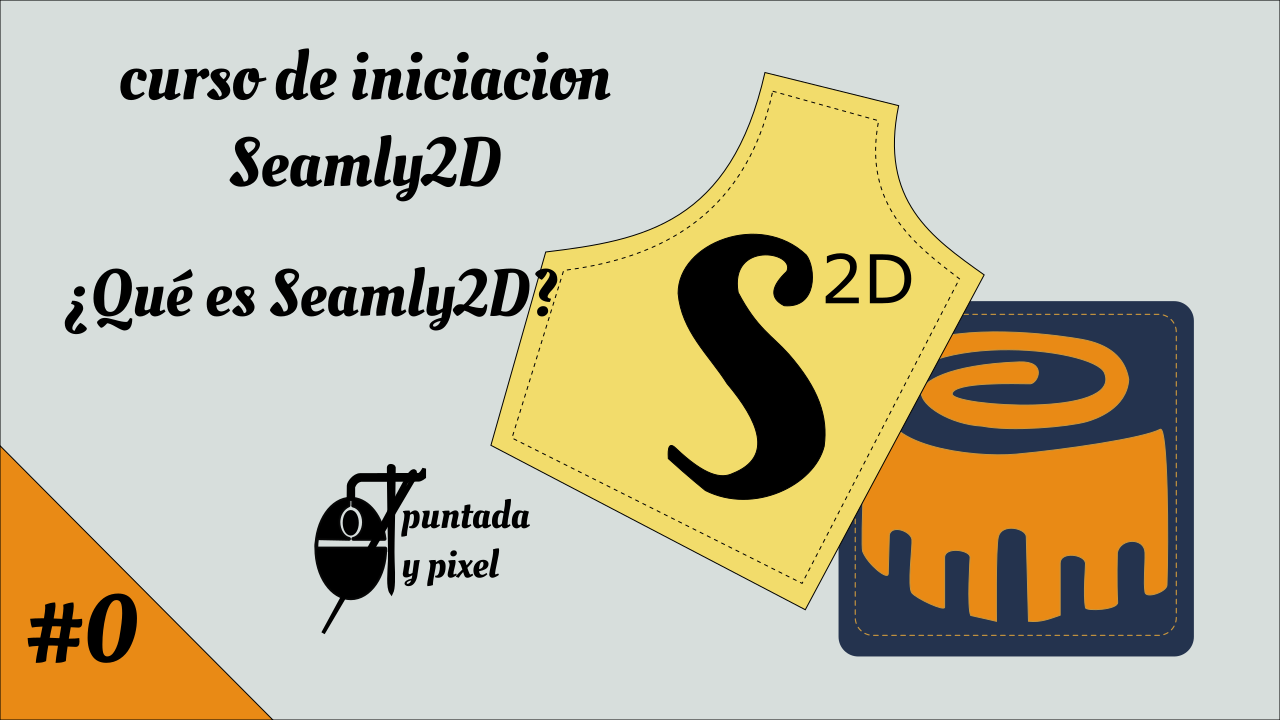
Gracias a todos los que hacéis posible este proyecto.
6 Likes

HI! Im really still new here but I’ve gone as far as creating pieces, adding allowances, etc… I’ve also watched and read about drawing curves using formulas. The last couple I’ve watched are quite clear but would’ve been way way easier to digest IF we saw a video of how the control points handles’ length and angles basically affect the curve we are trying to draw. For example, the longer the length of the handle point means…?
1 Like
I think that the best way to learn about curves and the handles is to check out some tutorials on Bezier Curves. Here’s one that I found for you that explains a bit and has an interactive curve that you can play a little with: bezier curves tutorial
And then here, @Douglas explains them in Seamly.
But to briefly explain how the length of the handle will affect the curve…
If you draw a perfect square - each side 10cm - and you would like to draw a perfect circle inside the box, then, using the curve (spline) tool, you would create the curve to touch on all 4 side at the halfway mark. Your handle will go at the angle of the lines that you selected the nodes. The length of the handle will be roughly 55% of the line between the selected node and the corner of the square to create the perfect circle. Anything more or less than the 55% will result in a more square type of circle or some other odd shape.
So, the closer to the 55% handle length, the more perfect your circle will be.
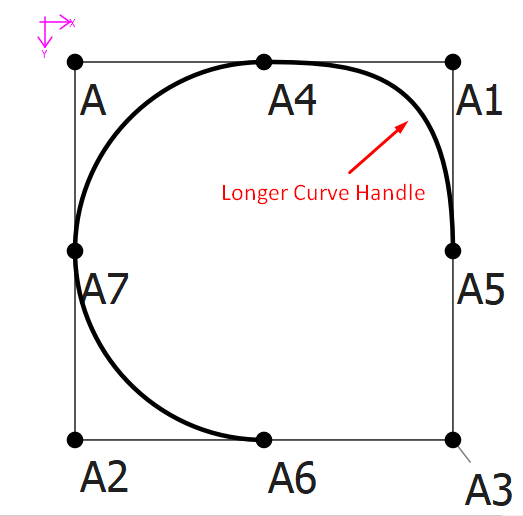
Here’s the file that you can play with:
Curve Handles.val (2.5 KB)
1 Like
Or in the case of curves in general… the smoother the transition between one curve and another.
Or “0.551915” to be more precise. ![]()
I put this value in a custom “bez_approx” variable and multiply a line length by it for control point length formulas.
2 Likes
Thank you so much! I am in a different time zone and I look forward to your replies to my query in the morning! Never failed me… thank you…better than coffee.
2 Likes
Again, big thanks for your tips, Douglas, and for not getting tired of my questions! I just wanted to smoothen a curve that I manually created…and look where it’s taken me!? Bezier curves! …we learn something new everyday…
2 Likes