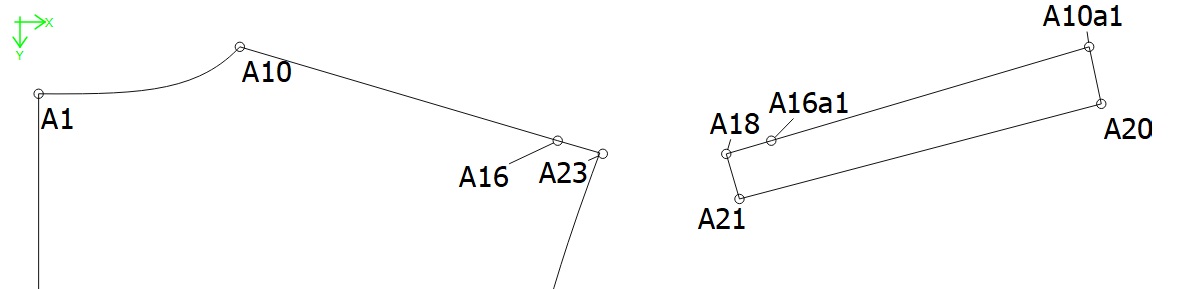
So, I tried to use union tool but I can’t unite any pieces together. Does the pieces needed to be from two different pattern pieces? I mean, I make front and back pattern on the same piece, and then I want to move the front shoulder yoke onto back pattern piece. But I can’t unite them! Here’s the attachment:
I want to unite A20 onto A10 and A21 onto A23 but I don’t know how to do it. I’ve selected the first and second point from the front piece which are A20 and A21, and then selected A10 and A23 from the back piece. Nothing happen.
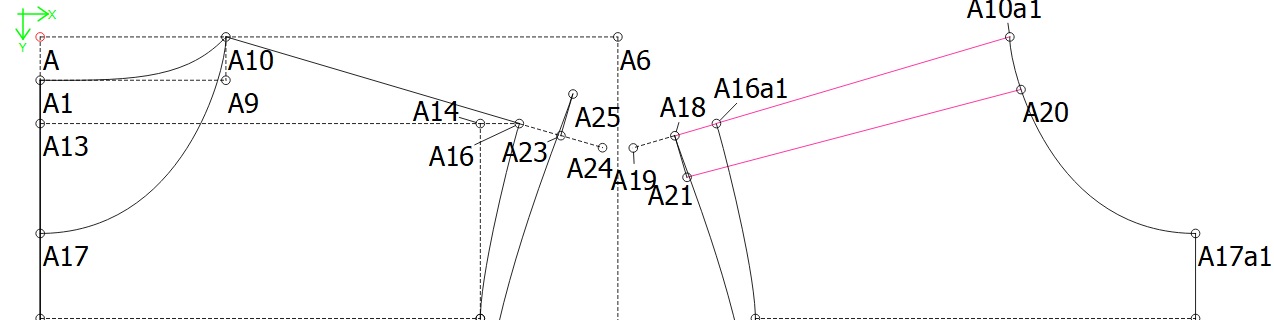
Actually, I need to unite them on the draw mode because I will make a new armhole based on the new united pattern. Like this:
The union tool only works in the detail mode not in draw mode.
I’d use the move tool to do this. It will create a copy of the points you’d like to move and move them to where ever you want them to be.
I’m not too sure how you got 2 nodes on top of each other but if the second one is at any distance from the first one, you should be able to increase the distance between them.
I’m not too sure if this is the under-arm seam, but if it is, you can draw the seam line into the other pattern piece so that the parts that you’d like to add volume to are overlapping. When you select the nodes for the layout, you select the overlapping nodes.
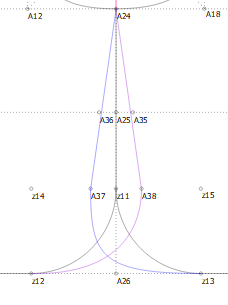
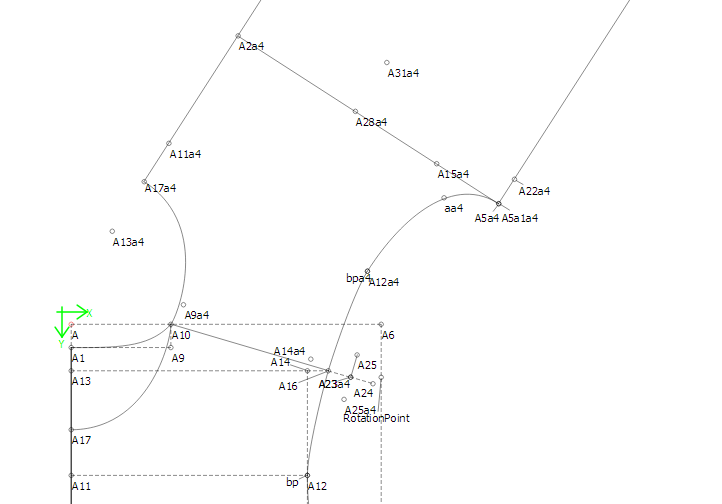
The blue line and curve belong to the Front piece on the right and the violet line and curve belong to the Back piece on the left, so when choosing the layout nodes for the respective pieces, they will be included and the centre line will be ignored.
I’d use the move tool to do this. It will create a copy of the points you’d like to move and move them to where ever you want them to be.
Yeah, I can use the move tool in the draw mode, but I need the pieces to be rotated upside down. Do you know how to do that?
I’m not too sure how you got 2 nodes on top of each other but if the second one is at any distance from the first one, you should be able to increase the distance between them.
I use the flipping object by axis tool. And then, I need to add a distance between them because I want to lengthen the armhole.
I’m not too sure if this is the under-arm seam, but if it is, you can draw the seam line into the other pattern piece so that the parts that you’d like to add volume to are overlapping. When you select the nodes for the layout, you select the overlapping nodes.
I’d flip the whole back piece along the shoulder line and then do the adjustments to bring the back shoulder seam to the front part. This solves all your queries and will also help you later when you get to the collar.
The tool I used is the “Flipping objects by line”.
I don’t understand how to do that. I tried but it didn’t move to the position I want. I clicked the neck curve-A20-A21-A18-A16a1. And then I clicked the A10/A16 on the back pattern but it looks wrong. Please help Do you know any tutorial for that?
Create three lines: Line_A23_A10 and Line_A18_A10a1 and Line_A18_A23
MOVE the back piece to connect with the front piece. Use the Move tool. Select CTRL, A18, A10a1, neck curve, A20, A21, then ENTER. Then arbitrarily move the mouse and click anywhere. When dialog box appears, overwrite the formulas with:
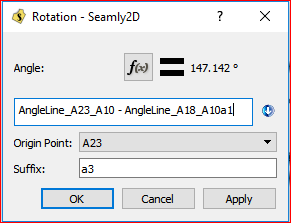
ROTATE the moved objects. Use the Rotate tool. Select CTRL, A18a2, A10a1a2, neck curve a2, A20a2, A21a2 then ENTER. Select A23 as the origin point. Then arbitrarily move the mouse and click anywhere. When the dialog box appears, overwrite the formulas with:
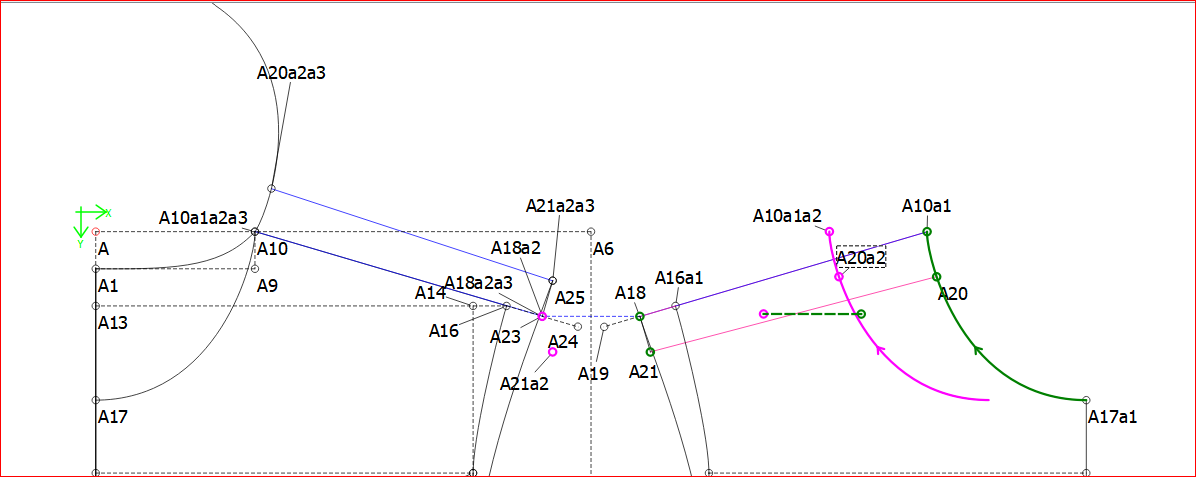
Draw in the line between A20a2a3 and A21a2a3.
It should look like this:
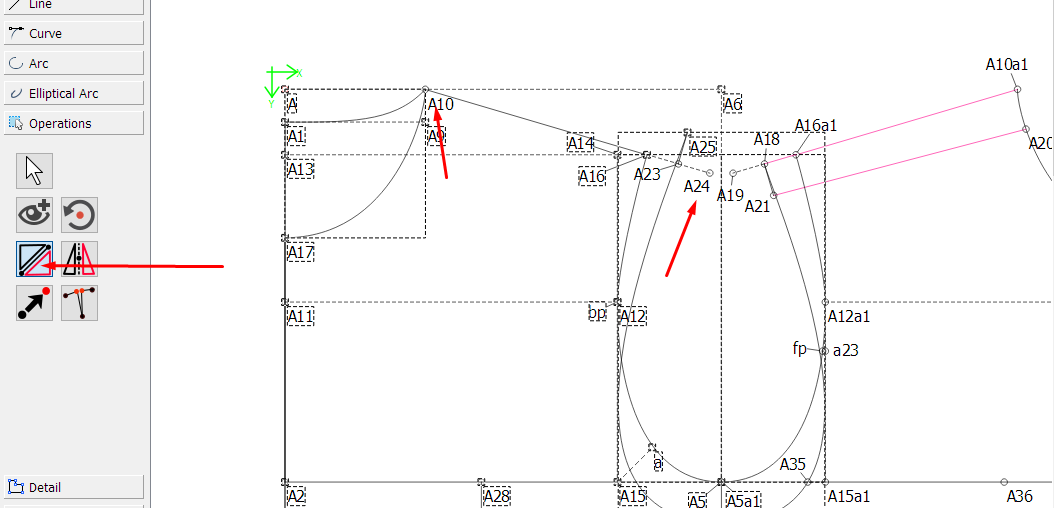
Using the “Flipping objects by line” tool, I selected all the objects on the left-hand side except the nodes A10 and A24 which I will use as the flipping line:
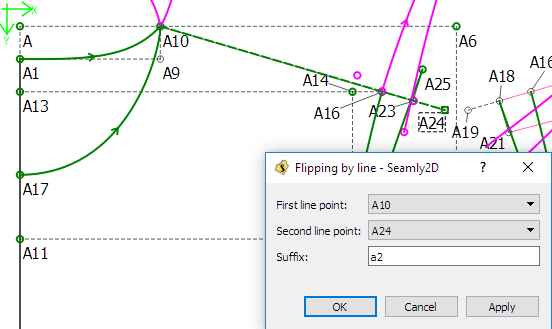
Hit enter to accept the selection and then select the axis line points A10 and A24.
Enter your preferred suffix for the added parts and click on OK:
Go to the added parts and draw in the lines again, if you wish.
A quick way to select a lot of nodes and curves is to zoom out so that you can see the whole part you’d like to select, Drag a box around everything, zoom back in to the area where the flipping line is, hold the Ctrl key & click on each of the 2 nodes to be used as the flipping line to de-select them and hit enter.
 Do you know any tutorial for that?