Yes… or just to segment a line / curve with more than just one point. Basically it would be taking the Midpoint tool and repeating x number of times. So yeah… I would code a class to segment a line, and then that class can be called either from a segment tool or the buttonhole tool… or a slash tool.
2 Likes
It’s just a vector file & should open in Corel or Illustrator, but I can also send it to you as a PNG or JPG, if you wish.
I should have been more specific… I know how to use SVG’S , I’m just not sure how to go about handling SVG’s as a graphic item in the program as far as a layout goes. Or more to the point how well SVG’s will plot. For ex… while you can easily print say a circle with a solid fill (AKA a Dot) , it’s not as easy to do the same with a plotter without a lot excessive pen strokes. From a programming standpoint it’s not hard to use SVG’s in the program… there’s a class to handle them just like many other graphic items. It’s certainly is easier to use an SVG vs having to write the code to draw the same thing… which is analogous to drawing with an Etch-a-sketch. A square… easy to code… a hook and eye… not so easy. Not to get too deep in the weeds, but currently the way the pattern piece graphics are drawn is as a path with the painter class, and while I was able to add Text to a symbol, like the Etch-a-sketch, the pen doesn’t leave the “paper” while drawing, so I was getting a line from the last path point to the start of the text - no beuno. Thus I had to delve into the use of QGraphicItems… and the point name issue taught me a lot about handling multiple items (a QGraphicsEllipseItem, a QGraphicItem, and a QGraphicsTextItem) as a group.
As an aside, adding SVG logos to labels would be a nice addition.
2 Likes
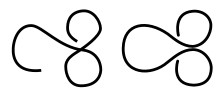
Aaaah… Thank you for explaining. I thought it was just a case of giving the instruction to print a small icon which could be created from a simple vector. So something like this which is like a piece of shaped wire?
However, I’m happy with other symbols, we’ll soon get to know them 
1 Like
En la industria textil lo que se hace es colocar los símbolos de botones, ojales, bolsillos … dentro de los patrones para que los cortadores hagan la marca y de esta forma saber dónde se localizan botones, ojales, bolsillos… y a la hora de confecciona no perder tiempo teniendo que medir.
Lo que he visto en algunos software es utilizar bibliotecas con los símbolos ya creados y con posibilidad de escalar su tamaño, tipo software de arquitectura. La función “internal path” es genial para ese trabajo lo que creo que se puede hacer son bibliotecas de símbolos.
Para las especificaciones técnicas,que tipo de cierre u otro elemento,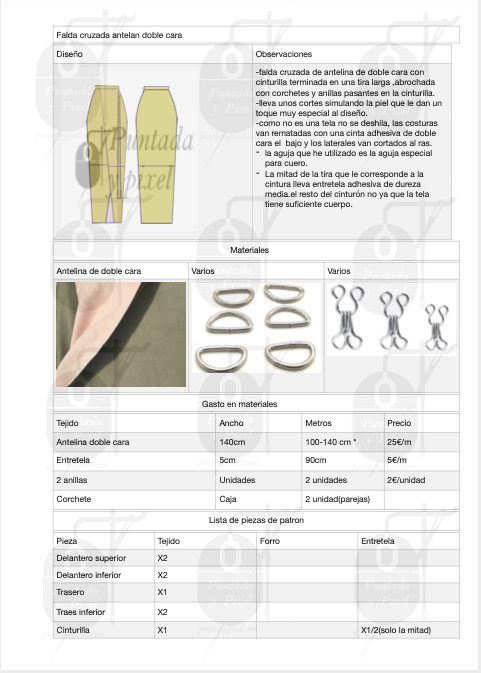 se confecciona una ficha técnica de taller donde se incluyen todos los materiales necesarios y que también ayuda a calcular el coste de la prenda.
Esta en español pero un ejemplo es este.
se confecciona una ficha técnica de taller donde se incluyen todos los materiales necesarios y que también ayuda a calcular el coste de la prenda.
Esta en español pero un ejemplo es este.
3 Likes
That’s probably the way to look at how to use SVG’s as symbols - as a wireframe… or as the just the outline of a graphic. While we can view on screen or inkjet / laser print SVG’s with line thicknesses and fills, that won’t work if you plot a pattern. It’s why there are specific plotter fonts. Like I said I need to actually hook up a plotter, and see how SVG’s are handled. It may be the case where fills are ignored… just like when cutting vinyl where only the (hairline) outline is cut.
If we can use SVG’s for certain symbols - or parts of one - it certainly would make coding the graphics easier. I say parts, because there cases where you would want to dynamically create a symbol based on the values from a dialog. For example… “Cut here” X… the scissors could be an svg, and the length of a … line could be set from the length in a dialog. Or even better, just like a grainline it could be resized interactively. The scissors would stay the same size, anchored to a selected point, and the dotted line could be dragged as long as you want.
2 Likes
The problem with using a library to store the symbols is sharing patterns. Unless you have the library, you can’t load the symbols. The symbol graphics have to be coded into the app.
1 Like
Spec / technical sheets would certainly be on the list of new features. While not directly applicable to this issue, it could be indirectly, as I would want to keep in mind that there should be a easy way to track certain symbols. With the quantity/ size used, so they could automagically be included in a spec sheet. For example if you drafted a vest and placed 5 buttonholes on it, the spec sheet should know that 5 buttons are required.
Hmmm… or an option in the buttonhole dialog chould have a button size drop down, where you could select a button size and the buttonhole length automagically resizes. And THAT button size could be tracked in a spec sheet. ![]()
So what other notions could this idea apply to?
4 Likes
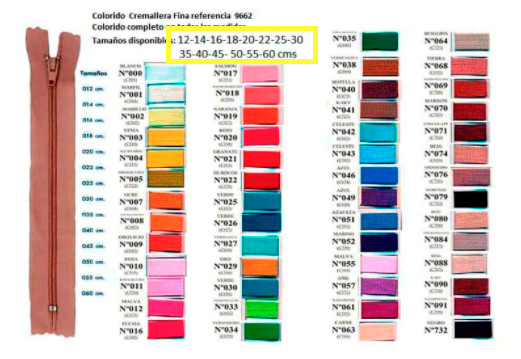
También puede aplicarse a la longitud de la cremallera. Diseñando una prenda, las medidas de las cremalleras son estándar y si no diseñas con las medidas estándar tienes que arreglar la cremallera. Aplicaciones miles, ya que una de las cosas que determina el precio de una producción en serie es cómo se cierra y cómo se coloca coloca, ese proceso determina el coste.
Se puede solicitar un catalogo de fornituras de textiles(cremalleras, cierres automáticos, botones de clavar, …) encontraremos variedad y lo que mas nos interesa medidas.
2 Likes
Con que pueda existir la manera de indicar el punto dónde se localizan seria suficiente.Intentare estudiar como hacerlo con lo que ya existe en el programa.
El sistema que se utiliza para poner muescas puede ser utilizado también para esto. la cuestión son los símbolos.
1 Like
I am coming to the discussion to give my opinion on buttons and buttonholes. What could be proposed would be to create shapes (eg buttons and buttonholes) that could be saved as “macros” and that could be reproduced endlessly. It could also correspond to “cut to the fold” and other designs that come up often
1 Like
That’s the idea I have in mind… in a dialog you would select a type of button hole, and define the size, and offsets, … generally providing an anchor point for the 1st button / hole, and then based on the number and spacing between them, the tool would simply repeat the button / hole x number of times.
Currently adding buttons and / or buttonholes is one of more tedious tasks to accomplish with the app. A dedicated tool to automate yh ed process will speed up the process immensely.
2 Likes
Well… pretty much the basis for all the tools in the app is a point. In the case of notches, you can designate a point as a notch… but only on a seam allowance path. By adding a symbols tool, the idea is to be able to add a symbol at any point OR just like the grainlines and labels - free floating anywhere on a piece. The disadvantage of free floating an item is that you can’t control the position as different measurement files are used.
4 Likes
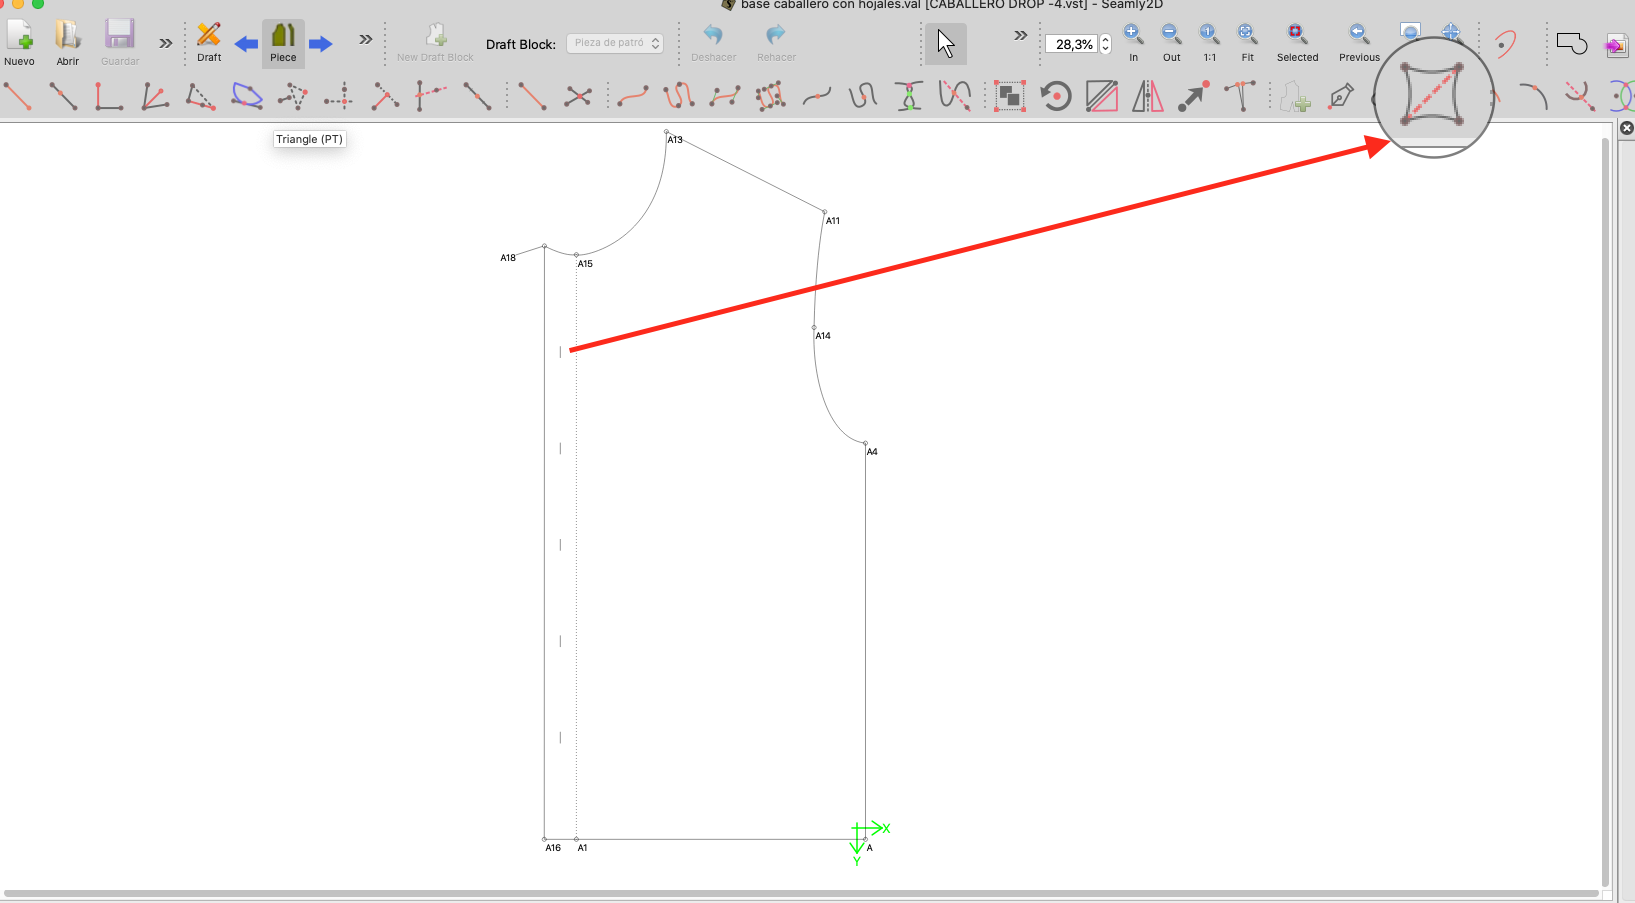
he estado investigando y he conseguido colocar y localizar ojales con la herramienta 
el problema es que lleva mucho trabajo, pero no queda mal. paso el patrón y la tabla de tallas.base caballero con hojales.val (13,4 KB) CABALLERO DROP -4.vst (2,9 KB)
3 Likes
What concerns me, when I want to designate the location of a button I must first draw a cross with 5 points and describe the button as an “internal path”. If I want several buttons I use the translate tool and “internal path” for each one. This is where saving this path as a macro and then being able to place it on an existing point would come in handy.
2 Likes
Yes, it’s a total pain, at the moment. It’s also a problem to make the arrows for the fold line. I can’t wait for the software upgrade on this 

2 Likes
What I have in mind for buttons/ buttonholes won’t require a path. Just like grainlines, they will be an automated tool to attach graphic items to a pattern piece - either free floating or anchored to one or 2 anchor points.
3 Likes
Yes! I was definitely always hoping for an automated button tool somewhere down the line. The way I learned to place them in pattern making class was to either A) choose an amount of buttons you want to place, set upper and lower offsets in order to determine the spacing between the buttons (button preset/ anchor points method), or B) preset the spacing, set an upper offset and place as many buttons as you need along a line/path with the lower offset determined automatically (spacing preset). EDIT: ooh, and also determine vertical or horizontal placement. EDITEDIT: Also, maybe: an option to set the distance between bartack and the button? Ranging between 1 and 3 mm? Is that useful anyway?
3 Likes