"Make at least one pattern piece" - Thought I did that

I’ve made cosplay costumes for… 30+ years. Finally decided it might be nice to use software instead of being on my knees with butcher paper.

Trying to figure out this software but I have to say its such a nightmare I don’t grasp how anyone uses it. This is coming from a professional software engineer, that is quite good at everything from Adobe Illustrator to Fusion360 CAD software. I’ve literally modeled entire suits of armor yet can’t make a simple part in this.

Coming from Fusion360 parametric CAD software I really want to be able to make this work as it fits my parametric concepts of good design and workflow.

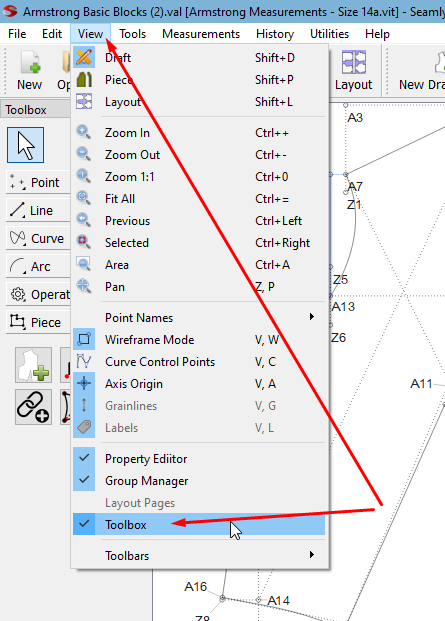
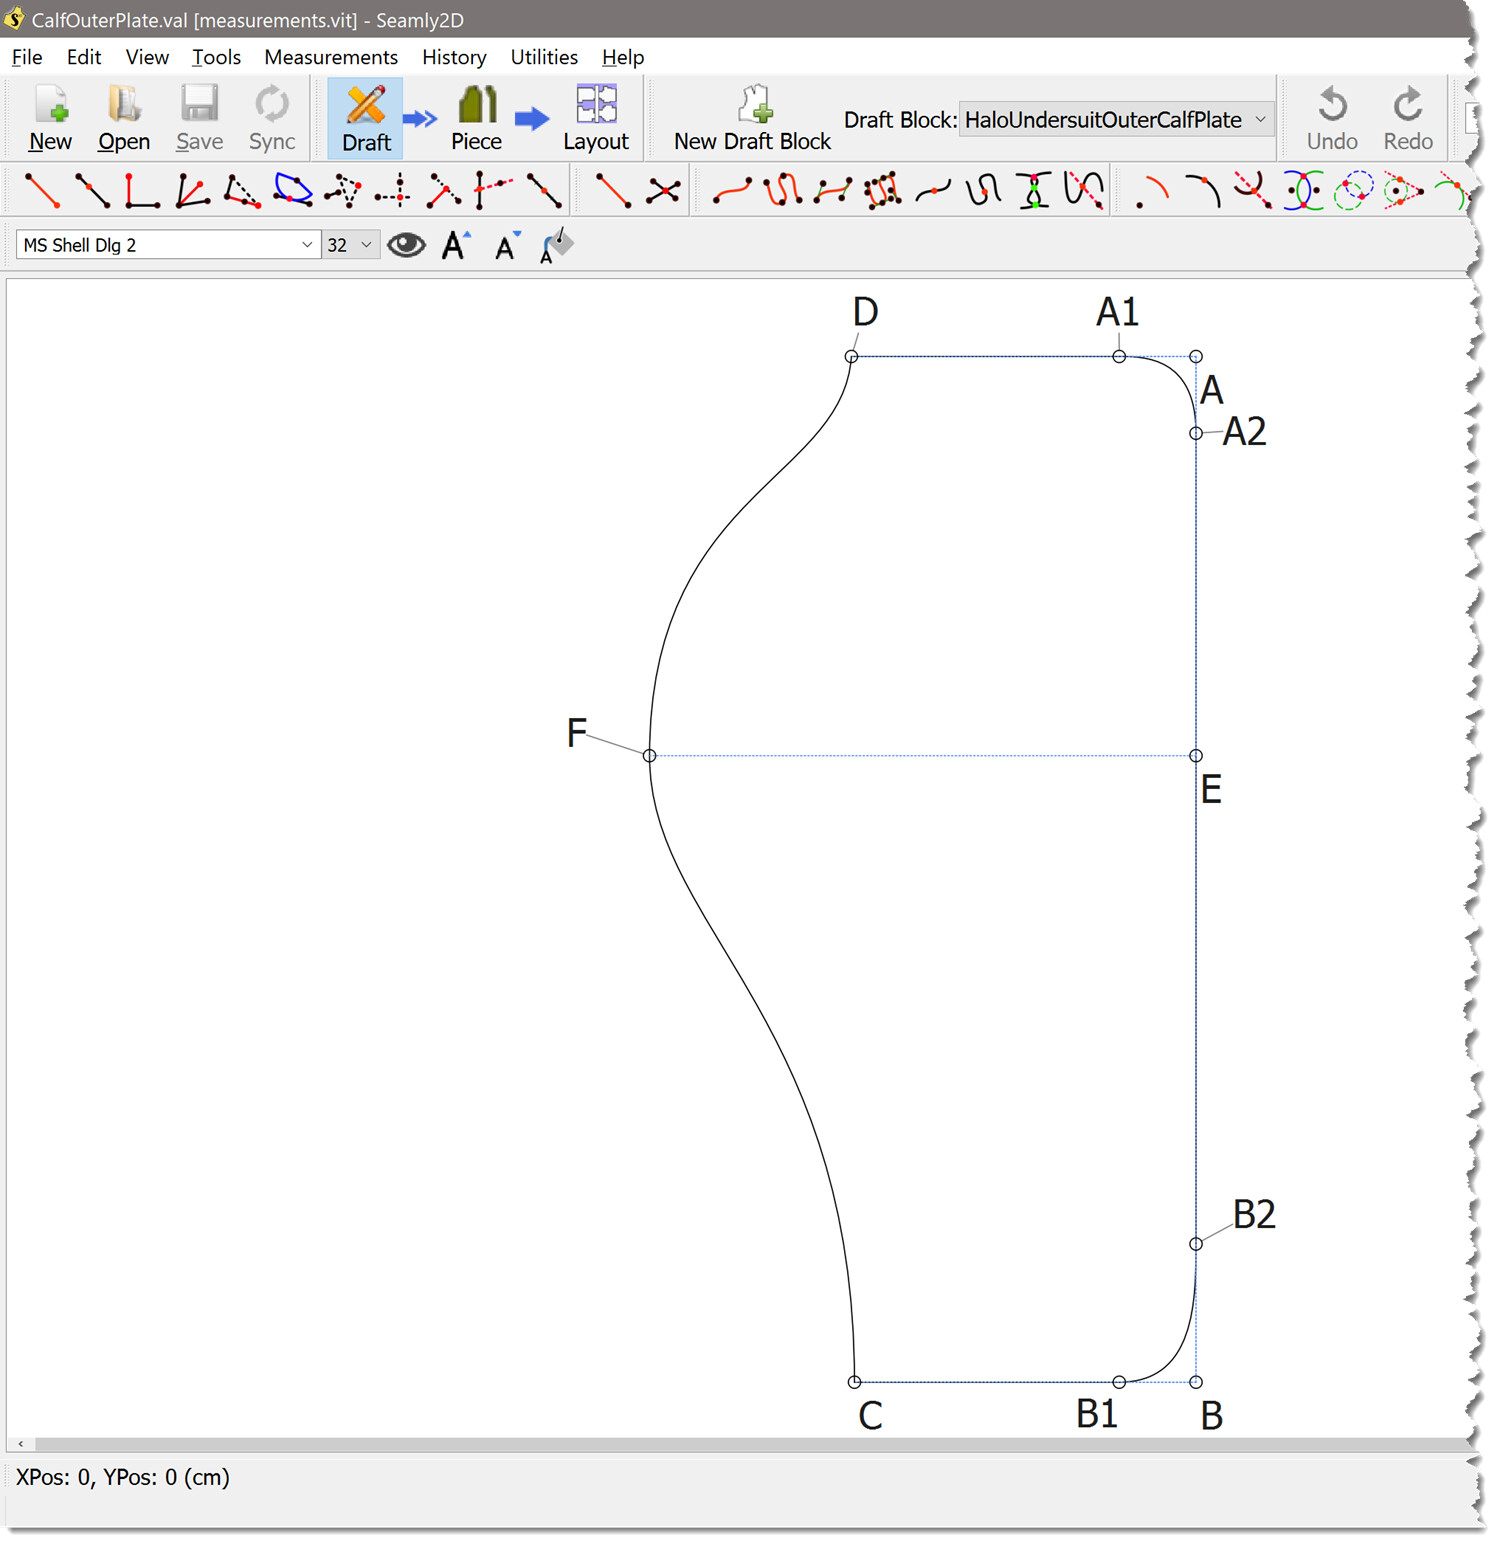
But some YouTubes to get me started - Did a measurements with SeamlyME and I made this basic design. And yet can’t seem to do a thing with it.

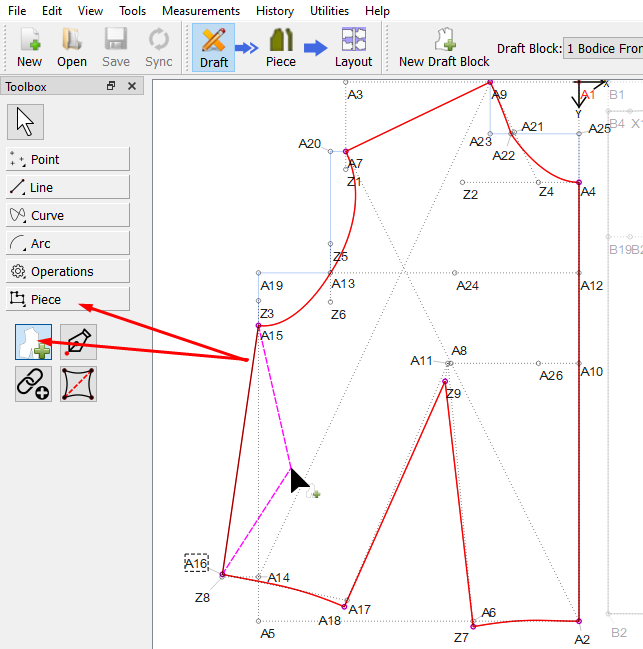
I tried adding a label. I did the label template as directed in a YouTube. Did the pattern properties for name and so on. Got a message about making at least one pattern piece. Well huh? Didn’t I just do that. But I realize it is showing as a “draft block”. Ok. Now what? Can’t click “piece” without it saying “Make at least one pattern piece.”

So I try the workflow again. New. New again. And it says right on the window “new pattern piece”. I’m not an idiot, I can read. And yet when you try to go to ‘Piece’ it says “make at least one pattern piece”. Well what did I just make called “a pattern piece” if it wasn’t actually a pattern piece?

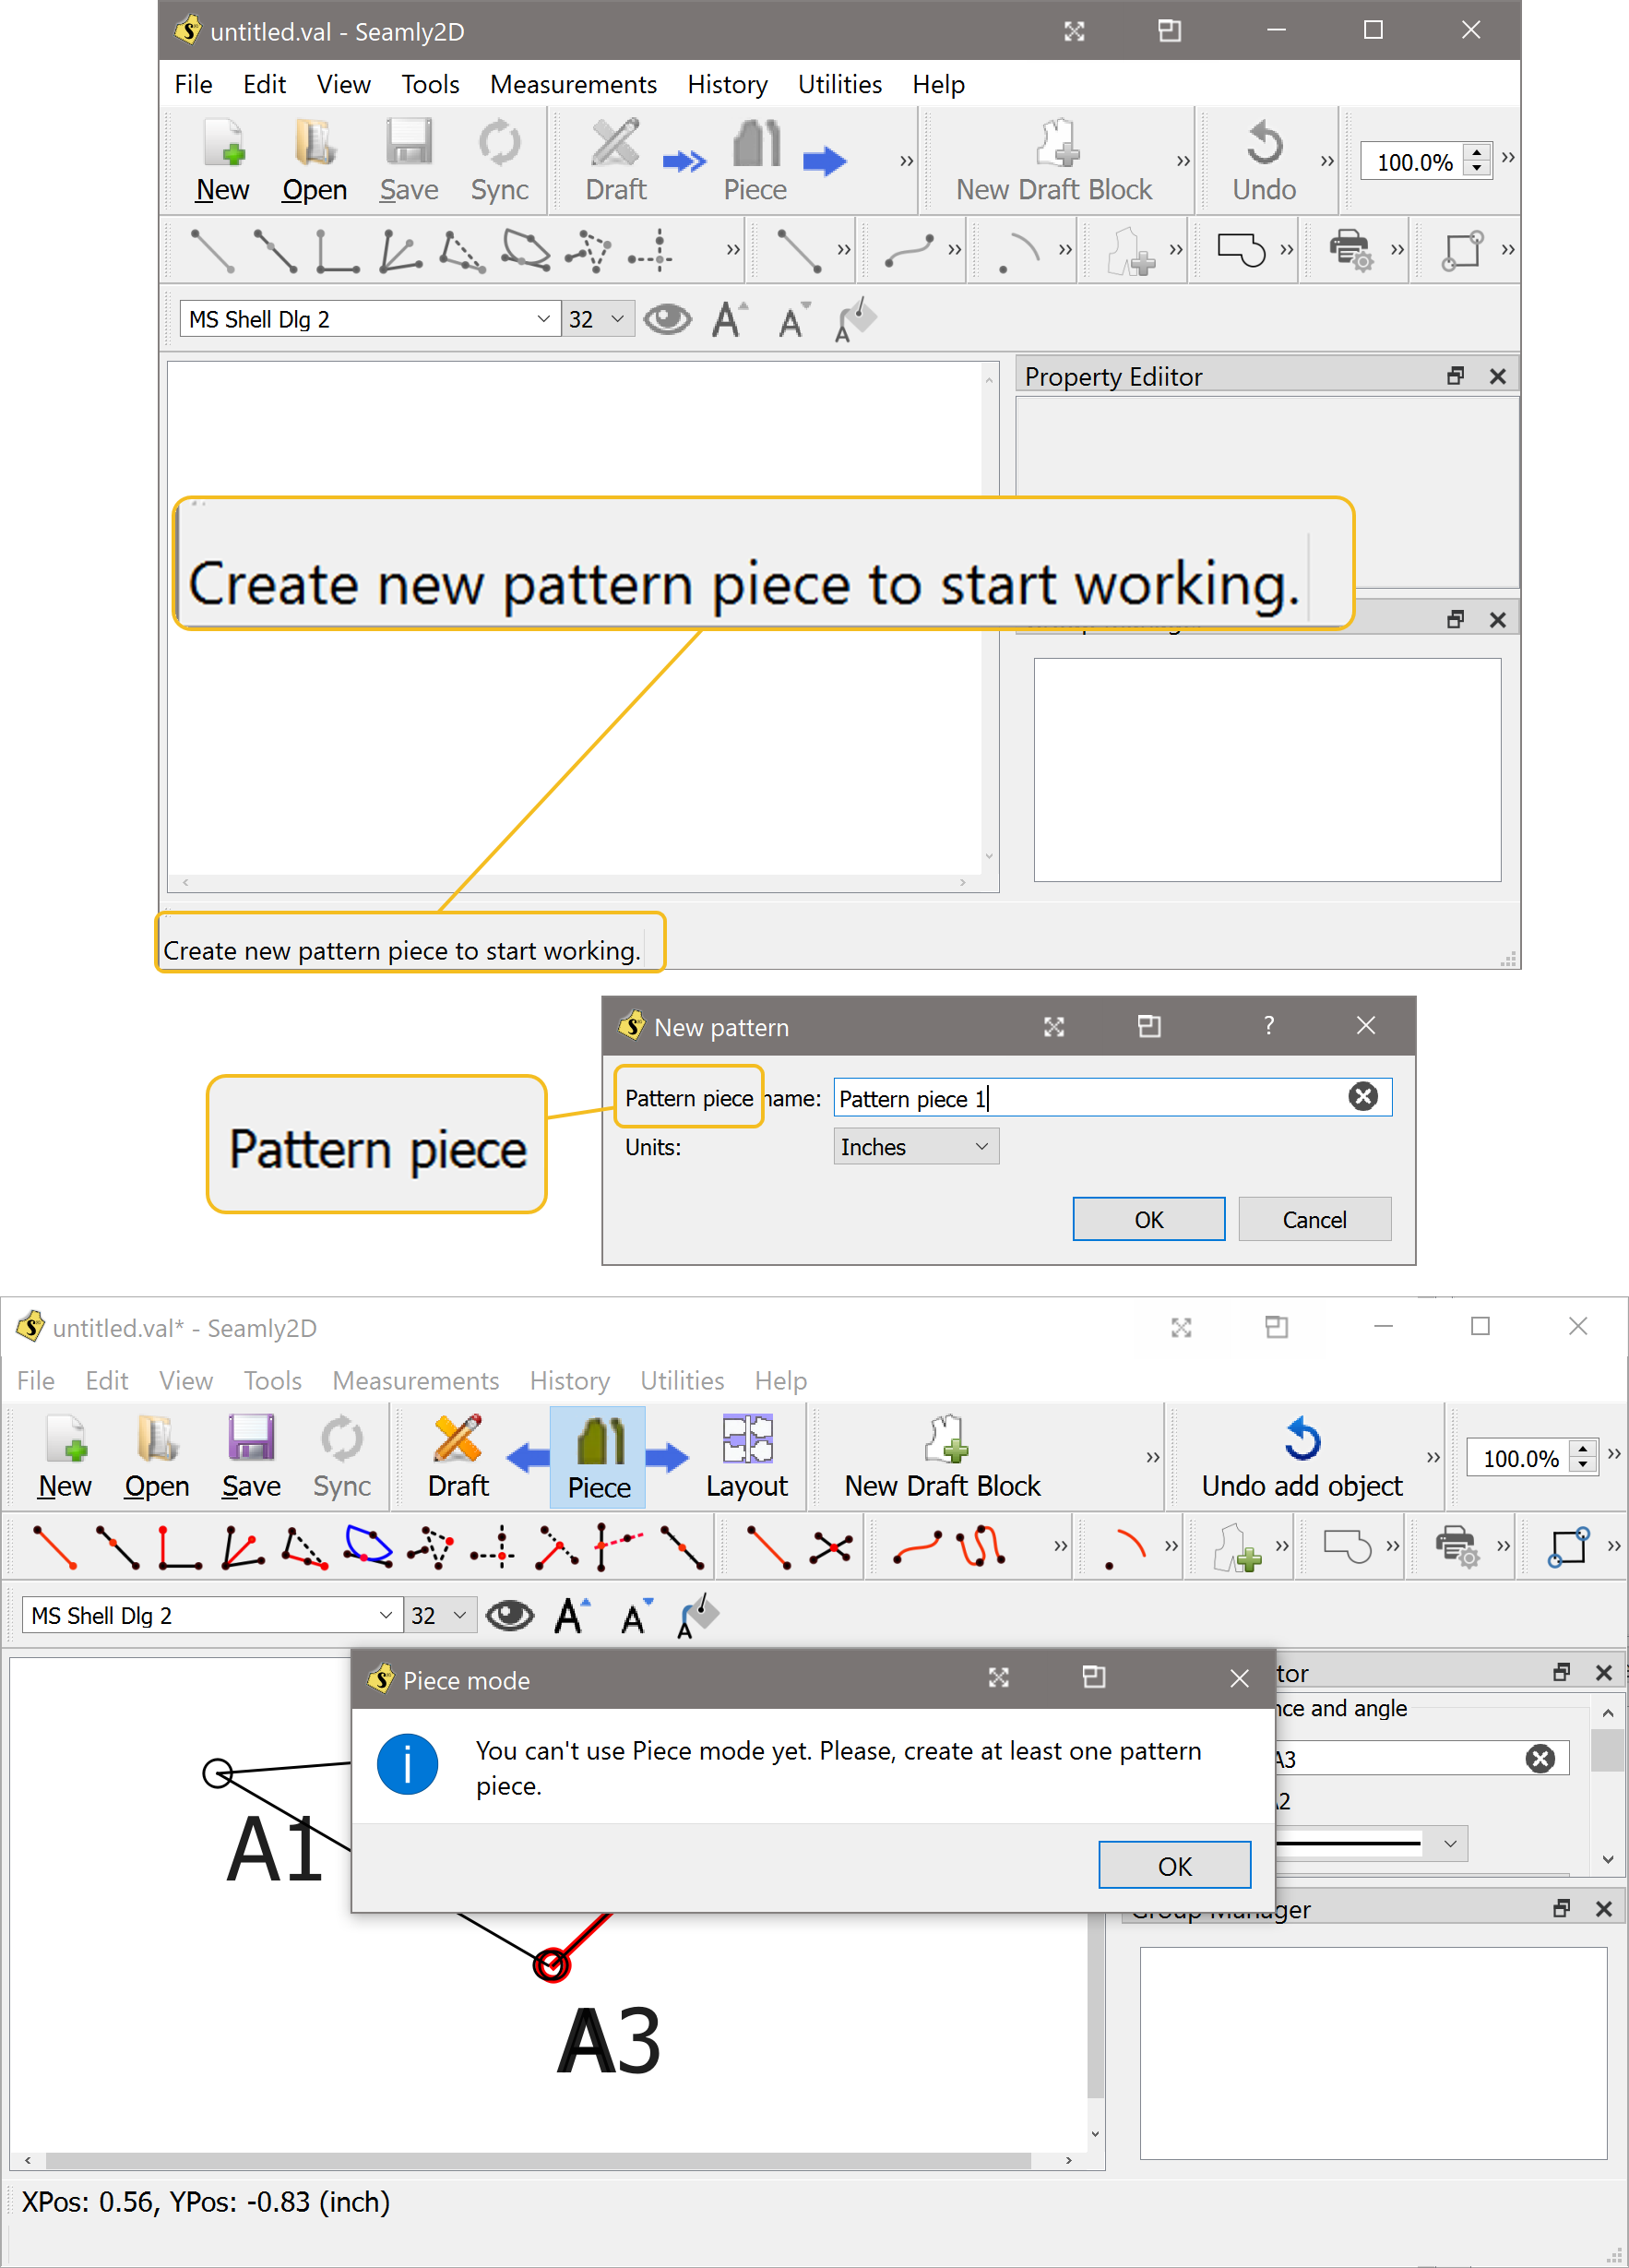
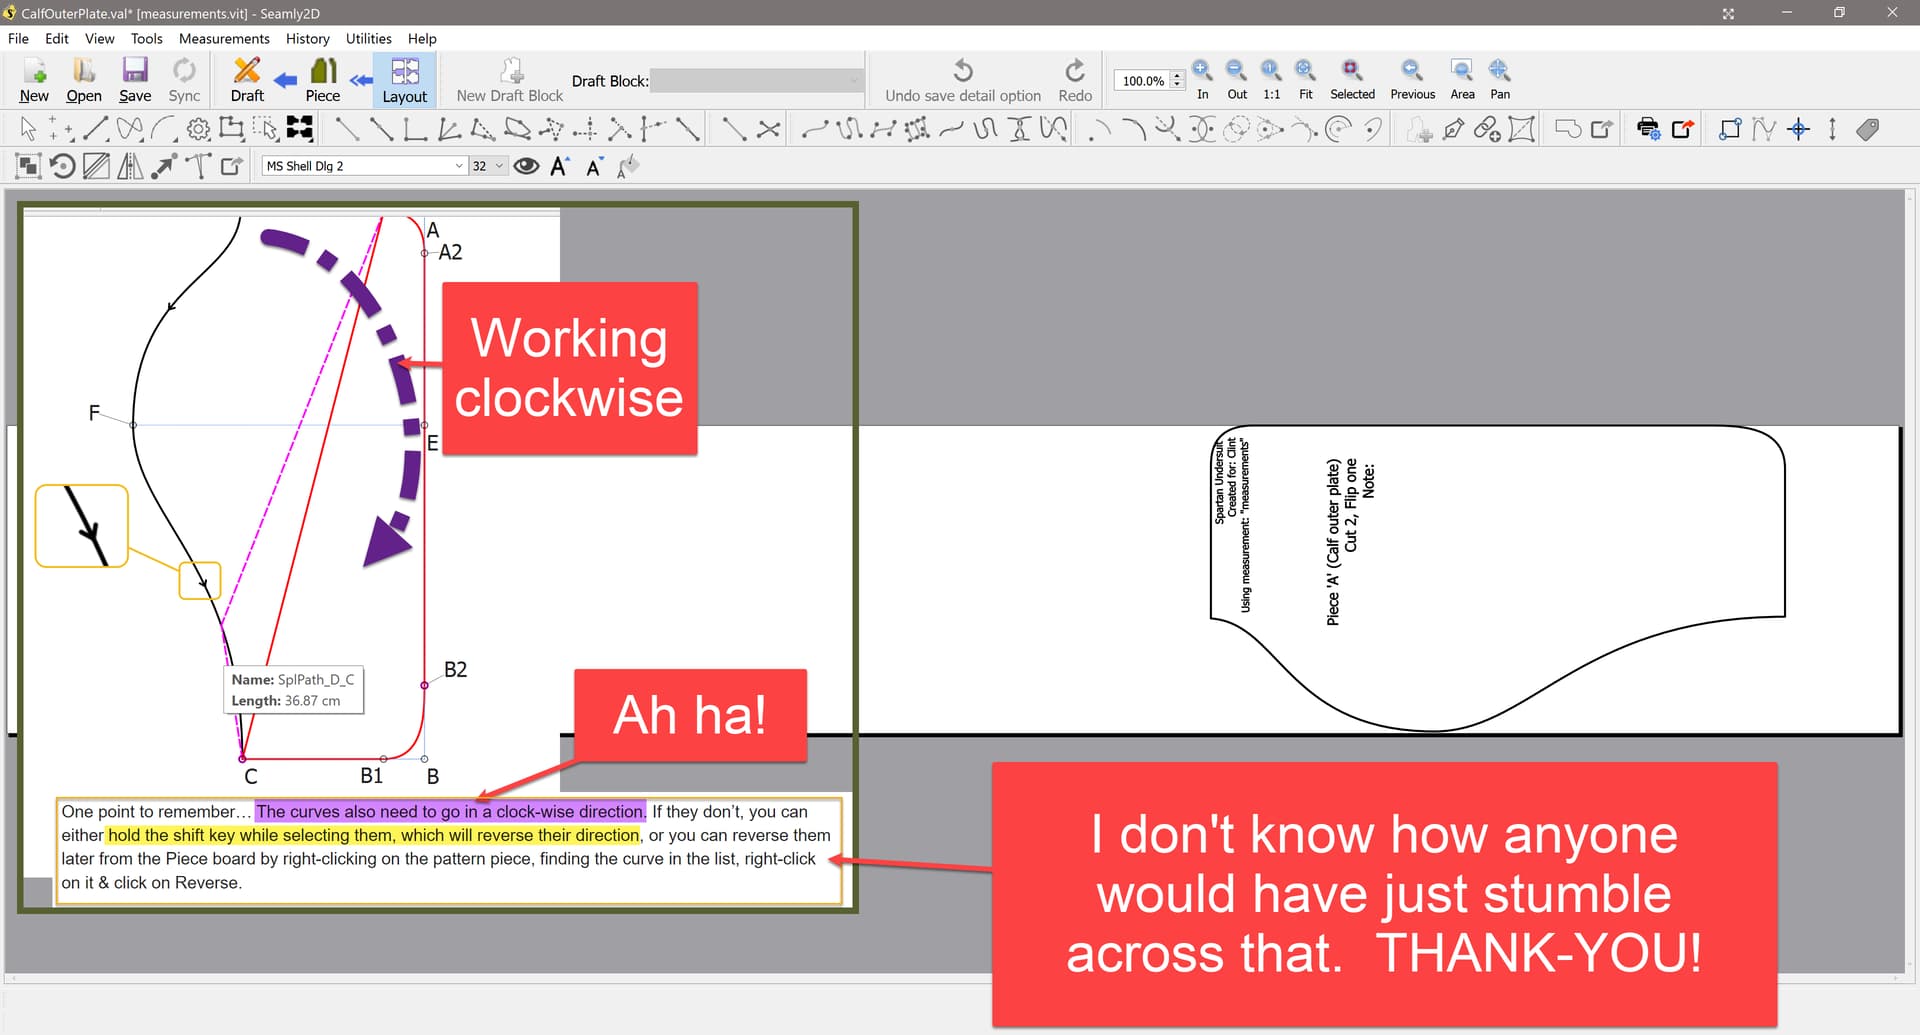
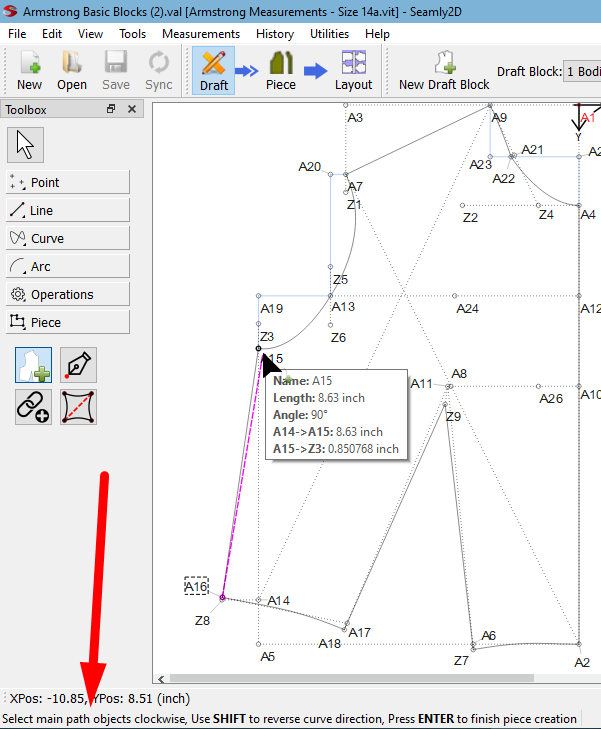
Is there some conversion process you have to do from ‘draft’ to ‘pattern piece’?

Thanks for making it through this rather gruff first post and any guidance you might be able to shed on this incredibly frustrating situation.

-Clint-

2 Likes

Hello and welcome, @SgtSaint

Firstly, it may be a little easier, when you’re starting out, to have your Toolbox visible. You may undock it so that it’s outside of your workspace, but at least have it visible:

image

With Seamly, you have 2 boards… The 1st one is for drafting your pattern pieces, as you have been doing, and the 2nd one is for the actual pattern pieces that make up the pattern - the one that you’re battling with.

image

Once you have drafted your pattern, you need to define the different pieces by using the Add New Pattern Piece tool. Click on the tool and select the nodes and curves of the outline of the pattern piece in a clock-wise direction. After selecting the last node or curve, hit Enter. Click on OK on the menu that comes up.

Once this is done at least once, the Piece board will be available where you may add seam allowances, labels, grainline, notches, etc.

One point to remember… The curves also need to go in a clock-wise direction. If they don’t, you can either hold the shift key while selecting them, which will reverse their direction, or you can reverse them later from the Piece board by right-clicking on the pattern piece, finding the curve in the list, right-click on it & click on Reverse.

If you have missed a node or a curve, there is a tool that you can use to add it.

Since you already have some vast experience with CAD software, I’ve only given you the basics to get past this glitch, so please don’t hesitate to ask again if you have any other problems. :slight_smile:

3 Likes

Hi Clint,

Without going into a lot of history - you can read old posts here - the orignal dev was not a draftperson or pattern maker, and English was not his 1st language. There are still remnants of incorrect terminolgy that I’m slowly fixing. The use of pattern piece is one. That being said, I’ve degrees in Civil Engineering, technical theatre, started programming in the days of punch tape & cards, and have owned a costume business for 40+ years… and can attest, while there’s a learning curve to the workflow - Seamly2D does work exceptionally well.

Labels, grainlines, notches, seam allowances are details added to pieces in Piece mode. Like Grace has pointed out you need to add pieces from a draft block before proceeding to Piece Mode.

Let us know when you get that far, and need to create a layout, for which I’m sure you’ll have more questions.

2 Likes

@Grace

Thanks for explaining… you beat me to punch, albeit saved me from typing out my explanation. :slight_smile:

2 Likes

You can also right click on any empty spot in the toolbar area and a context menu will pop up to toggle any of the docks or toolbars. It’s a normal Qt feature.

1 Like

Thanks all for the @Grace -ious welcome. I really appreciate that in-depth explanation. In all the videos I went through, not once did they get into ‘boards’ or the idea that there was a draft and real part space. That’s a little odd to me, but whatever I’ll get over it.

Toolbox… Yeah I have them all out there, just as toolbars instead of a pallet. Better use of space. Primary monitor is 4k. Secondary is 2560 as a 32" ultrawide. So might as well use the real estate.

At one point after 10 different “I wonder about this” experiments I did get to the selecting clockwise stage @grace described. Which again without any context … So while I was selecting and trying to be a good boy and do it in a clockwise order of selection it wouldn’t have occurred to me that the lines themselves have a directionality to them that also had to be clockwise. So you saved me on that!

From there I stumbled my way through to a basic layout. @Douglas Thanks for the background, both on the software and yourself. Its good to hear that someone doing costuming professionally that long is using this software: That’s a recommendation I’ll listen to.

No doubt I will darken your door again with questions on basic software expectation-concepts. And I’ll try to catch up on reading back questions etc. I need to beat on it a bit, learn some of the terms and so on for even the questions to have meaning.

2 Likes

Yeah… the app’s documentation could use some updating. Like I said the original dev was not a pattern maker so things are a bit quirky. The project forked, and I sort of picked up the mantel a year or so ago. One of my goals is getting the UI more polished and user friendly - while adding some improvements before we update all the documentation, and hopefully some better instructional videos.

At any rate, once you get past the initial learning curve, it will start to make more sense. What I suggest is to take a look at some patterns and measurement files of other users.

I will actually be using the app for a job coming up… we will be tailoring a bunch of costumes for a new touring production of Annie, and will be using the The Red Book / Supreme System for the vintage 1930’s look with some of jackets and pants.

2 Likes

You’re very welcome, @SgtSaint

The only reason why I suggested that you open the toolbox is because I keep mine open when I’m helping people on here & giving screenshots of where I find the tools, so that they can find them in the same place, regardless of which language they use. Please excuse some of the terms that I use, like ‘boards’, these are my own which I find people tend to get the picture :grinning:, so also a bit quirky.

Congratulations on making your very first pattern piece. Very well done!

A very small tip… When you’re doing something and wonder what to do next, there is a “Help Text” at the bottom left of your screen:

image

You can find a few tutorials and videos on the Wiki in various languages, and you’re very welcome to ask your questions on here.

Oh, wow! @Douglas, are you going to give us some more photos?

2 Likes

In drafting terns not quirky at all.

Technically boards is more accurate than window or view… as in reality it’s the same QGraphicsView in the same QMainWindow… where switching modes swaps QGraphicsScenes or if you please - boards. Using scene though is probably too “programmer” oriented - which is fine for programmers, not so much pattern makers and sewers.

I’m ok with “boards”… or maybe “workspace” - which is a common term used in graphics apps?

I’m sure I will. Might even make the pattern(s) available. I know for sure I need to draft a 1930’s period butler - thus the Red Book of Tailoring - Supreme System. That’s the beauty of using Seamly2D… I can draft it now using for example one of my employees measurements, make some mockups for fit… then when we get the measurements for the actors, I can just plug them in and plot out a pattern in their size.

Here’s an idea of the costume:

4 Likes

You can save even more real estate by changing the app pref… Graphics->Toolbars and toggle off the Text labels under the icons. Also you could close all the tool toolbars except the Toolbox Toolbar - which is like the name implies - it’s all the tools of the toolbox in one toolbar. That’s what I prefer to do - placing that toolbar on the left side in place of the Toolbox (which is a Qt QToolbox - a custom dock window). Saves both vert and horz space in the workspace window. Eventually I’ll get around to adding the ability to create custom toolbars so you can put whatever tools you use most in. Plus you can always access any tool by the Tools menu or key shortcut.

2 Likes

Hang in there @SgtSaint . I have a background in programming/software engineering (40 years+) and 10 years of teaching myself to be a costume guru for community theater and Seamly2D is the best tool I have found. I have lurked since 2017 and seen the transition from the original developer to @Douglas and I have to say that he is on a good track. There is only so much on human can do in a set amount of time. @Grace is great at explaining how things work. This whole community is full of resourceful people. I have done lots for many years with chalk, crayons, pens and pencils and various types of paper and commercial patterns adapted or combined. Seamly community inspired me to get and read some books on patternmaking theory. If you do a lot of costume work, I will bet this tool will save you time. Good luck and welcome

5 Likes

Hello @SgtSaint and welcome here. Don’t be frustrated. I know Seamly2D has a steep learning curve and maybe the wiki is a bit outdated at some points; I lost track ab bit because of my live that interfered and didn’t do pattern making at all but first thing now while taking tiny little steps to go back to pattern making Seamly was one of the first things I visited :). It really is a wonderful program once you get it an it makes live so much easier.

2 Likes