I want to make a curved line between two points and I want to be able to use a measurment formula added in seamlyme so that the curve will match the measurment. Is that possible?
Regards, Alexandra
I want to make a curved line between two points and I want to be able to use a measurment formula added in seamlyme so that the curve will match the measurment. Is that possible?
Regards, Alexandra
Ah… not really. There’s no way to determine the length and rotation or position of the control points to create the curve desired. In other words there are multiple curves that would give the length desired, but the question is - which one?
Assuming that you want an arc, the answer appears to be, “No.”
http://mathcentral.uregina.ca/QQ/database/QQ.09.07/s/wayne1.html
However if you’re good at equations this one might help? “The formula for the length of a chord is: d = 2•r•sin (a/2r) where: d is the length of the chord . r is the radius of the circle. a is the arc length.”
You could trial-&-error a “good enough” solution for a single measurement, but not establish an equation that would consistently approximate the correct answer. That said, I intend to prove that statement, but not tonight.
You mean Yes.
I was going to say that it could be possible to create an arc of given length between 2 points.
For an arc or curve?
Hello and welcome to the Seamly2D forum, @sylexandra
Perhaps if you explained exactly what it is that you would like to do, we could advise you a teeny bit better… Like if you are trying to match the curve length of the sleeve cap to the curve length of the armhole, where both are designed according to measurements in SeamlyME.
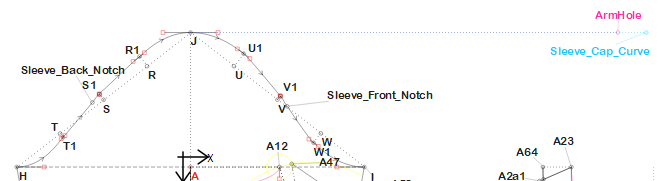
Here, I have a sleeve cap that will automatically adjust the width for the sleeve when the cap height is adjusted while keeping the curve length within the 5cm (2inch) accepted norm between armhole & sleeve cap curve, as you can see at a glance on my line where I have them showing. ![]()
Interesting question. My amateur way of approaching this (until now, perhaps?) is just fiddling with the amount of curve until I get my lengths close enough  So, to match inseams of a pant for example.
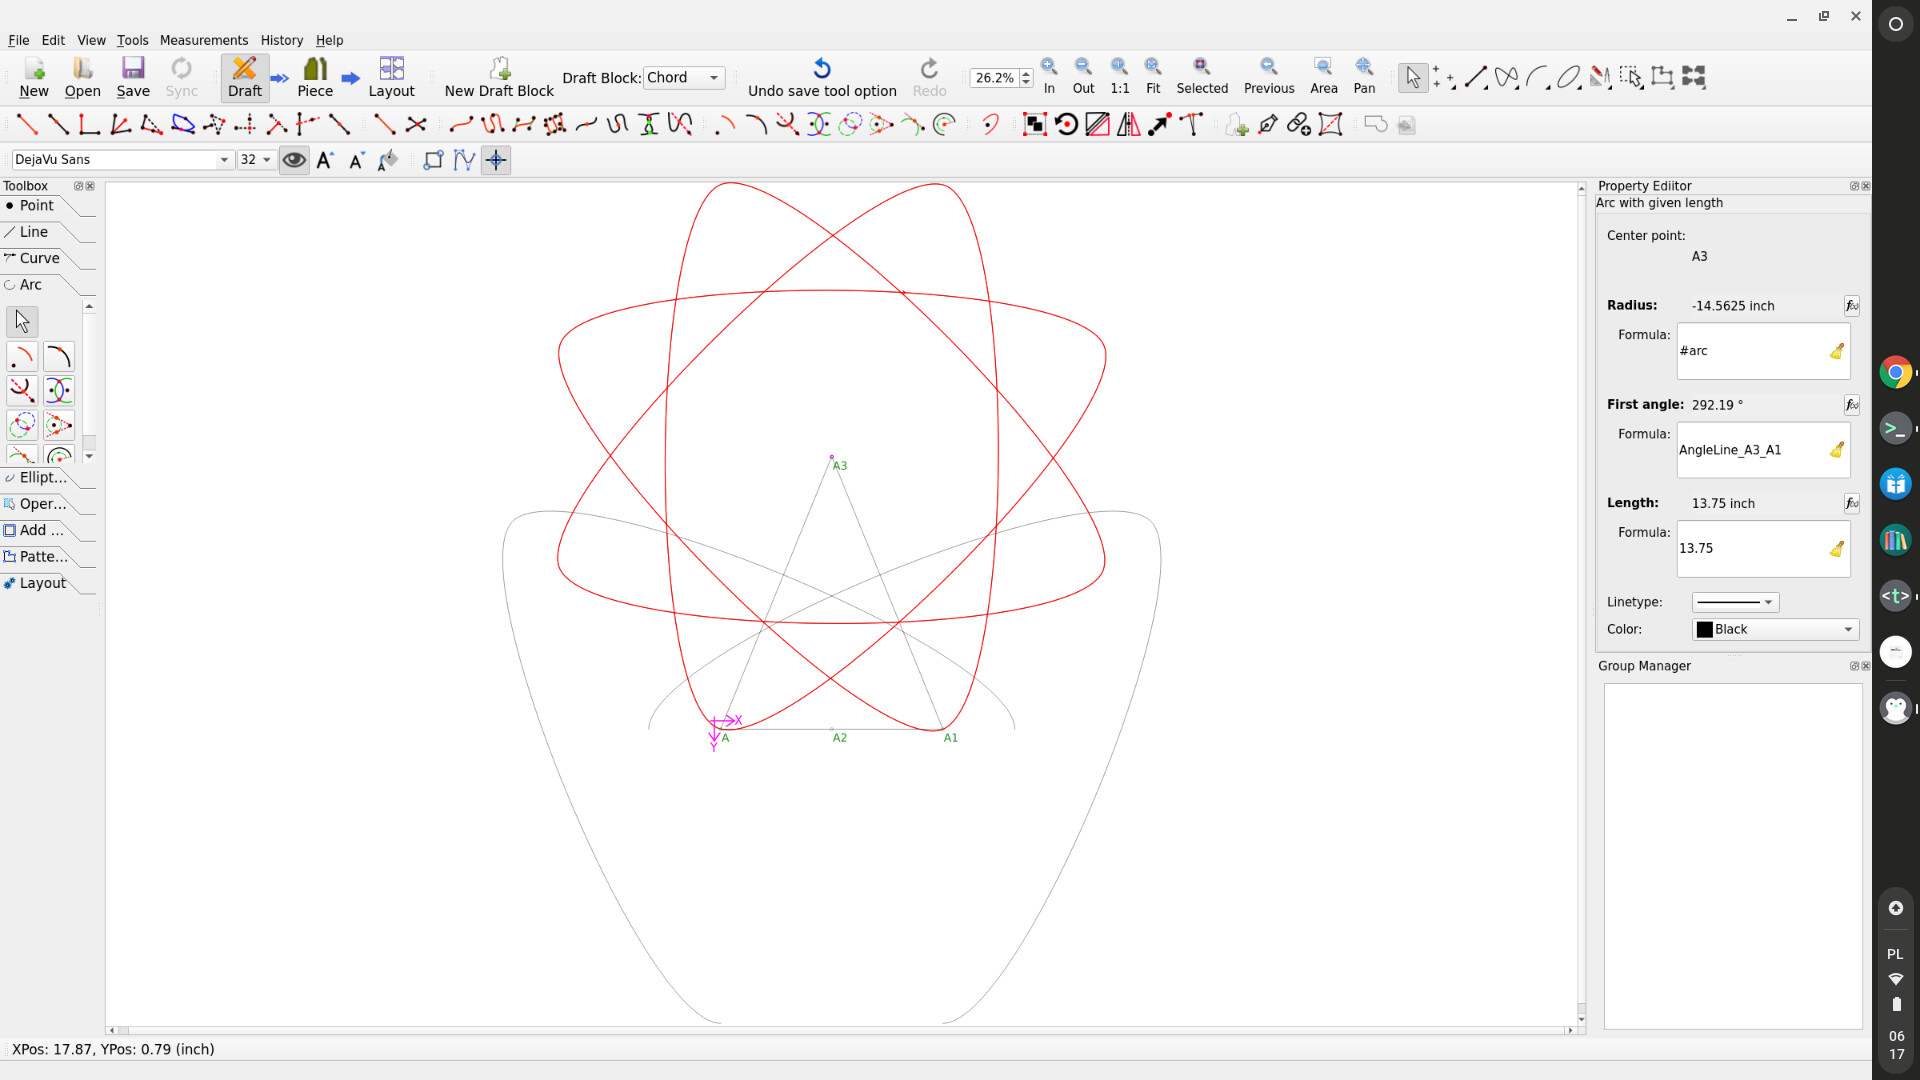
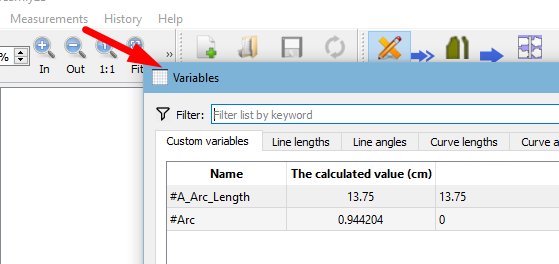
I’m having trouble working out what formula to use. Obviously this one is way off in the bleachers behind me: the radius of the #arc=13.75/sin(13.75/_pi)
Apparently -91.4991=13.75 who knew? LOL
I’m not done trying, but that flower was too funny not to post about.
![]()
LOL, @Pneumarian , you got a lot further with that than I did ![]()
Yeah, I also do a lot of fiddling to get the trouser curves the same length. But I was playing with something a while back where I got them down to a formula. I think I should get that pattern out & have another look at it ![]()
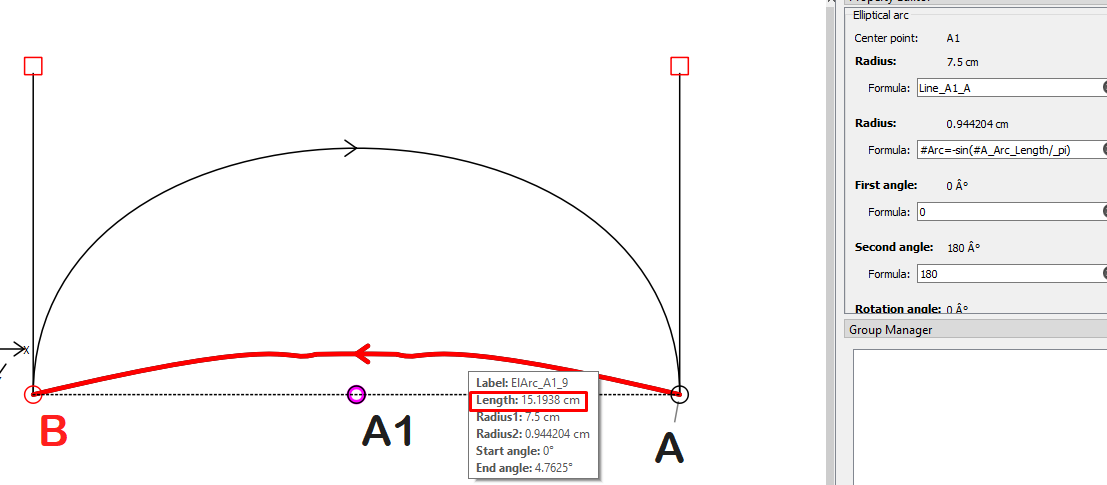
I tested your formula and it’s really good if one uses the Ellipse tool with the line to the 1st radius:
I think this is about as close as one can expect. I created 2 variables & set one to 15cmm & Arc to 0, since the formula will establish this.
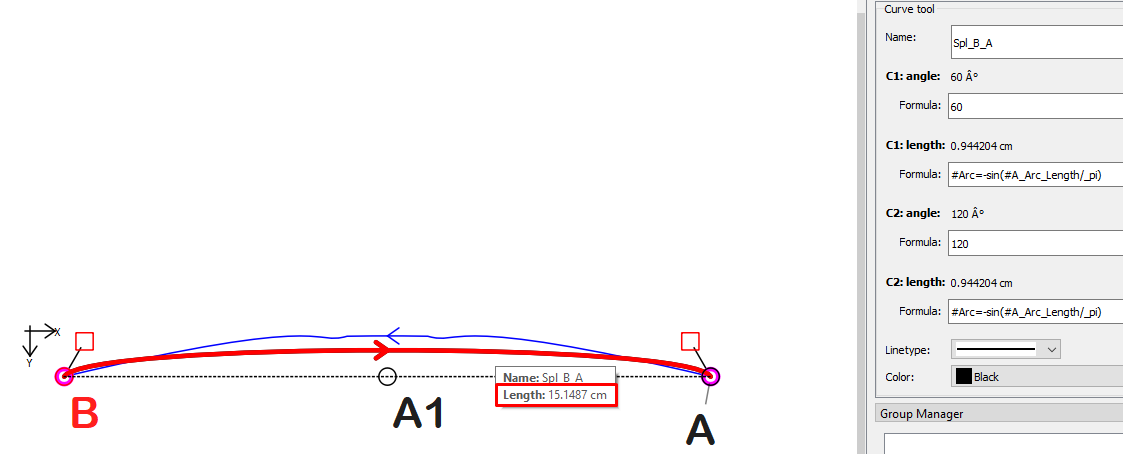
And then I changed your formula to this:
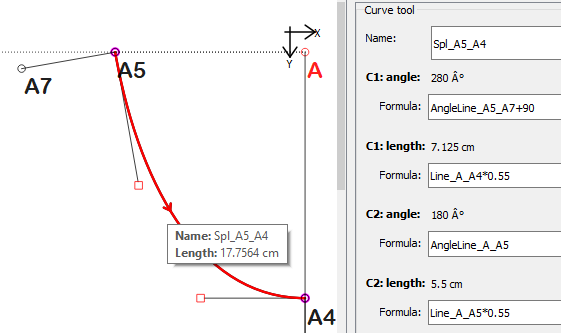
#Arc=-sin(#A_Arc_Length/_pi)
And here, I used the curve tool ![]()
![]()
![]()
I angeled the handles inwards by 30° and it actually made the curve line more accurate. Now to think of a formula to automatically set that so that the curve line is 100% accurate ![]()
Thank you very much, @Pneumarian, you’re a Star ![]()
![]()
![]()
Wow! Thank you all for such fast answers!
The thing is that I make dog clothes. I do this ”by hand” but I want to make them a little more professional ao that’s why I’m using Seamly. Or well… trying to.
The pattern I’m making has several arcs, where you put the head, and the legs. So I really need them to be an exact length so that the pattern will fit that exact dog. And they need to start at 90 degree angle for the first 5mm so that the pieces will match without gliches - and then I want the arc or curve to be an exact length.
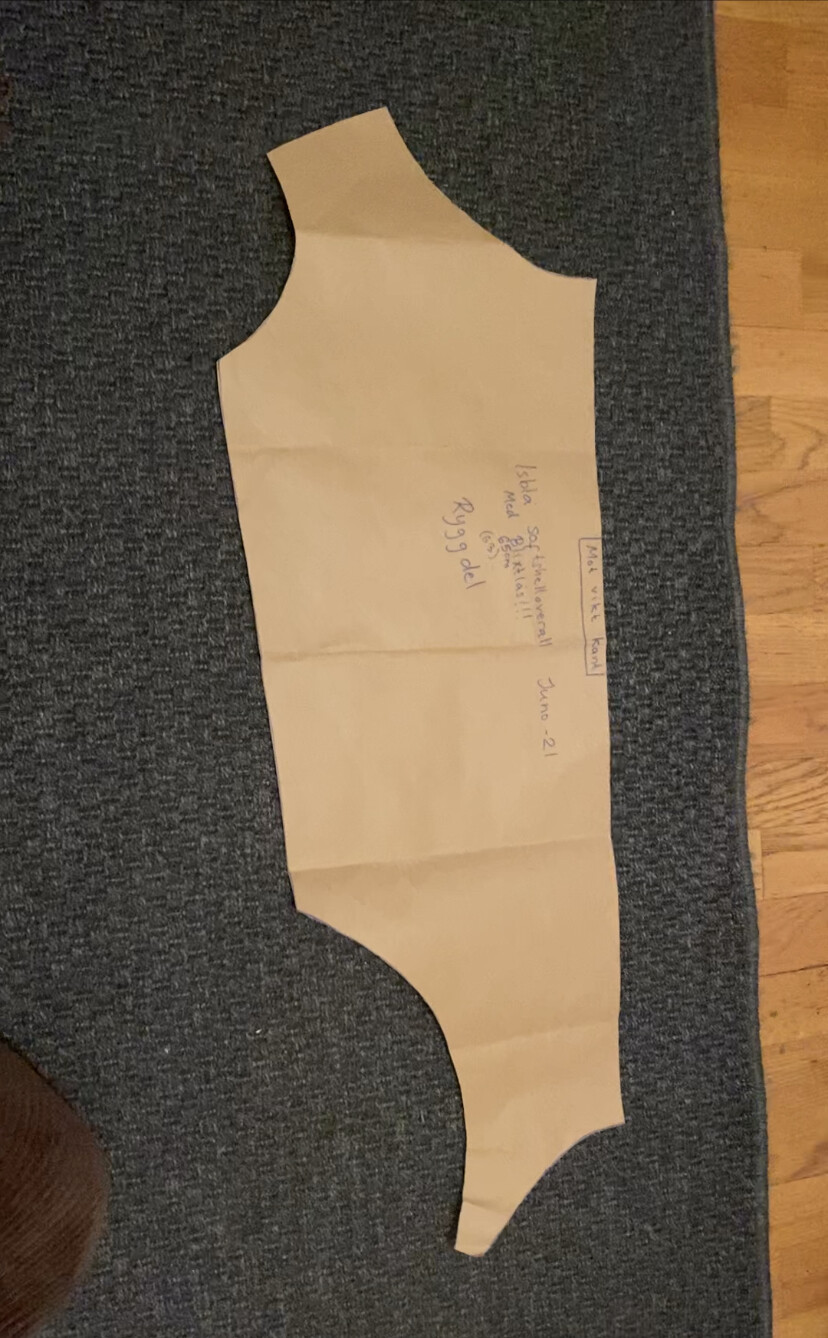
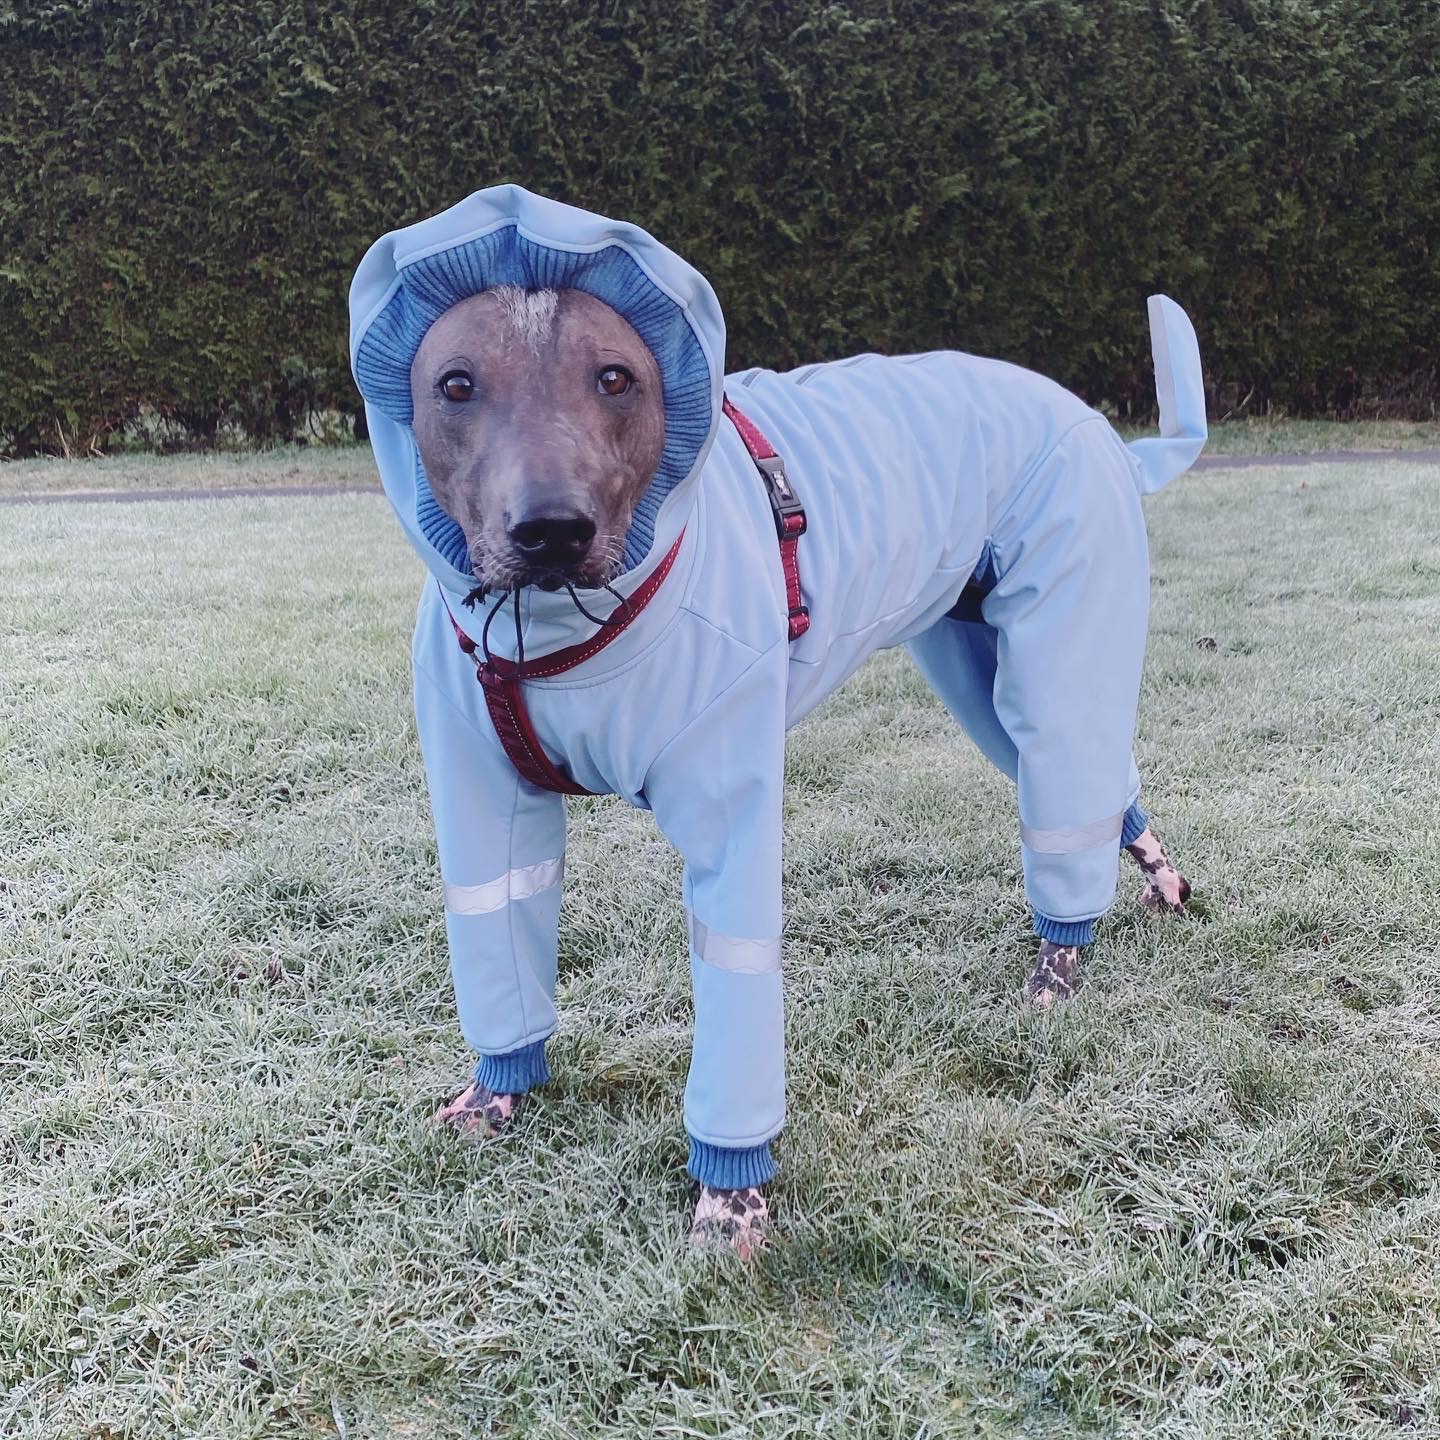
This is ONE of the pattern pieces that I’m trying to digitalise. As I said: I usually do this by hand based on the dogs measurments, but it takes forever so I wanted to use Seamly to be able to just measure any dog and put the measurments in Seamlyme and have the pattern pieces change automaticly.
I guess this just won’t be possible… at least not without me first getting a math degree 
The only measurments that I usually have to match the dog to the pattern is:
Back length Neck girth Neck length Chest girth Front leg length Hind leg length Hind leg girth
And when I do pattern for my own dog I also use measurments from the tail, feet, chest to chest, between legs, between fromt legs and face girth.
And I usually ask for a picture of the dog to determine how wide the pattern need to be in certain places.
But it’s all in my head and I’ve just somehow gotten used to ”fake it til you make it” - as all my pattern by now always fit the dog. But I can’t give an exact reason as to why it works. So I guess this software is too diffucoult for my needs.
I would want to be able to sort of paint a pattern but also see the exact measurment of every pencil stroke. I guess I might need Illustrator after all. But then I have to make all the pattern pieces by hand like I always do 

It’s perfectly possible & you can use the Variables instead of the SeamlyME measurements (or that is what I’d do).
I’m thinking that the 1st 5cm is where the valcro/fasteners will go. With that, I’d just do a straight line. After the valcro line, you can put in the formula.
I’ve added these 2 measurement lines to my sample above:
Ok, now I’m embarrassed. I see that the curve line is about 1.5cm longer than the variable ![]() We’ll have to look at it again. I’m so sorry.
We’ll have to look at it again. I’m so sorry.
Here’s a doggie coat that I made for my fur-babies last winter - for ideas:
Dog Coat - Cindy.val (19.1 KB)
Not amateurish at all… that’s exactly what I do all the time with pen and paper. Besides… experience will show that sewing and tailoring skills are more important than getting seams to match exactly in a pattern. Also the fabric being used can determine how accurate your seams need to match. Natural fibres like wool - as opposed to something like polyester- can be stretched or eased to fit within reason.
Same sort of thing needed when created neck openings to fit a collar of a specific length. On paper I use a rulered french curve all the time, where I can adjust the front and back necklines to fit a particular actor.
A bit out of scope of this issue, but a french curve type tool may be a solution to creating a curve of a given length… with a given pre-defined curve shape.
Sorry, I don’t understand you fully (I am swedish so english isn’t my main language) but how is it easier to use variables than measurments? I want to be able to put in the measurments and have the pattern change accordingly.
Maybe I’m not understand you correctly but I am not using any velcro or anything and my pattern isn’t for a coat. It is a dog onesie.
How do I do that in the program? 
Oh, wow! The onesie is beautiful ![]()
It won’t make any difference. Perhaps it is better to use the measurements for the body measurements. Either way will work. I just like having my pattern related formulas in the Variables where I can access them from within the pattern.
After seeing your photo that you uploaded here, I see that there is no reason for a specific formula as long as you create your curve using references to guide lines in the pattern and then create the other parts to match:
This is the same principal that is used in making clothes for people and you can tweak the curve handle angles and lengths to get the curve line to be the length that you require, as long as they reference something in the pattern, they should resize smoothly.
Thank you!!
Sorry, but I don’t understand what you mean ![]()
When I make the pattern by hand I use the neck girth to make the curve for the neck piece, so that is what I’ve tried to do. Different breeds will have different angles of the curve, so I’d bery much like to have the curve be a certain length and then be able to tweak it’s angle but still have the curve be the right length. The curve on the back piece will have to be 2/3 of the neck piece, so it is really importsnt that the curve will match the measurments.
Thank you for your answer and sorry for not understanding ![]()
If you draw all the straight lines of the pattern, I think it will be easier for me to help you to create the curves for you, then you will see what I mean. But basically, you go to work in exactly the same way that you would by hand, just add curves as best you can, then I’ll help you to perfect the curves afterwards.
Or send me the instructions and measurements & I’ll do an example for you. ![]()
@sylexandra, I’m seeing two options.
The first option is definitely preferred, & is the one which @Grace has offered to help with.