Ive been looking through this forum I’ve downloaded two pdf manuals an still I can’t get anywhere with this program I’ve asked my husband for help he’s spent two days also He was a machinist for Boeings for years and he’s very smart but when I ask him for more help to figure this out he trys but I get that look from him It was my intentions to be able to make clothing for the grandkids an was a better source to save my designs Ive been sewing for years as well as drafting clothing off of measurements Theres got to be some sort of tutorial that doesn’t bounce all over the place confusing you even more I’m not a quiter when I do things that are new but there has to be an instruction that is easer to understand HELP PLEASE before my husban disowns me
Hi Chloe, you’re not stupid. The first time I faced the program I didn’t know where to start. There are many videos on how to start drawing your patterns. Grace herself has some on her YouTube channel. I leave you a link to the first video of her. In the Wiki you have more resources. Cheer up. https://www.youtube.com/watch?v=NkmeIStHU50
Thank you for this starter I’ve seen it once before but she moves to fast and theres no audio to explain things I will try to go through it again Again thank you
Hi @Chloe,
Yes, I deliberately didn’t do any audio because I haven’t mastered captions in multiple languages yet ![]() And background music always just irritates me. And I normally use the Pause and Rewind when I’m following a training video of this kind, to watch an instruction over & over again & then to do it myself.
And background music always just irritates me. And I normally use the Pause and Rewind when I’m following a training video of this kind, to watch an instruction over & over again & then to do it myself.
That video goes with the instructions on the blog.
On this topic, you can find PDF files to a training that I wrote in 2017 that you can print and follow, may help you: New member, any spanish speakers? - #9 by Grace
I’m afraid that all of our manuals and tutorials need to be updated with the program improvements over the years, but I’m sure these will help you to get going.
I was up half the night last night I think my husband no I’m sure after this morning is about to ring my neck, because when I finaly crawed into bed with him he asked if I made progress, as I told him I did “but” I ran into a snag and needed his help. Well
I was finaly able to get to the point I figured out how to enter measurements and save it it shows as a vst but in seamly2d I need a val file and cant find it,
Yes I tried exporting it, I dont want to discuss that
when asking my husband he looked at the book an came back with "this was a waste of paper an ink. Apparently the manual is for a older softwear, and told me to find the real manual.
I’m sorry Gracie I tried your vedio but I had a hard time pausing and rewinding and re-starting it was just way to much so i went back to the manuals we downloaded.
We went back to wiki and tried to get a manual from there but apparently the page no longer exists
My husband told me he didn’t understand why there wasn’t a simple step by step manual in the help files
He kinda gave me hell telling me when he was working with new people in his machine shop that it was important to give them a step by step instructions and make sure the fully understand the directions
I could go on about the lecture as you can imagine I’m sure so I’m still trying to find a step by step manual
I guess thanks anyways
Chloe
Oh I forgot in the task bar there is no pattern piece listing if that helps that is shown in the manual I have
Hi again, @Chloe Once you have set up your measurements in Tape, you open Seamly2D and Click on the New icon or Menu>File>New or CTRL-N to create a new pattern file. After you have done this, then you can got to Menu>Measurements>Load Multisize to attach your measurements file which is the .VST you mentioned.
Then you can save the file as - Menu>File>Save as Which will create the .VAL file that you are looking for.
Once you have done this, then you can start drafting your pattern.
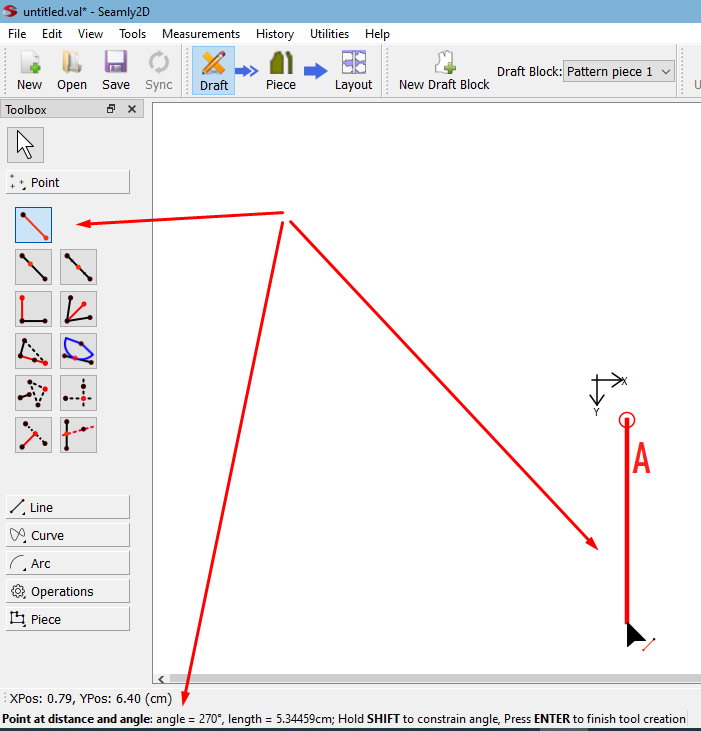
To explain all the tools that are available and how to use them is a lengthy process, so I suggest that you play around with them and see what they do. In the beginning, it is all a bit confusing but when you select a tool, a ‘next step’ instruction will show at the bottom left of the drawing board that will guide you on what to do next.
If you get stuck again, just let us know on here what it is that you’re trying to do and we will try our best to help you.
Thank you I’ve already been toying with 2d and learned I missed a couple measurements (critical) I’ve managed to straghten out the measurements that as a test I got off one of my Hempstead dolls and am attempting to do a A line tunic for it The only thing as my husband says is I need a digital protractor so I can understand the degrees all my arks and lines are on the top menu bar it would be easer if they were on the side but I’ve yet to find a manual that covers the version I downloaded. So I guess it’s going to be a lot of starting over since theres no undo tab till I get it all figured out. At least ive got the measurements down pat as many times as I re-did them. Back when I learned to do blocks I don’t remember it being this difficult to understand. This is a serious challenge that’s not for everyone. If I didn’t want to save room with the patterns an try an keep them digital, I’d just go back to the tryed and tested methods Again thank you
Hello again, @Chloe
And welcome to the Seamly2D forum. (Sorry that I missed welcoming you yesterday.)
I helped to write the manual in 2017 when I was learning the program and, at the same time, learning to do pattern making. It was an exercise to find out how all the tools work. I need to put my head down and redo them all with the new tools and changes, but I just don’t have the space at the moment and there are still some changes coming that will need to be included in the manual.
To keep Seamly2D as a free and open source software, we offer our services for free, too, so we all have day jobs and this why things move quite a bit slower than at Boeing. ![]()
Ok, I put mine on the side because I can find them in their different sections and I keep only the necessary things at the top in the toolbar ribbon that aren’t under the tools. This is how Seamly started out and I find it easier when I’m working and when I’m helping people on here. So if you’d like to take a moment to set yours up, here’s how:
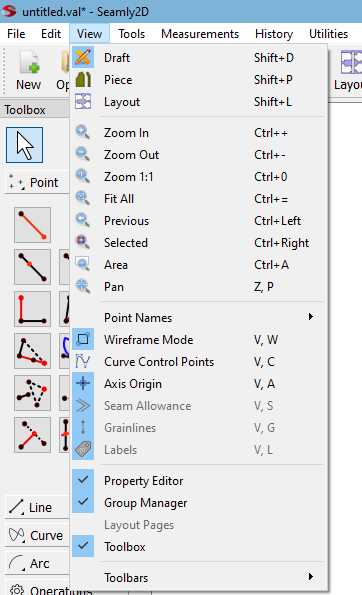
In the menu under View, you can choose what you’d like to see. I like to keep the Toolbox, the Property Editor and the Group Manager visible. You will probably only use the Toolbox for now, but you will soon see the use of the Property Editor. I don’t think you’ll be using the Groups for a while yet, but I’d suggest you leave it open for the day that you do wish to use it, because you may forget that it’s there in a few months - I know that I did.
These are the main items that I put on the ribbon:

You can also access the view menu by right-clicking on the Toolbar ribbon.
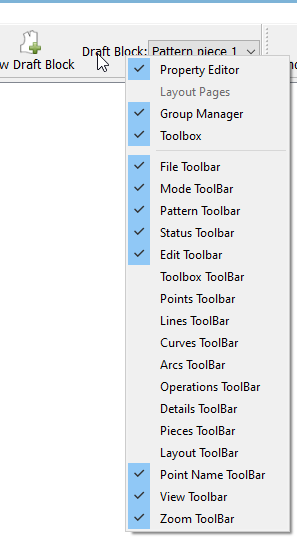
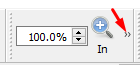
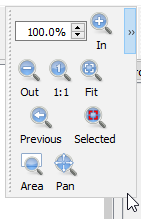
When there are too many things in a section of the Toolbar, that section will be minimized with the small arrow to the right that you can click on to see the other contents:
I think… Play around with selecting and deselecting an item at a time until you have your screen set up they way that it makes things easier for you. You can’t break or lose anything ![]() and I’ll be around, on & off, for the day if you have any other questions.
and I’ll be around, on & off, for the day if you have any other questions.
Thank you so very much I’m learning that this may be quite a challenge but as I found out it’s going to take some serious dedication to learn this. Please let me know if I’m expecting to much but my idea is to create a basic blocks and be able to save it and retrive it and either minimize or maximize the grading by changing its values saving me the time it takes to re-draft each time Ive learned in the past when you build your basic blocks you can re-adjust the different blocks to fit almost any fashion I’ve learned when I was doing it the old way it was creating way to much space saving all the paper patterns. It seams like it would be easier to just retrieve them from my computer. My husband retired from Boeings about 10 years ago and I hate to constantly bother him when I know he’d rather be working on things in his shop, so thank you to everyone for your help
No, you’re not expecting too much. This is how I work. I have my basic blocks, tried & tested, and I have my multisize measurements chart, all nicely set up, which I use while designing. When I make a pattern for a specific person, I create an individual measurement chart for him/her with all the measurement areas in it, using some measured measurements and some from the nearest size to the person’s measurements, and just load it into the pattern & voila! a custom-made pattern for that person.
Everything depends on what you learn now, in the beginning. It is a learning curve, but the rewards are even greater. And you will find what works best for your existing pattern-making methods.
Most important is that you have a little fun and a sense of achievement while using Seamly2D. This is what keeps me here on the forum. It’s such an amazing program that keeps me interested and wanting to help people to get going with it.
Thank you Grace If I can figure hot how to get the waist circumference when /4 set I’ll be fine till the next time I enter another measurement In seamlyme I’m getting a bunch of errors on the measurement auto calculations apparently because dolls are not exactly proportioned to standards of measurement (but again no human runs the same standards) it appears that it doesn’t like what im entering because it seams to be changing measurements when I reflect them to seamly2d As I said before I’m questioning if what I’m trying to achieve in saving storage is really going to be worth this time. As I said my husband is retired and the kids are all grown up so we kinda cherish the time we have togeather, but this program is getting to the point he’s loosing patience with me being so frustrated trying to learn this. I one stubborn ol girl, so in time who knows. I can live with the fact that I can’t seam to change the tool bar as it shows in the manual and the tool bar hasn’t the same features as in the manual. That’s one thing. I’ll keep trying but as I said it would be nice to read a step by step manual as apposed to it bouncing all over the place, so as I make progress I’ll keep setting up a path to take till I can’t go any further. Again thanks
Hi Chloe… If it makes you feel any better, I struggled with grasping the apps when I first started using them, and I’m an engineer, programmer, pattern maker, own a costume shop - for 40+ years. Now I work on the development of the applications.
Yes, there’s is a learning curve to the applications, but once you grasp a few basic concepts it gets easier. I’m sure you’re in good hands with @Grace helping. We certainly don’t mind being bothered so you’re always welcome to ask away. In fact I don’t mind what might seem like stupid questions as they can sometimes give me insight into how to make the apps clearer and easier to use for new users.