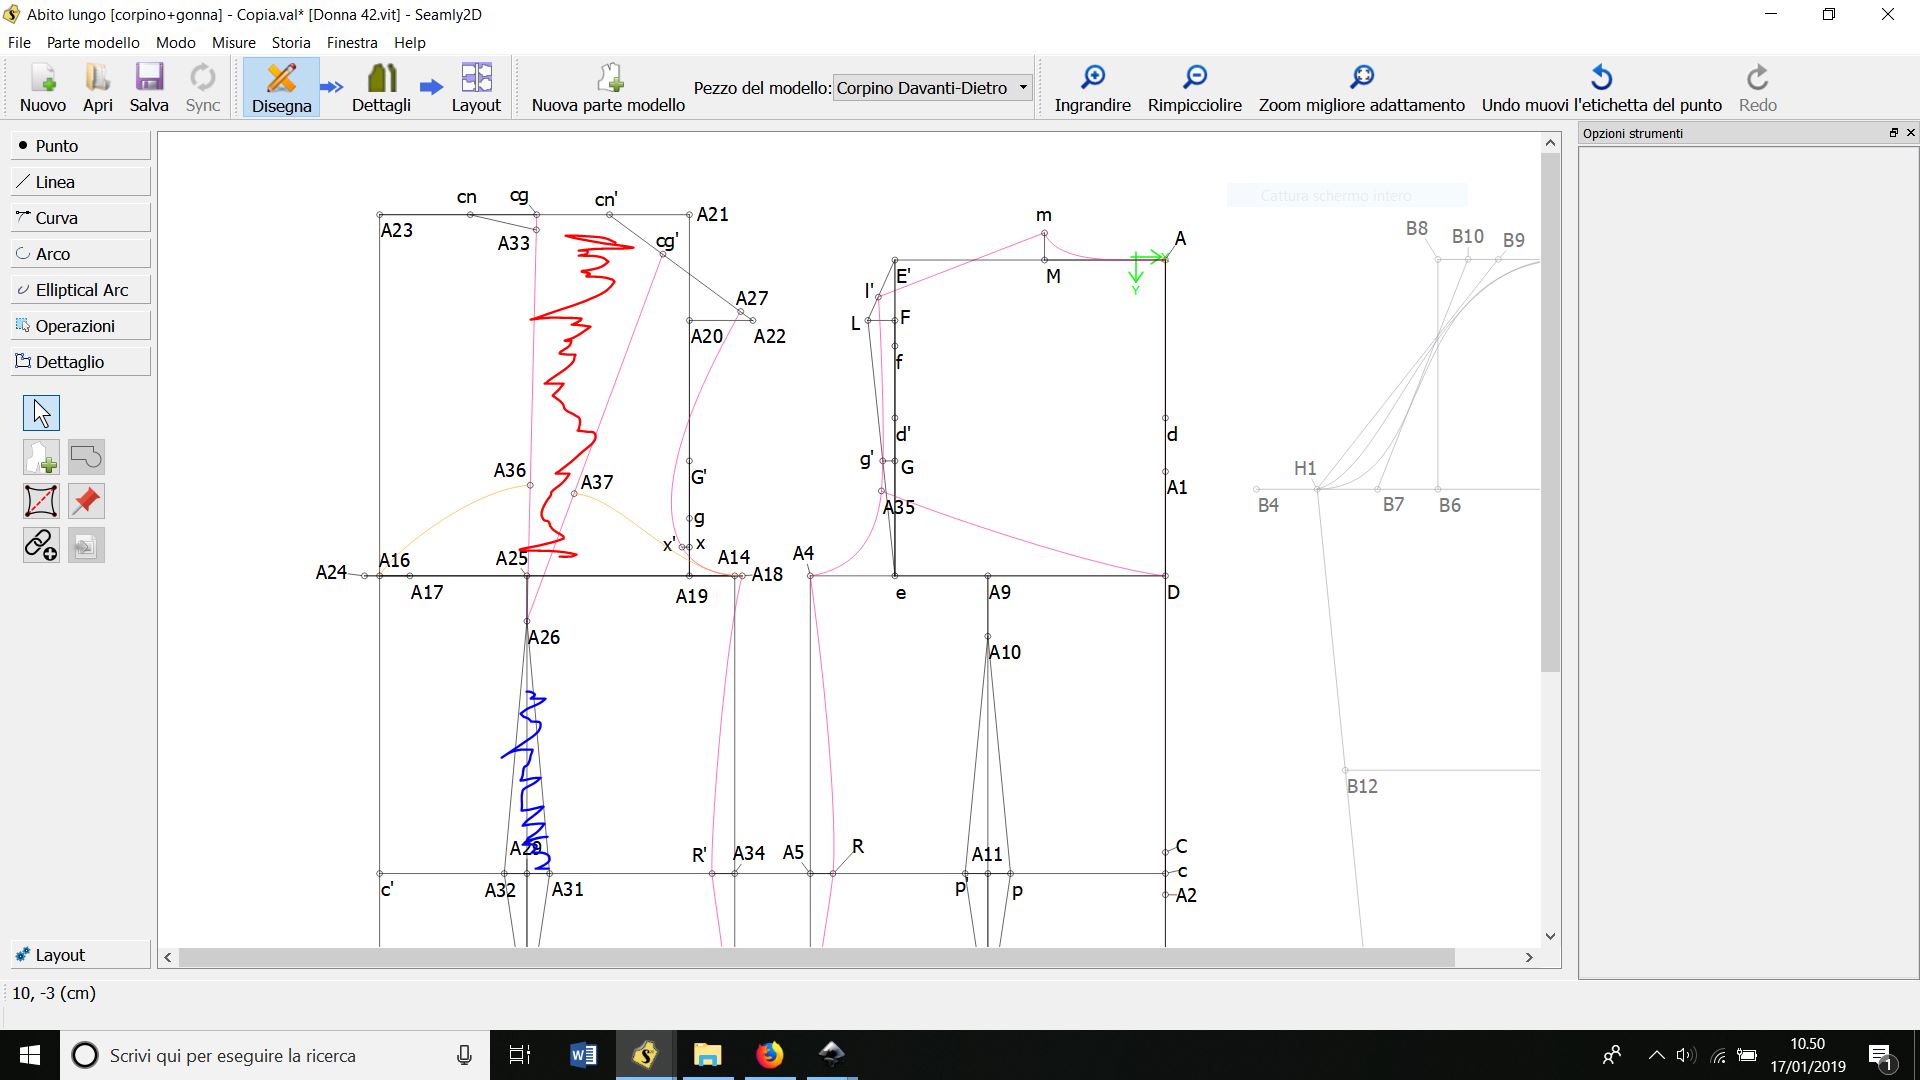
Good Morning. As you know, to have the right breast fitting of a woman bodice, we must nullify a specific pattern area (please tell me if my terminology is wrong ); we call it “cuneo” in italian. Here you can see the screenshot with a red mark where I want to “merge” the line A33-A26 with A26-cg’, and the blue mark where I want the pattern to open consequently.
@luca_lavore I believe the English term “slash and spread” is related and I believe you need to look at the rotate tool. @Grace will probably be more helpful than I can. In English I would call the area that you have marked in blue a DART
Yes, what @kmf says is perfectly correct. That is the tool to use and the bell sleeve tutorial will show you very nicely how to use the tool. If you keep an eye on the hints on what to do next in the bottom left side of the screen, you’ll manage just fine
Thanks for your replies. I need to do operation previous described when i’m still in drawing mode, because after that I still need to add more lines and curves (for example to create heart-neck or v-neck or other neck shapes). I’ve tried with an arc, joining lines to its radius, but I am still unsatisfied whit the result. By the way I accept this problem as it is for the moment, don’t expect too much from a software under development
I’m sure, speaking on behalf of @slspencer, @kmf and myself, we LOVE YOU and your DAD right back
Sometimes, one needs to get a bit inventive to achieve the desired design, but I can assure you that there is a tool for anything that needs to be done - if not 1 tool, then definitely 2 or even 3, but there is always a way with Seamly2D.
Please don’t hesitate to ask again if you’re uncertain of which tool you need to use to achieve something
Yes, before you answered me with the right way to rotate, I had tried creating an arc between the dart width, drawing all the lines dependent to its radius, and then lead the arc to 0
Obviously the rotation tool is the right and perfect way to nullify a dart, but you are right, there is always a way to do something!!
Yes, the rotation tool is the ‘slash and spread’ tool for Seamly2D. If you were working by hand, you’d simply cut the two dart lines and swivel the paper to where you want it to be. Here, we just use the rotation tool
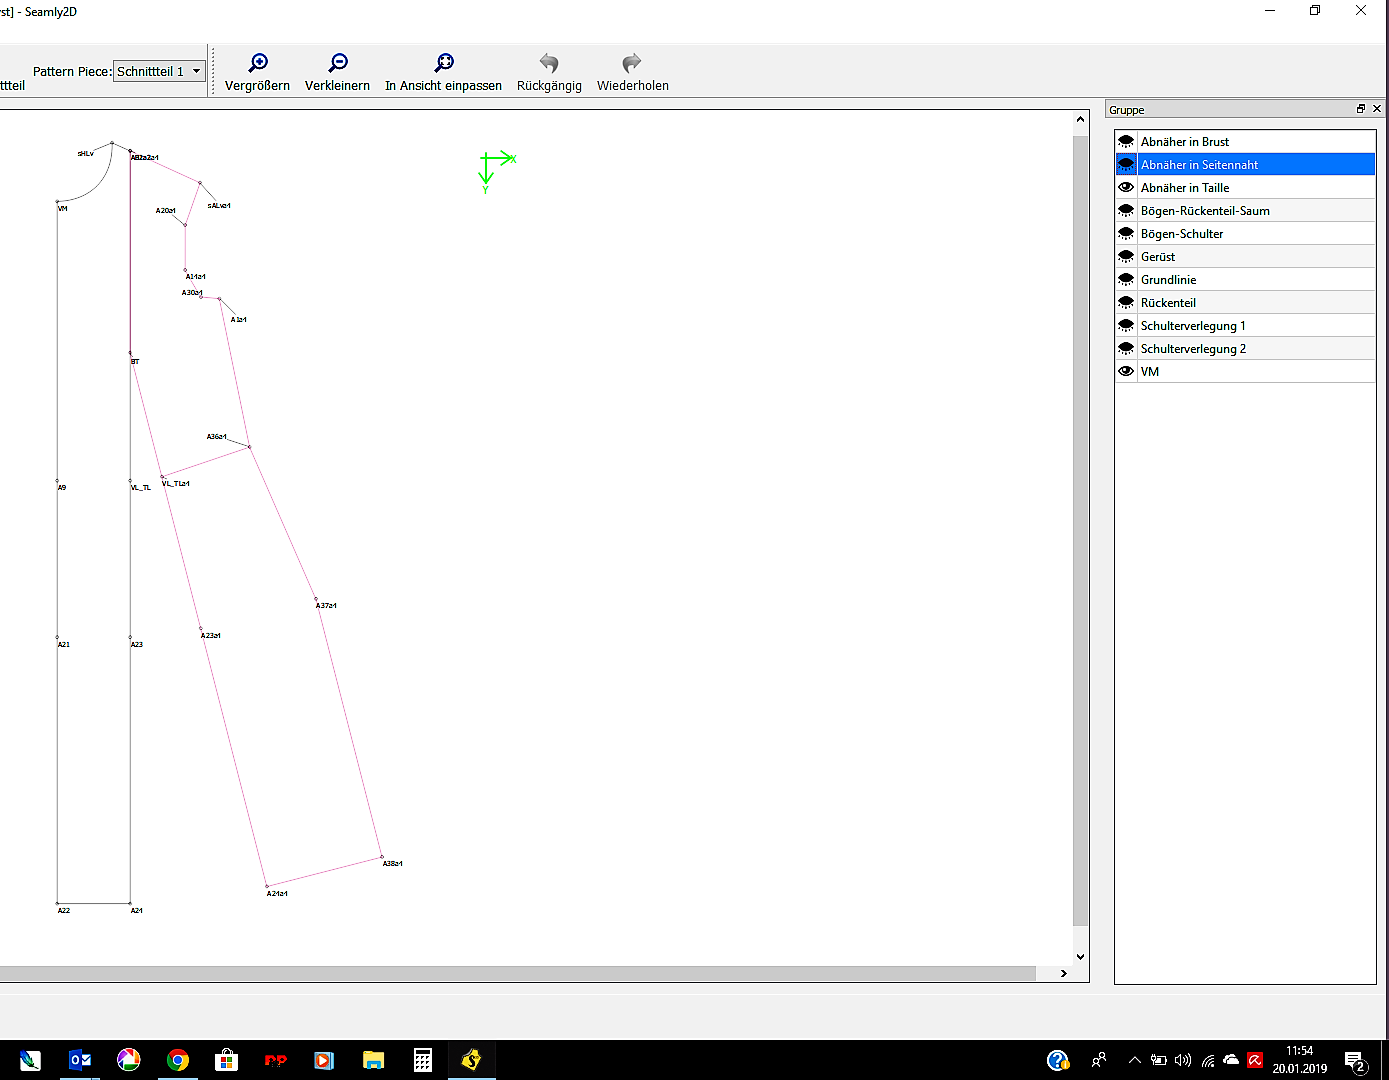
I also used the rotary tool for that. So that I can work meaningfully with it, I have created a framework and then formed individual groups:
darts in chest
Darts in waist
Dart in side seam
4th VM - is always the same
The back part is in a different group, so I am able to work only on the front part
At my first try, I have already drawn the curves of armhole and side seam. It then turned out that it is not or very difficult to get the corners to other points. The whole thing became very confusing.
Now I have, for example I created points for the neck hole and the shoulder point on the shoulder line, which I can then push back and forth on the shoulder line.
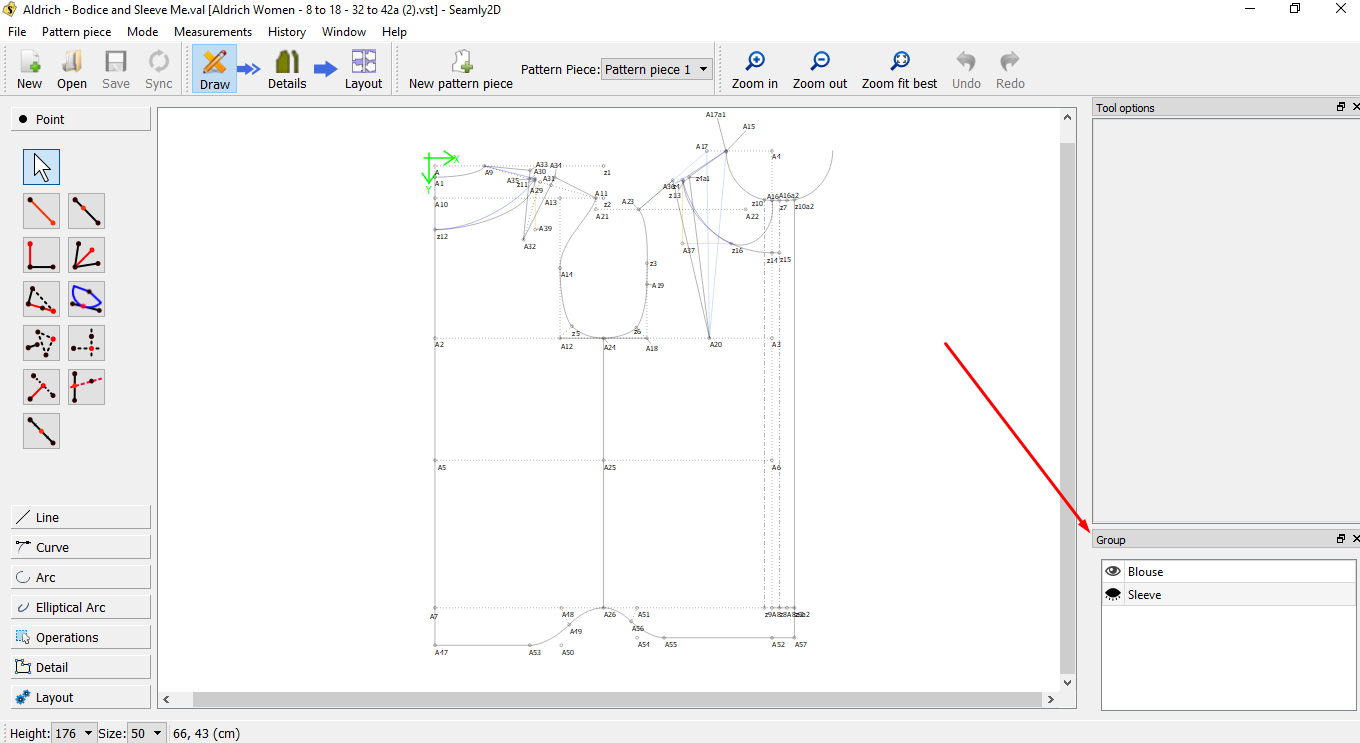
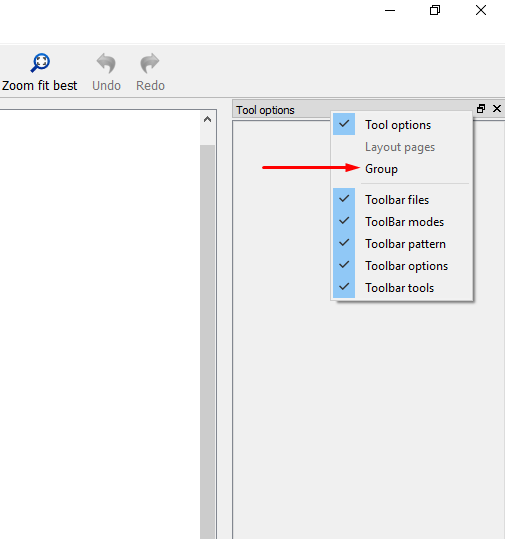
If they aren’t listed, then right-click the gray bare that says Tool Options and click on Group:
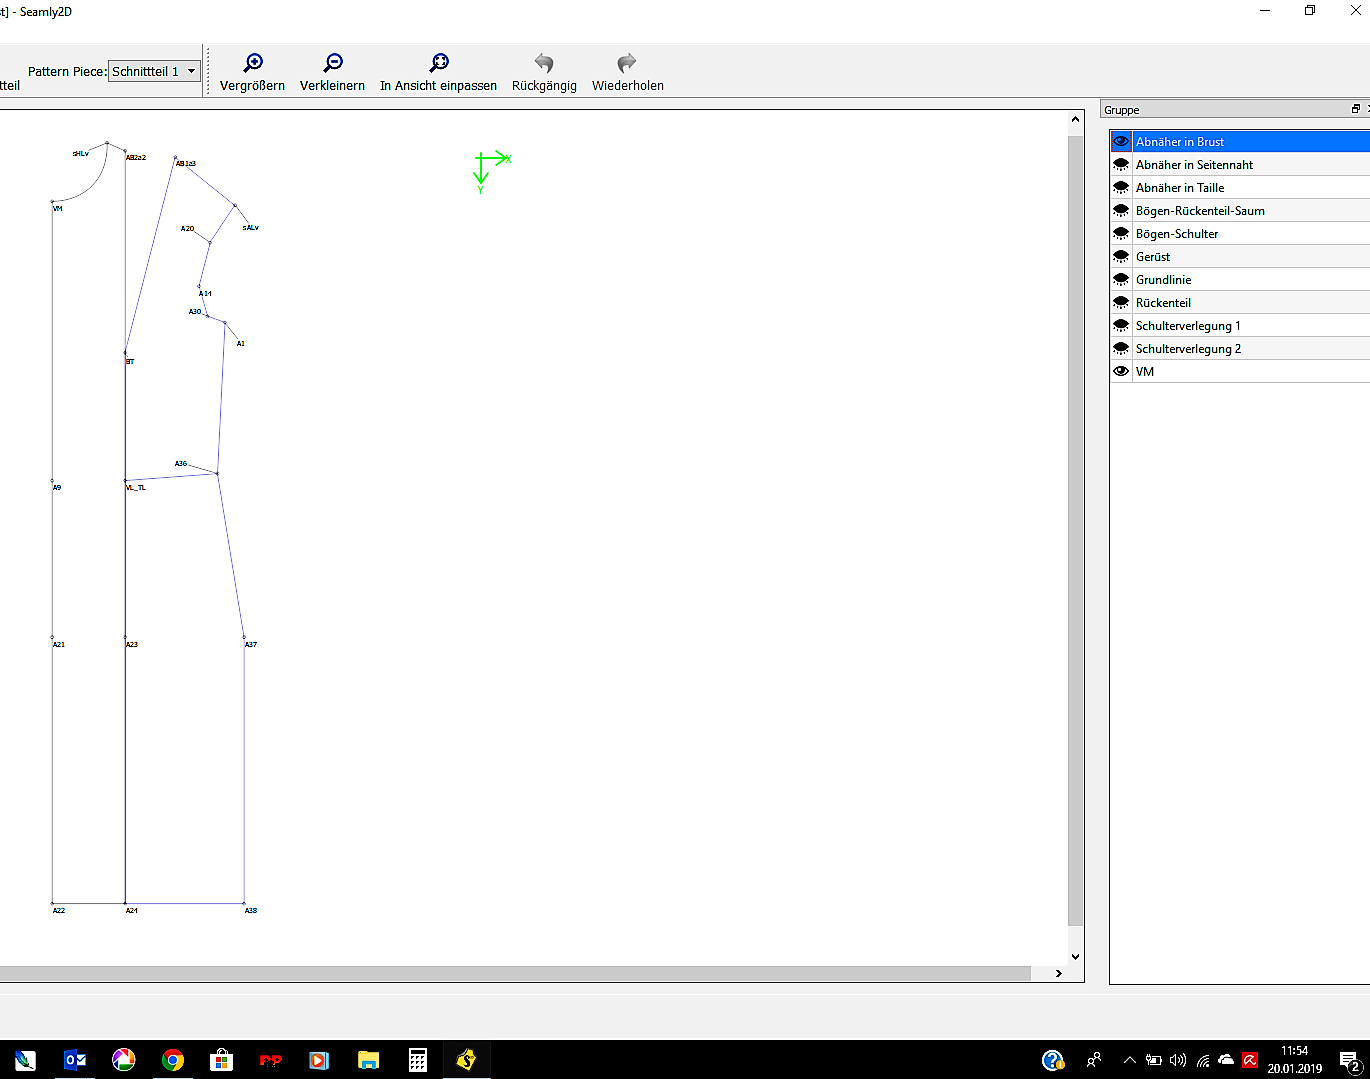
This will open an area where your groups are listed. Then you can click on the eye next to the group name to make it invisible or visible (closed eye or opened eye) - as you can see in the first screenshot.
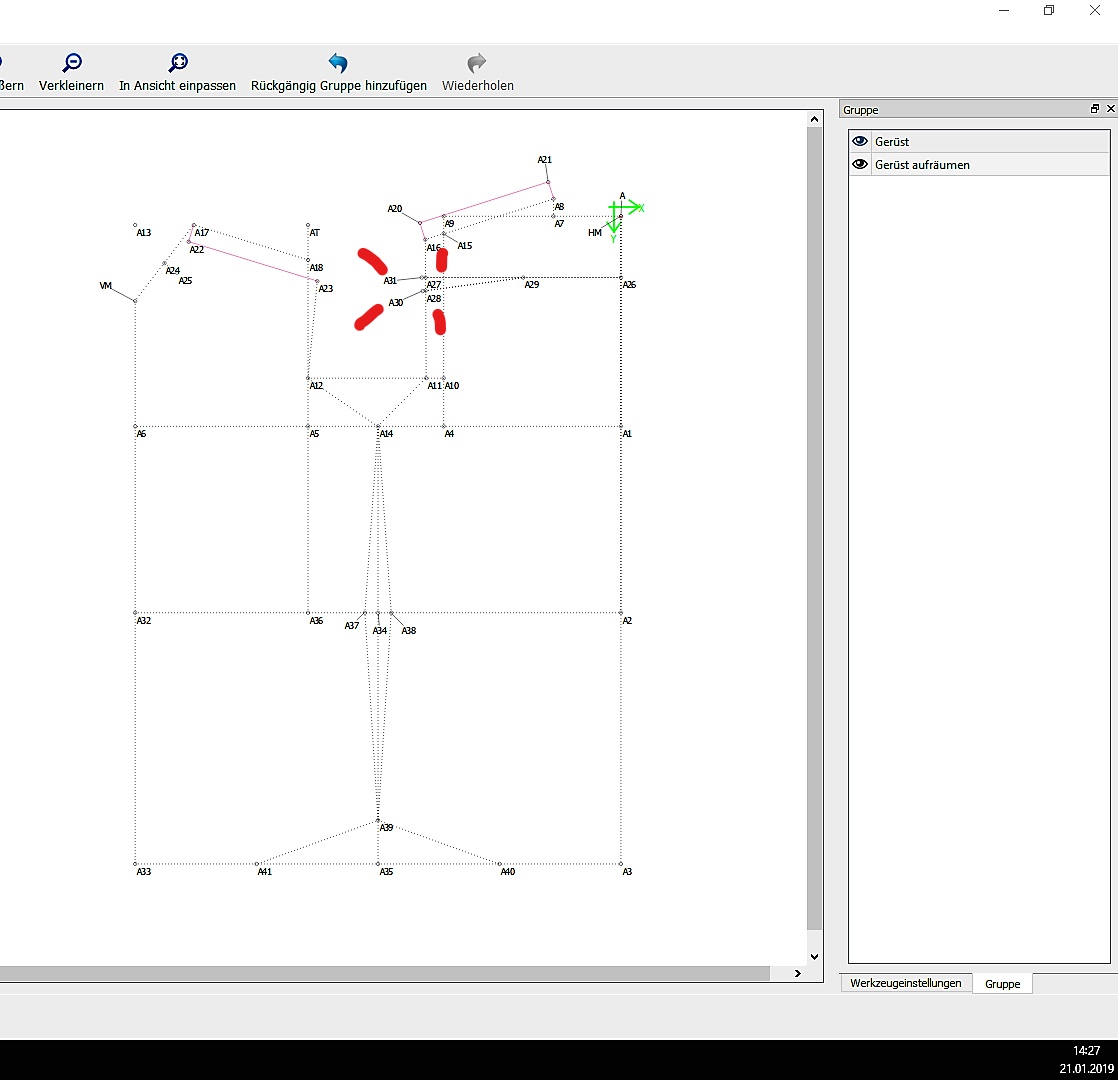
das ist eigentlich ganz einfach:
Ich arbeite gerade an einem Grundschnitt für ein Herrenhemd.
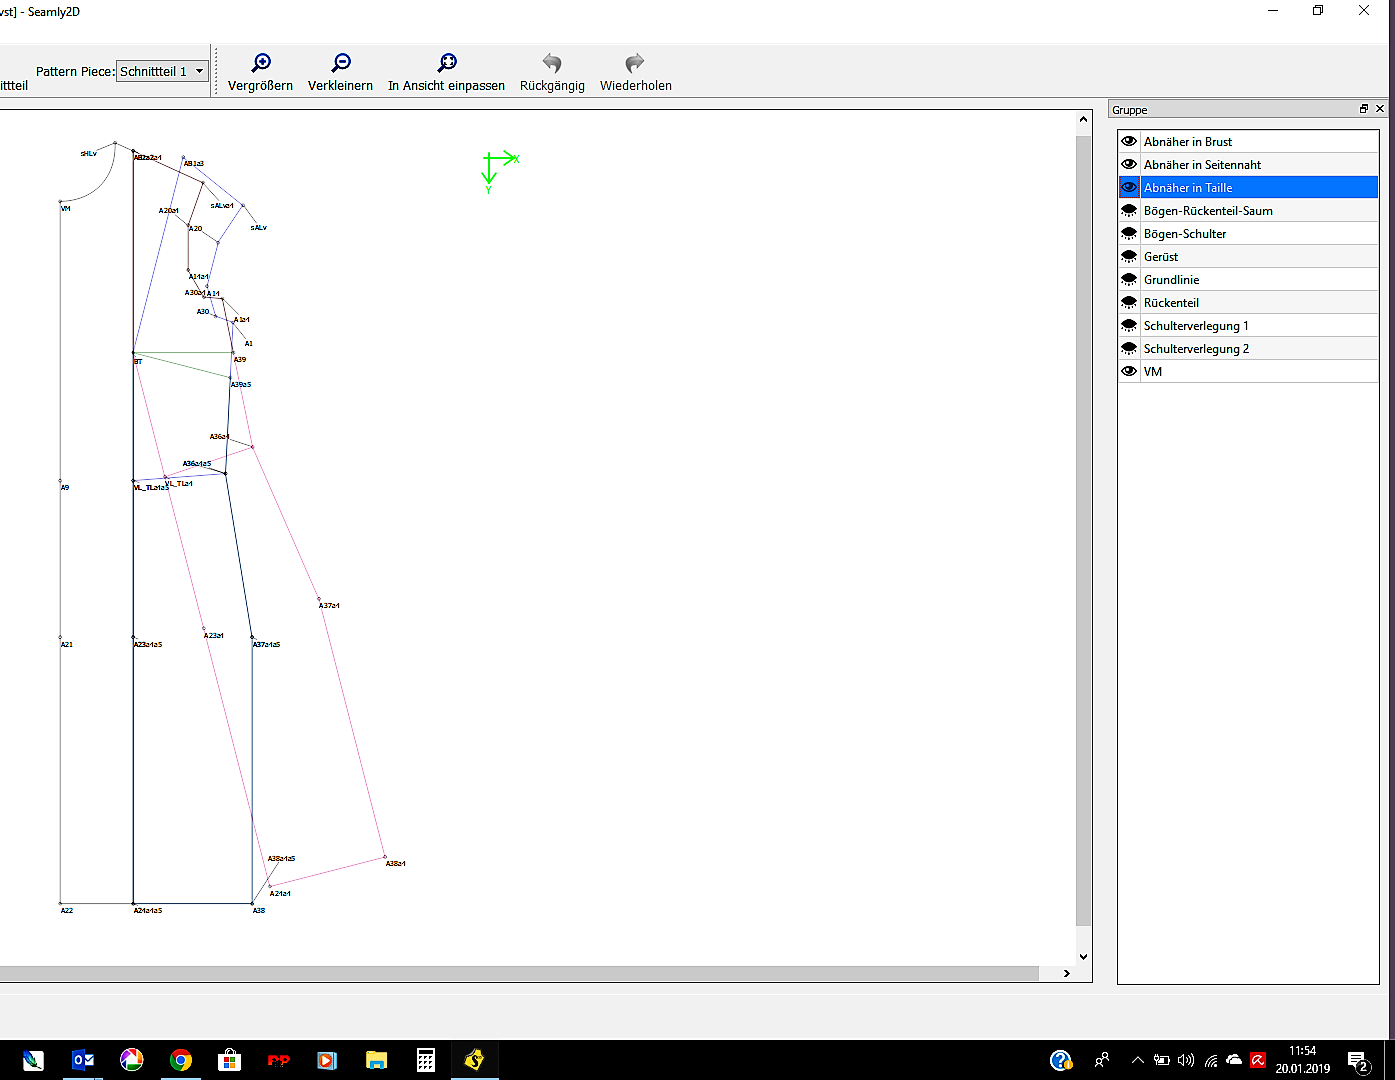
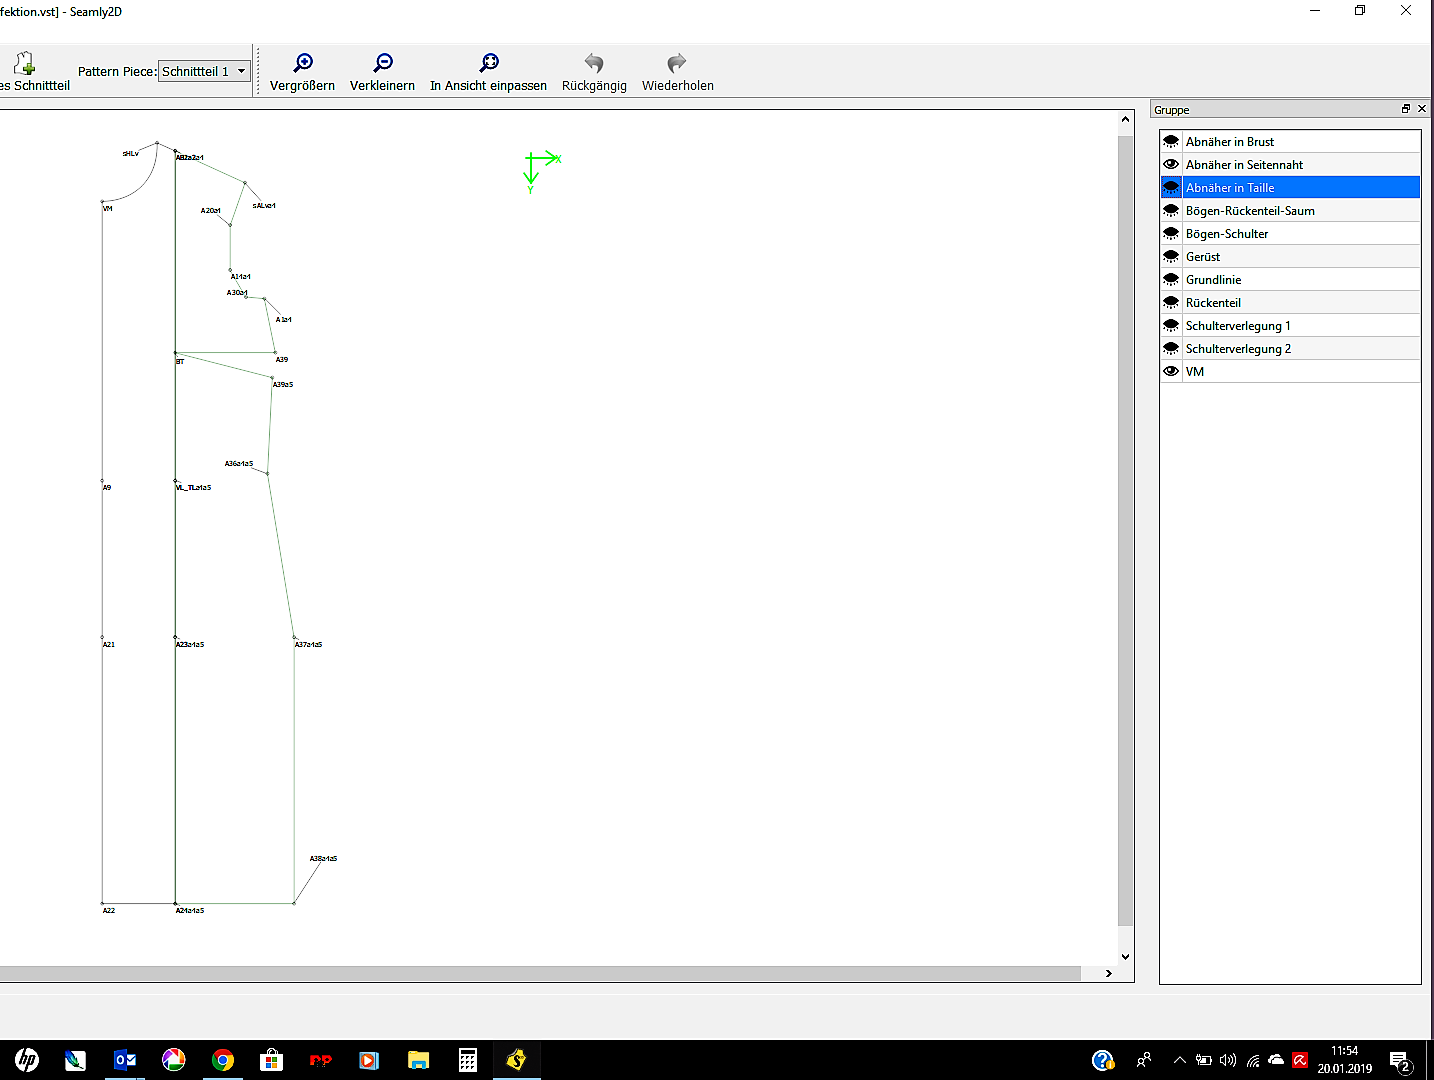
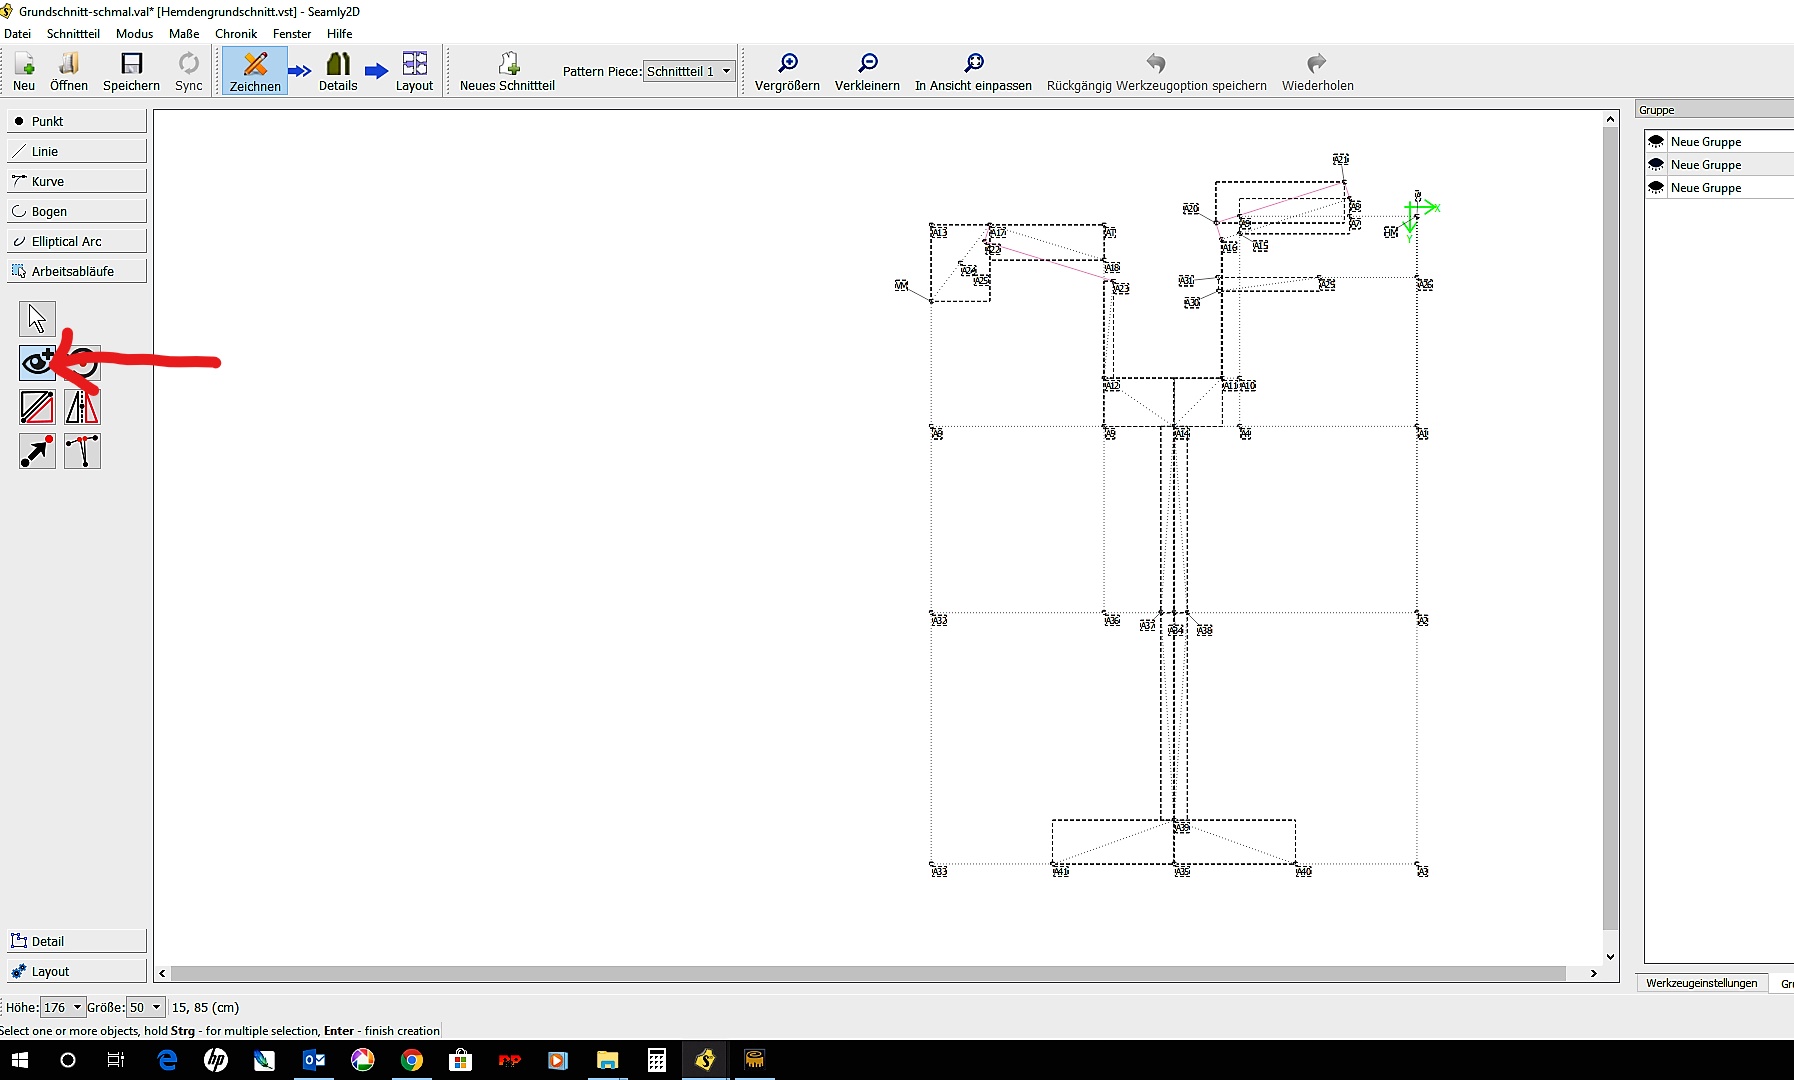
Das Gerüst ist bis auf den Ärmel fertig. Im Bild siehst du wie rechts schon neue Gruppen stehen. Das Auge ist zu, das heißt du kannst die Punkte nicht sehen.
Ich möchte immer auf das Gerüst zurückgreifenund und möchte eine Gruppe bilden.
Unter Arbeitsabläufen siehst du das Werkzeuge: Auge
Mit der Maustaste ziehst du komplett über das Gerüst, dass du gezeichnet hast und drückst auf Enter.
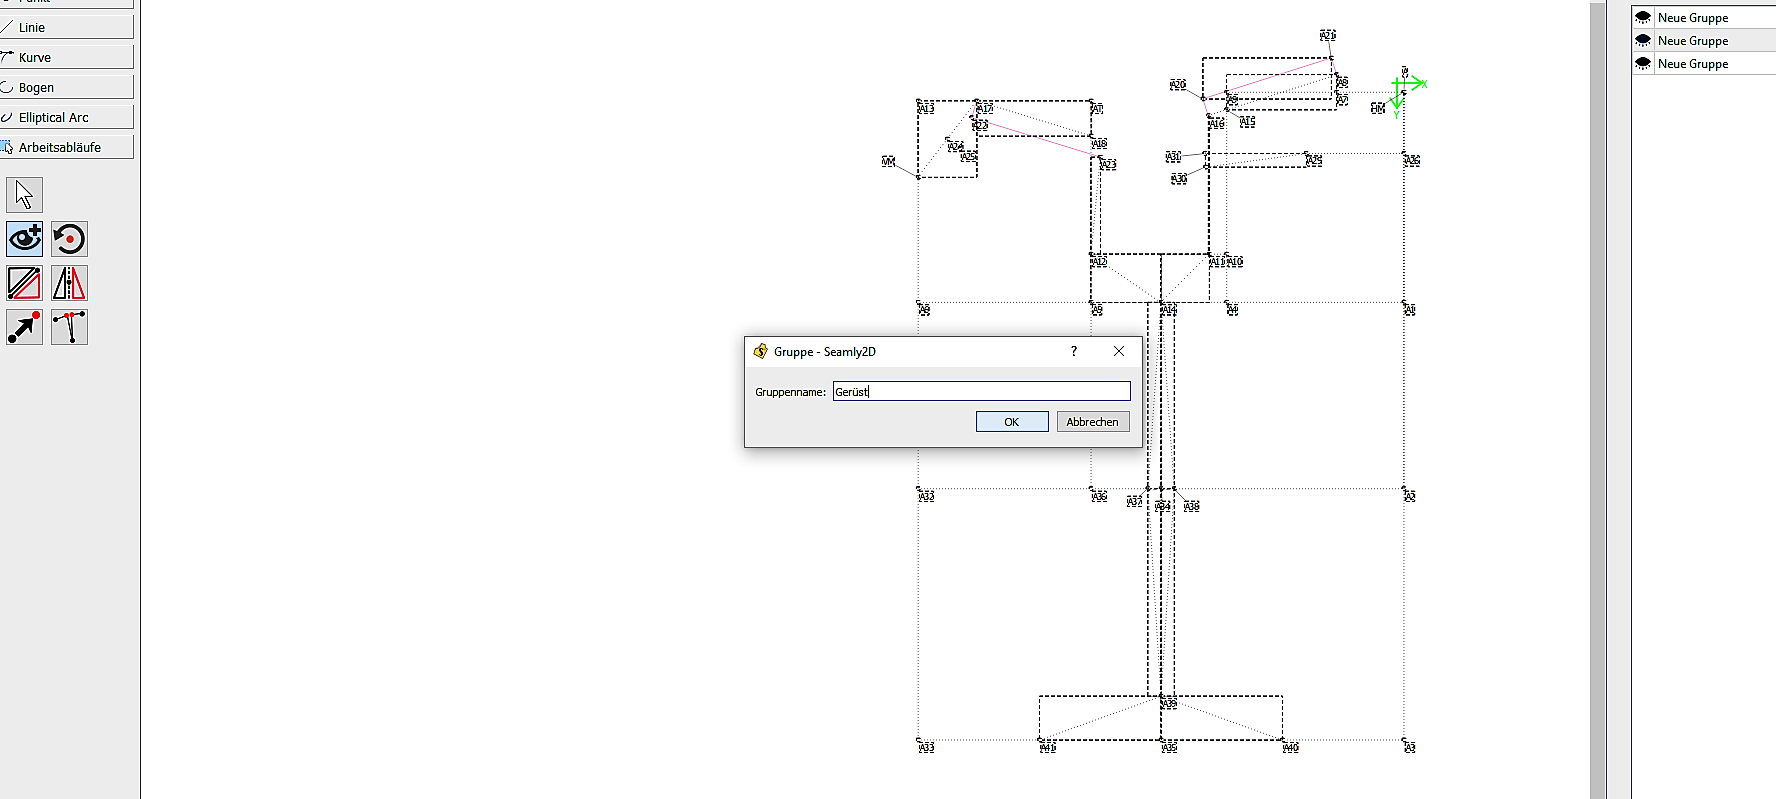
Daraufhin erscheint ein Dialogfeld. Du kannst der Gruppe einen Namen geben: Gerüst und drückst dann auf OK.
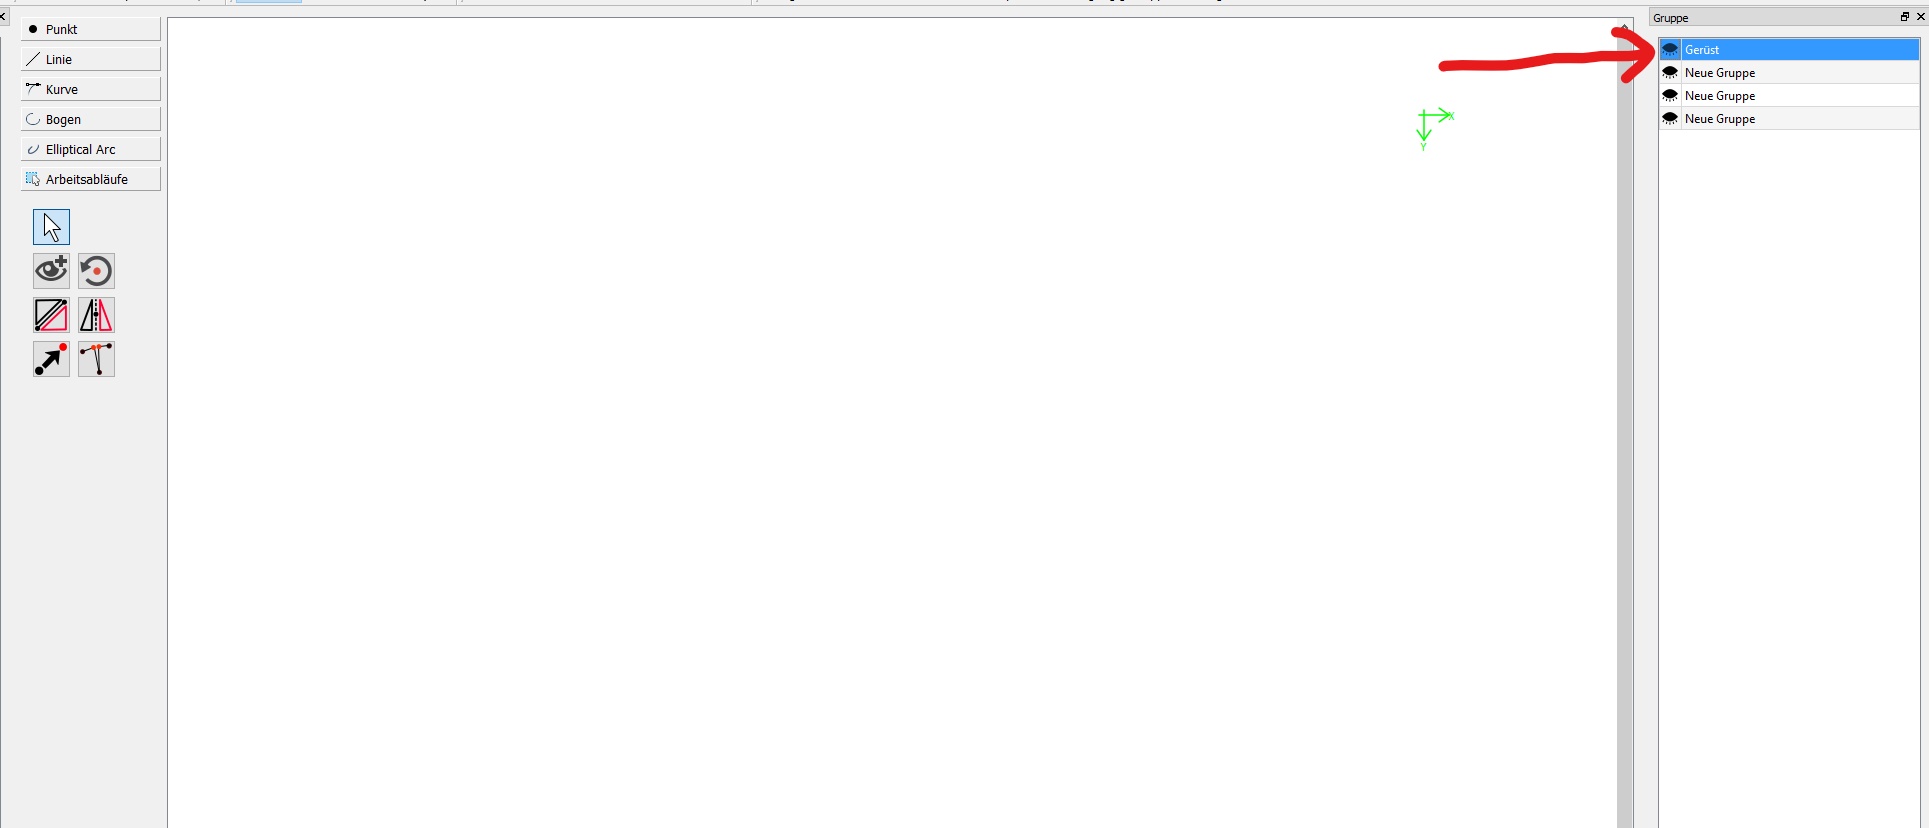
Wenn ich jetzt die anderen Gruppen öffne, sehe ich die Punkte, die ich vorhin versteckt habe. Ich hatte den Gruppen keinen Namen gegeben. Ich werde sie jetzt bündeln.
Dafür Lösche ich die neuen Gruppen mit der rechten Maustaste. Ich kann sie umbennen oder löschen.
Jetzt kann ich eine neue Gruppe bilden. Z.B. Gerüst aufräumen.
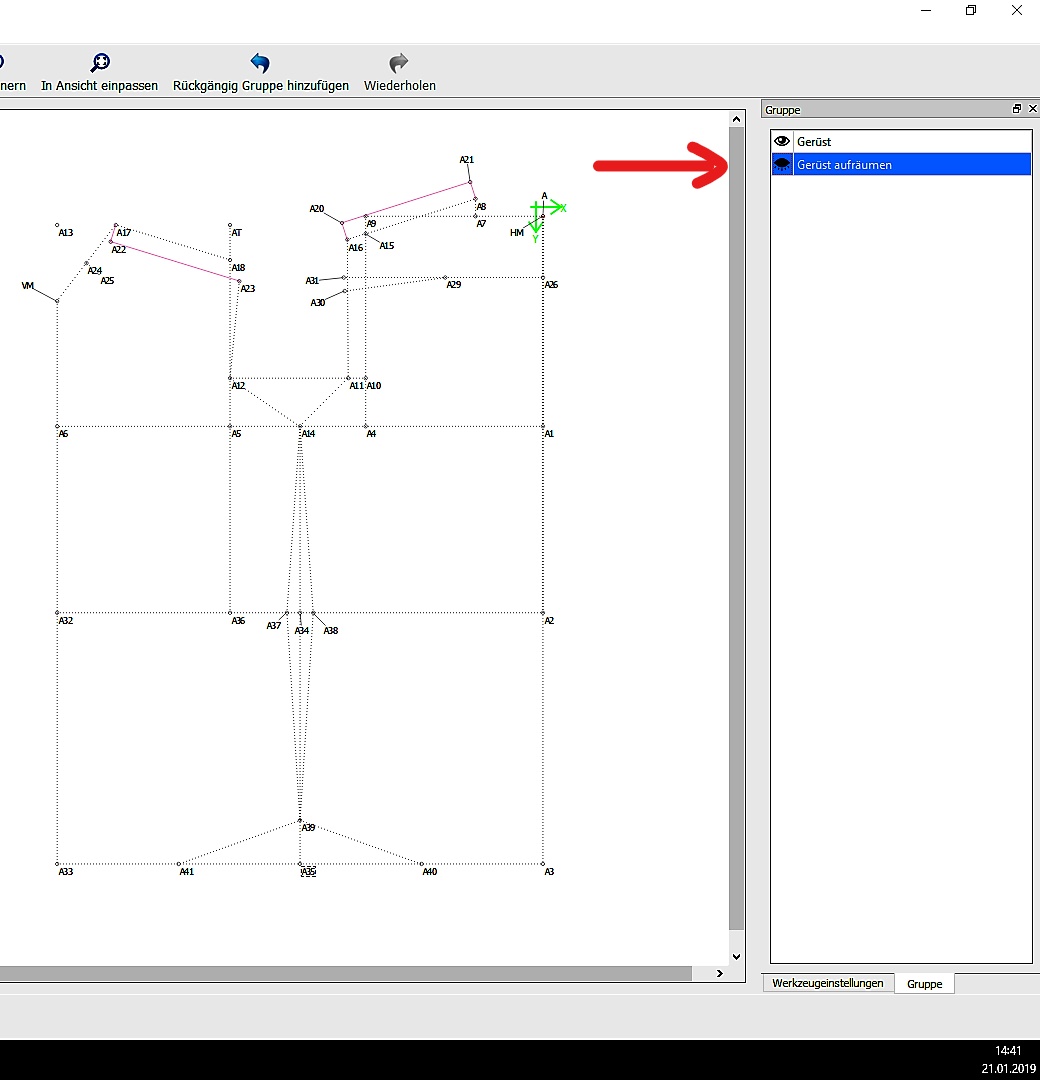
Wenn jetzt beide Gruppen offen sind sehe ich alle Punkte.
So habe ich immer die Möglichkeit Gruppen zu erstellen. Im laufe der Zeit sammeln sich immer mehr Punkte an. Die Zeichnungen werden immer undurchsichtiger und verwirren. Somit kann man gut Ordnung halten.
Man muss sich vorher gut überlegen wie man die Gruppen benennt. Damit kann man gut eine Abfolge bestimmen.
Other than that, groups work in almost exactly the same way as the rotate tool. Except that you will be selecting all the node, curves AND lines (while holding the Ctrl key) that you would like to put in your group.
Or you can drag a box around everything while holding the Ctrl key.
Press Enter and a box will pop up where you can name the group if you wish.
It doesn’t really change the pattern like the rotate tool does, but it will store the same or different nodes, etc. in a group so that you can see or not see them.
This is very handy for keeping your work space tidy so you can concentrate on what you are doing, and also, as @Scholli did, keep different versions of the same thing together.
FYI when you have created your detail for printing, the different parts are also listed at the bottom right, like the groups, and you can also close or open the eyes to choose which parted you’d like to print
It’s all very clever
Let me know if you need a more detailed description of how to use the the Group tool.
 ); we call it “cuneo” in italian. Here you can see the screenshot with a red mark where I want to “merge” the line A33-A26 with A26-cg’, and the blue mark where I want the pattern to open consequently.