Hi, first of all, I’m really glad I found this software. I try to make my pattern digitally lately and Valentina is so easy to use.
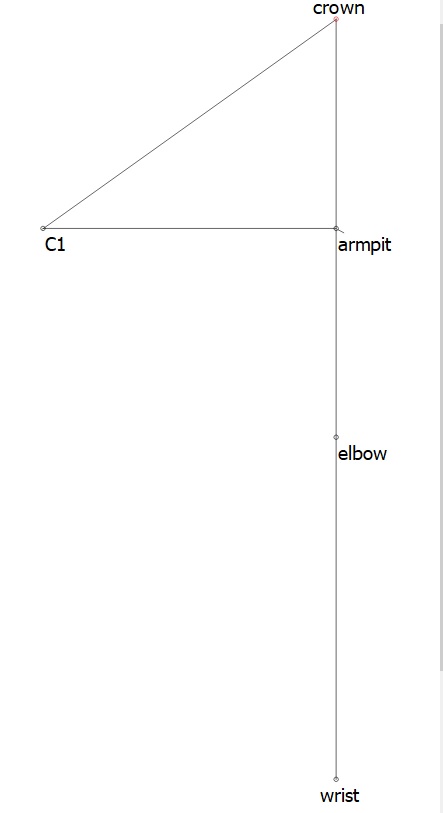
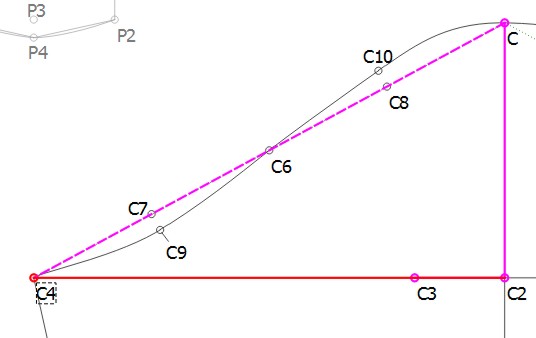
I have made some pattern blocks but now I’m stuck at making sleeve cap. So, I already calculated my crown to armpit length, but now I need to make a straight line (no measurement, just line) from armpit to C1, and then I need to measure crown to C1 by my back armhole measurement. I don’t know the length of armpit-C1 line (so I can’t make a new line) nor do I know the angle of crown-C1 line (it can became straighter or leaner depends on back armhole measurement).
It should be like this:
Oh! Also, after I’m done with making the triangle line, I start constructing the curve line. After everything’s done, I have to measure it again so that it would match the armhole in the bodice block. Usually, the new line (crown-C3-C4-C1) is longer so I need to cut it and raise the armpit line. How can I do that in Valentina?
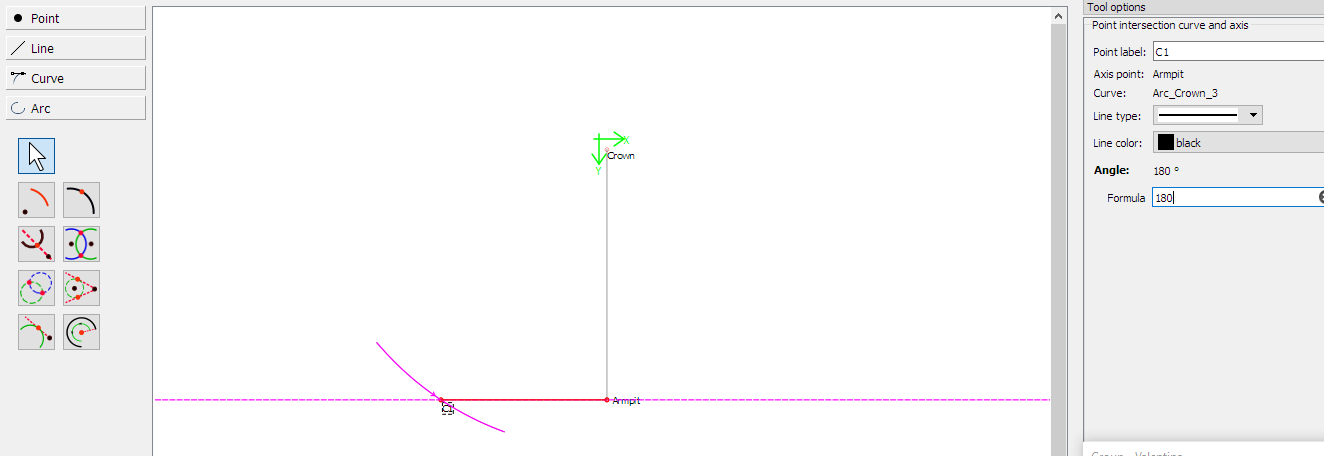
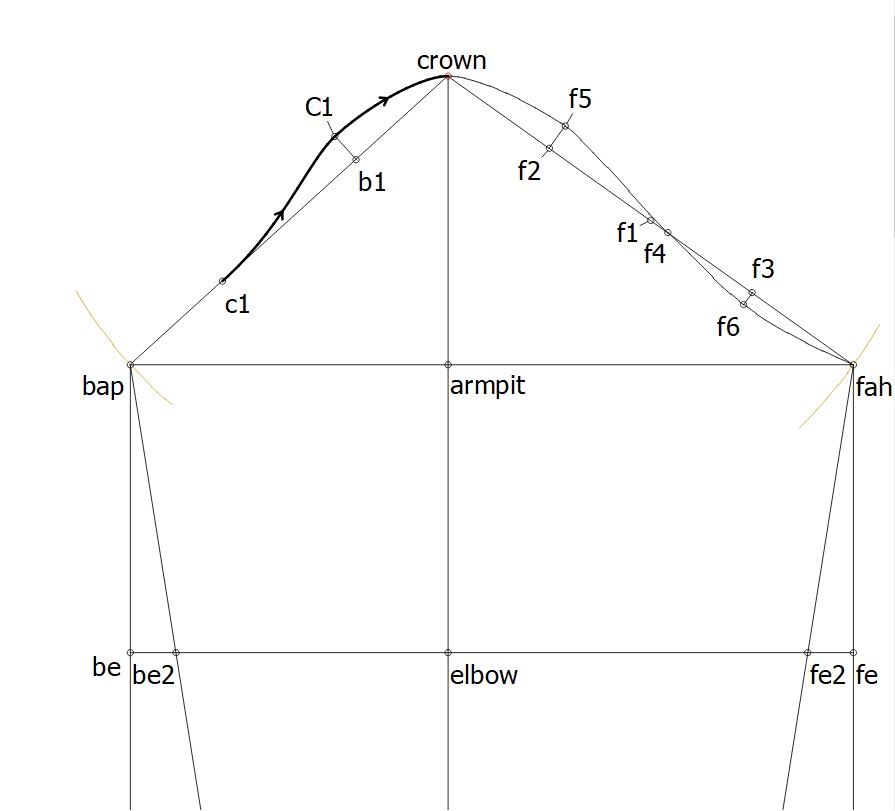
I used the Arc tool from the crown using the calculated diameter and then the Intersect Arc and Axis tool to place the point C1 at a 180 degree angle from the armpit:
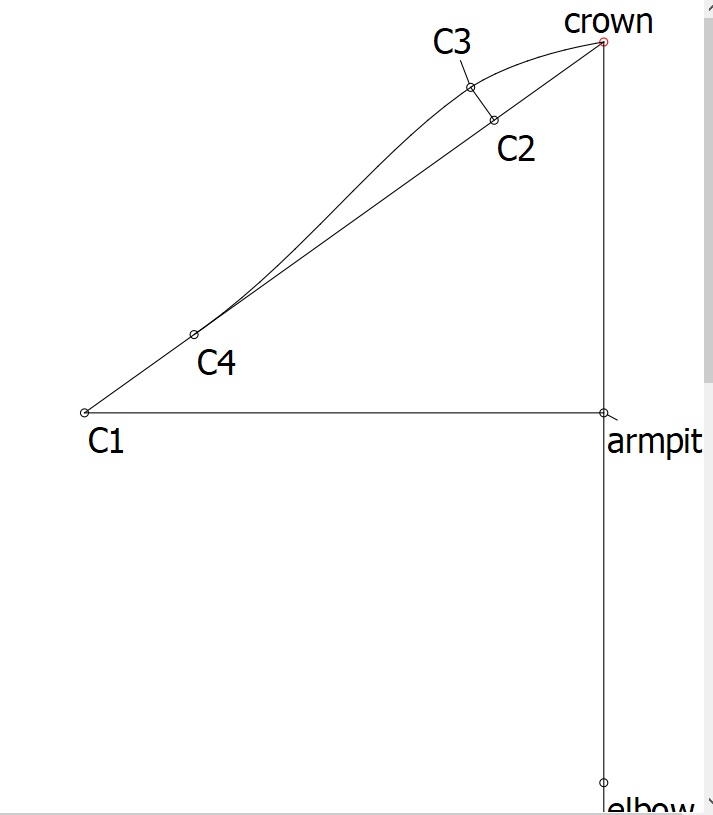
Normally you don’t want to do that - that’s the depth of the arm scythe. If you shorten that, the sleeve will dig into the armpit… to shorten the length of the scythe, you need to decrease the distance from armpit to C1… and whatever the other half would be - C2? Also generally you would divide the distance from crown_C1 in half… the cap will be above crown_C1, the under part of the sleeve below like:
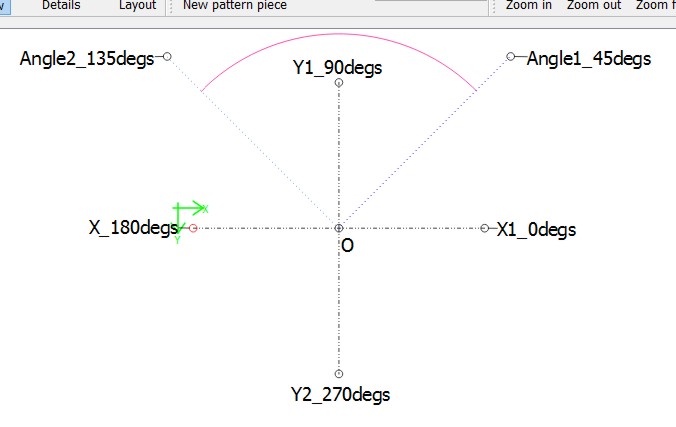
Going counterclockwise … Angle1 is the number of degrees from 0… angle2 is the number of degrees from 0… the arc is between the 2 at radius from the center point… maybe this will help to visualize: I used 45 deg for angle 1 and 135 for angle 2.
The normal directions on a compass work anti-clockwise. So 0 is a straight line from the axis point to the right, 90 is straight up, 180 is straight to the left and 270 is straight down.
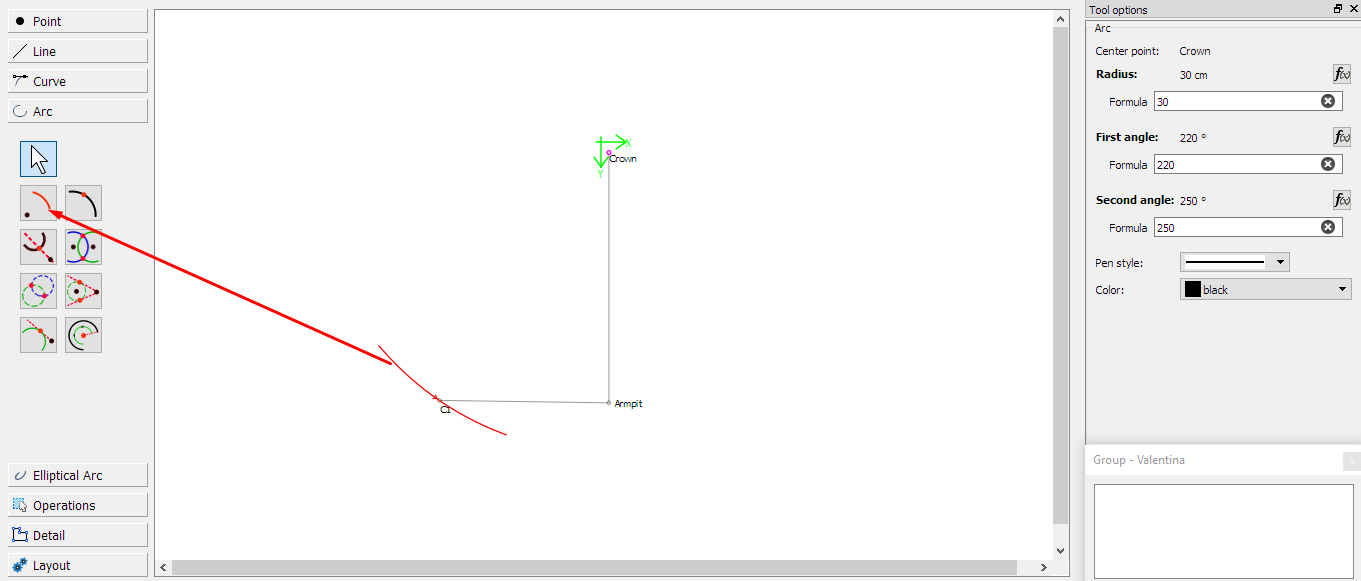
If you look at the first image I posted, I used 220 for the first angle and 250 for the second angle.
This means that the arc will start below 180 degrees at 220 degrees and will end at 250 degrees, which is before 270.
The axis point is, of course, the Crown point from which you’d like to measure from.
These can be edited on the right side of the drawing board until the arc covers the general area where you’d like to place your point.
Ahhh I know! So I need to minus the c1 radius by the difference between the new line and armhole in bodice block. If the value is 0.5cm, then the crown-C1 radius is bah-0.5.
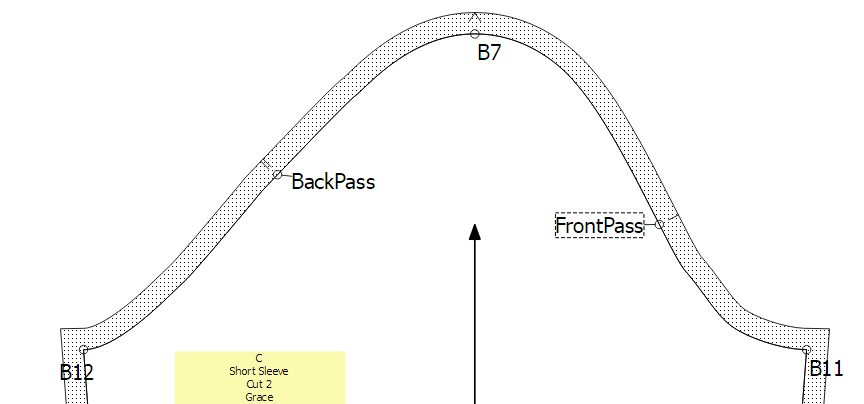
One more thing! Now I want to trace the notch point. I have no problem with the front notch because the curve is already in clockwise direction. But how can I make the back notch point because I need to trace it in counterclockwise direction while I make the curve in clockwise direction. Maybe I can edit it first by making the back sleeve cap in counterclockwise, but is there another simpler way to do it?
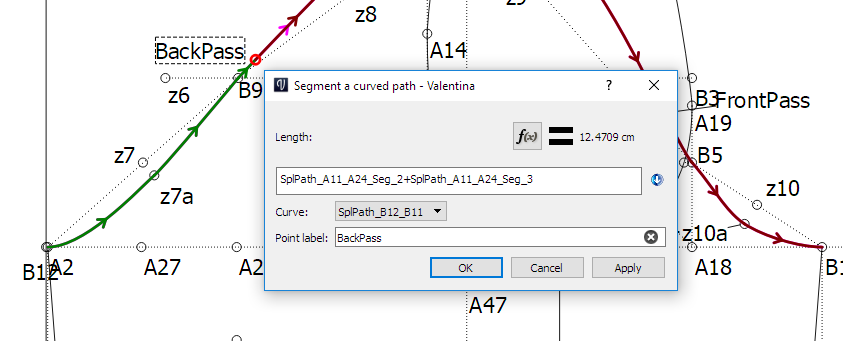
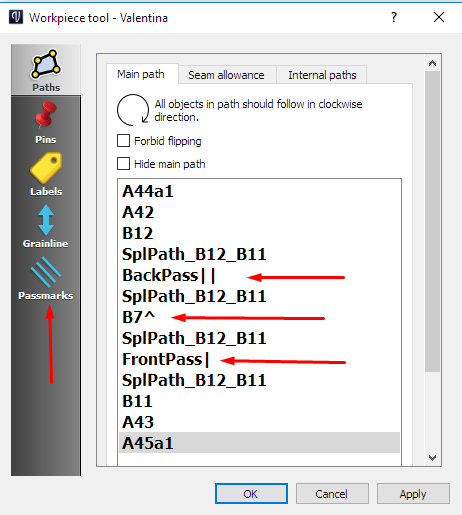
Notches are called passpoints which are added to nodes by right-clicking on the node and selecting passpoint when you have created the detail and show in the seamline. You can edit the type of passmark on the right of the Options menu at the bottom.
I add a node at a specific distance from the armhole edge of the curve by using the segment a curve tool:
Because I’m still learning (or lazy) and am not too particular about sewing in ease stitches between the 2 notches, to fit the sleeve cap into the armhole of the bodice, I measure the notches from the armhole to the corresponding point on the bodice.
Ahh, I see, so I could measure it from the edge instead of the crown point. But then, my back sleeve cap is consisted of straight and curve line. Aside from measure it manually, is there any way to combine the measure of the overall line? Am I making any sense? Pardon my English.
@Grace i think there is not a way to measure entire length from edge to edge, including the curve. Do you know something I do not?
The best way I would know today is to artificially create a line with a formula. This is not the way the formula would look inside valentina but I hope it makes sense.
Use point at distance and angle tool.
select ANY arbitrary point as origin
Stretch the new line in ANY direction. Press enter to finish the creation.
Inside the dialog box that appears:
click on f(x) for the length.
Inside the “edit length” dialog box that appears, create your formula.
At that point you will have access to all of the length of lines and length of curves that exist and you can add them together. the result will be the length of your new line and valentina will do the math for you.
Do not add the line to any detail and change it to a color that does not offend you and ignore it.
I believe there is an existing issue to request a “ruler” line. The addition of curves to that should be added to the existing issue
Perhaps I’m not describing what I do very clearly. Firstly, I am working from Metric Pattern Cutting for Women which is available on Amazon: Amazon.com
I haven’t reached the point where the marking are created to match up the back armhole of the bodice with the back sleeve, so I have created my own markings, working off points on the curve of the back bodice and like-wise with the front bodice.
Here are my files if you’d like to see what I have done:
Let’s assume the line extends from the end of the sleevecap.
From the end of the curve (exclude the line) mark your passmark up the curve towards the crown at the distance you need minus the line length. If this is 0 or a negative number, then your notch will be at c1.
Alternative:
Start the curve from the end point of the sleevecap, and define it with a very long control handle to get the shape you want.
Reason:
The straight lines and curve offsets for drafting sleevecaps in manual paper-based patternmaking are there to create a starting place for the sleevecap curve. The patternmaker is expected to smooth and tweak this curve during the manual fitting adjustment after sewing the mockup or prototype.
Valentina/LibreFashion lets you skip those manual steps by calculating a fair smooth curve that matches the length of the armscye (plus a little bit of ease, unless you’re making a leather jacket or an overcoat.)
Hallo, thank you for this treat, i am working at the same topic :slight_smile
But i cannot open the Bodice and Sleece.val File, my system delivers only a source code as a .txt file, what is wrong there ?
Thanks in advance
Helga