Hello from the UK, I’m pretty ancient with experience of digital graphic design and basic html coding. Sewing has been part of my life since I can remember.
I only downloaded Seamly software last evening. My big problem is that I can’t get past a major hurdle. I must be missing something major.
Question: How the heck do I end a tool? For example I draw a line, but how do I stop it, ie finish with the line when the desired length is drawn?
I’ve searched, watched several videos, but can’t find an answer. I feel embarrassed asking to be honest, I know it will be something really obvious which makes my problem even more embarrassing
It sounds to me like you need to press “enter” at which time a window will pop up with the parameters of the line you just created. If that happens, click on the “OK” and your line will be complete. I am sure that @Grace or @Pneumarian will log on soon and either of them will be able to help you more
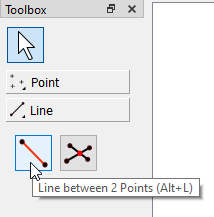
I suspect you are doing what I normally do when I’m engrossed… You’re trying to use the Line between 2 points tool. This will only place a line between 2 premade nodes.
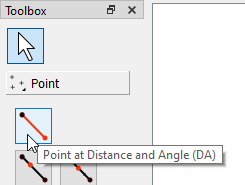
What you really need to use is the Point at Distance and Angle tool:
You should have the A node as the only node on your drawing board, so after picking up the tool, 1st click on the A node and then drag a distance and angle away from it & Left-Click. This will place a node and you will be able to choose what type of line (if any) you would like connecting the 2 nodes.
No need. We all start somewhere and, as I said, I do it often. I open the Line options to place a line and then want the other tool & click on that tool again. Then I sit & wonder why I can’t create the node that I want.
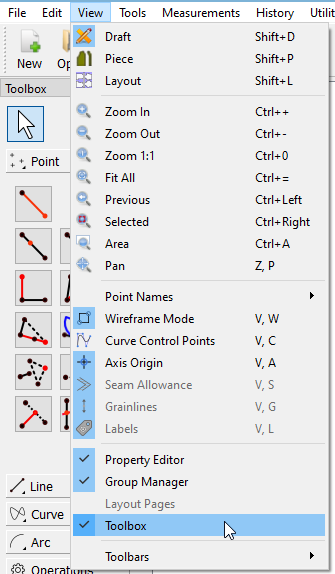
If your toolbox isn’t open, you can open it from the Menu>View>Toolbox:
I find that it helps in the beginning while you’re learning the program.
And another small tip… After you have picked up a tool, check the bottom left corner. There will be a small help instruction about the next step to using the tool.
Ah… thank you @AnnaFields - I initially tried that, but it didn’t work, which was really frustrating. But I persevered with what you wrote and rebooted the software and hey-presto it worked after closing all the windows…! Think my laptop decided to be awkward.
Glad this turned out to be just a glitch and not me being totally stupid
Many thanks for your help Off now to delve deeper now I’ve cleared the hurdle.
For the most part, you will create points and curves, which you will then use to create pattern pieces from ALA connect the dots. The line tool is simply there to be able to create a line between two unconnected points to get a (line) length value. If a pattern is drafted in the correct order, the line tool is likely never needed.
That being said, I highly suggest to watch a couple videos that will give the general idea how the app(s) work. They don’t operate like your general CAD or vector applications. This is due to the parametric nature of Seamly2D, where formulas are used in conjunction with measurements from SeamlyMe to calculate angles and lengths used in the various tools.
Thanks for your help @Douglas, I’m starting to get the gist of the software, think I need to exercise more patience though. Looking forward to being ‘Seamly proficient’, I can see what a great asset would be.