all’inizio ho faticato a trovare la soluzione , io faccio in questo modo , dalla finestra di dialogo margini di cucitura nella prima casella lascio 1; poi una prima volta - nodo A6 before cm.1 after cm. 4 e lascio vuote tutte le altre, poi OK ; secondo passaggio sempre nella finestra margini di cucitura nodo A7 before cm. 4 after cm. 1 lasciando vuote tutte le alte , a me funziona spero di esseti d’aiuto .
 Non ho capito gli ordini e non funziona
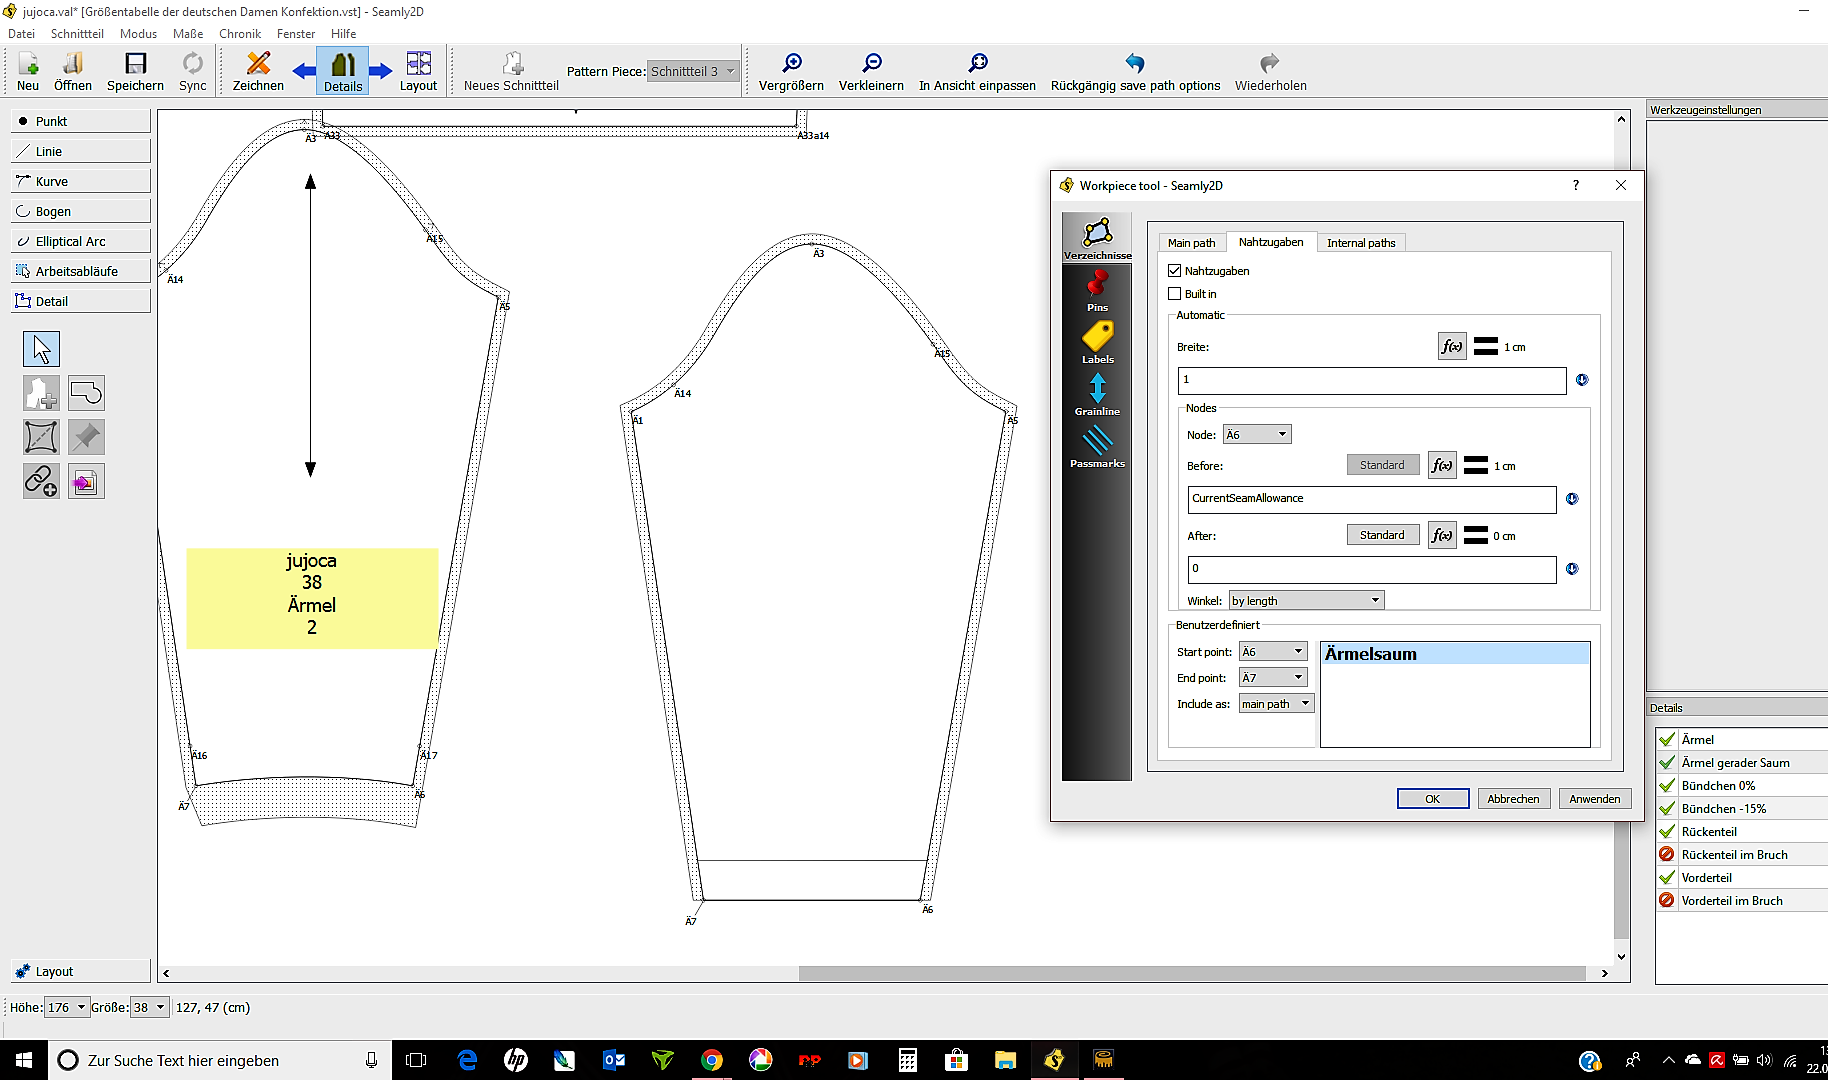
Ich habe den Ärmelsaum noch nie über einen Main Path gemacht.
Was bei mir definitiv funktioniert, ist bei Ä6 “Before” CurrentSeamAllowance, “After”, wo bei Dir 0 steht, 4 einzutragen.
Bei Ä7 dann bei “Before” 4, bei"After" CurrentSeamAllowance. Dann sollte der Ärmel einen Saum haben. Wie hast Du es denn bei dem linken Ärmel gemacht?
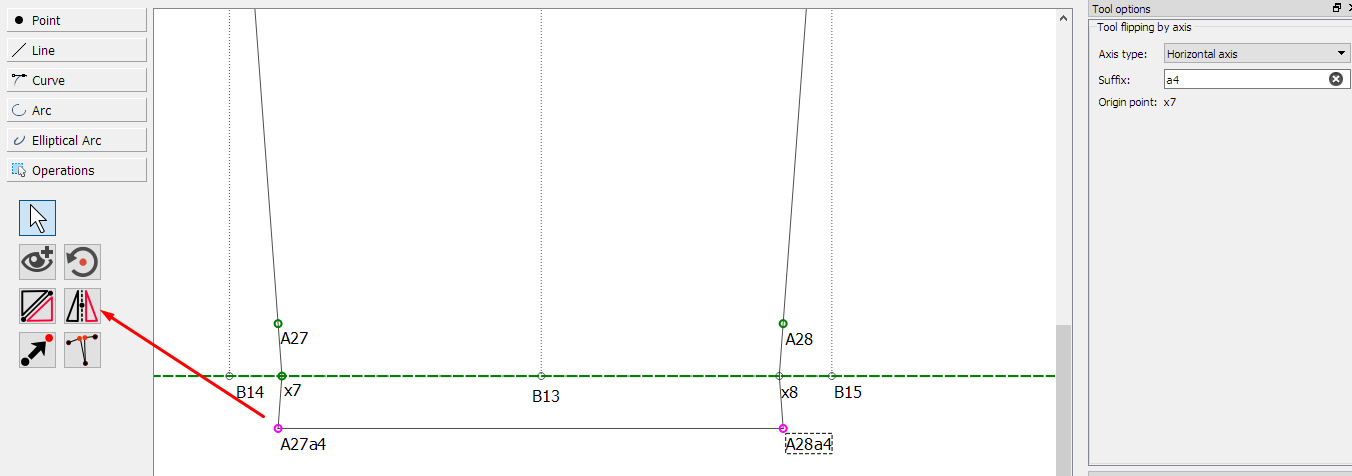
I think one should take into account the narrowing of the sleeves. If the seam allowance is used to create the hem, the sides of the article need to be at right angles to the hemline to avoid puckering when sewing the garment.
So in this case, I would rather draw the hem allowance into the pattern using the ‘Flip by Axis’ Tool.
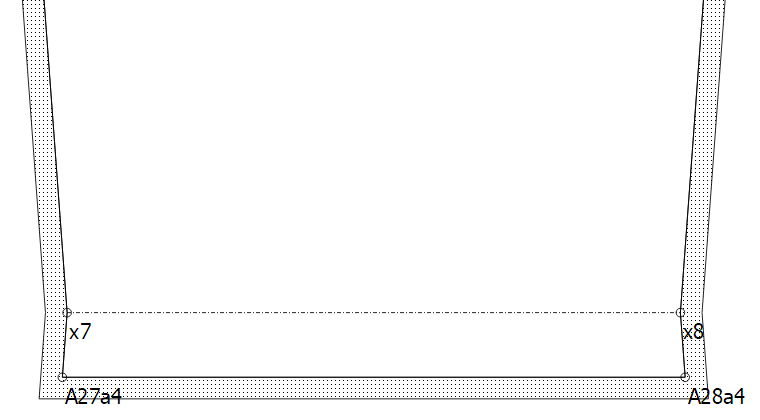
I added an internal path to show where the fold line goes for the hem and left the seam allowance alone. Here’s what it looks like in my pattern:
Please let me know if you’d like me to explain in more detail how I did this 
