My name is Helena, I live in Czech Republic and I am new to Seamly2D as well as pattern drafting
I didn’t have much trouble creating my first skirt block; I am starting to have some troubles now, though. Based on a pattern drafting course I’ve recently attended, I’ve drawn both front and back of my skirt to the same draft block. Now I would like to make some design adjustments to the skirt, so I’ve saved the original pattern as a new one and I am proceeding with the new file.
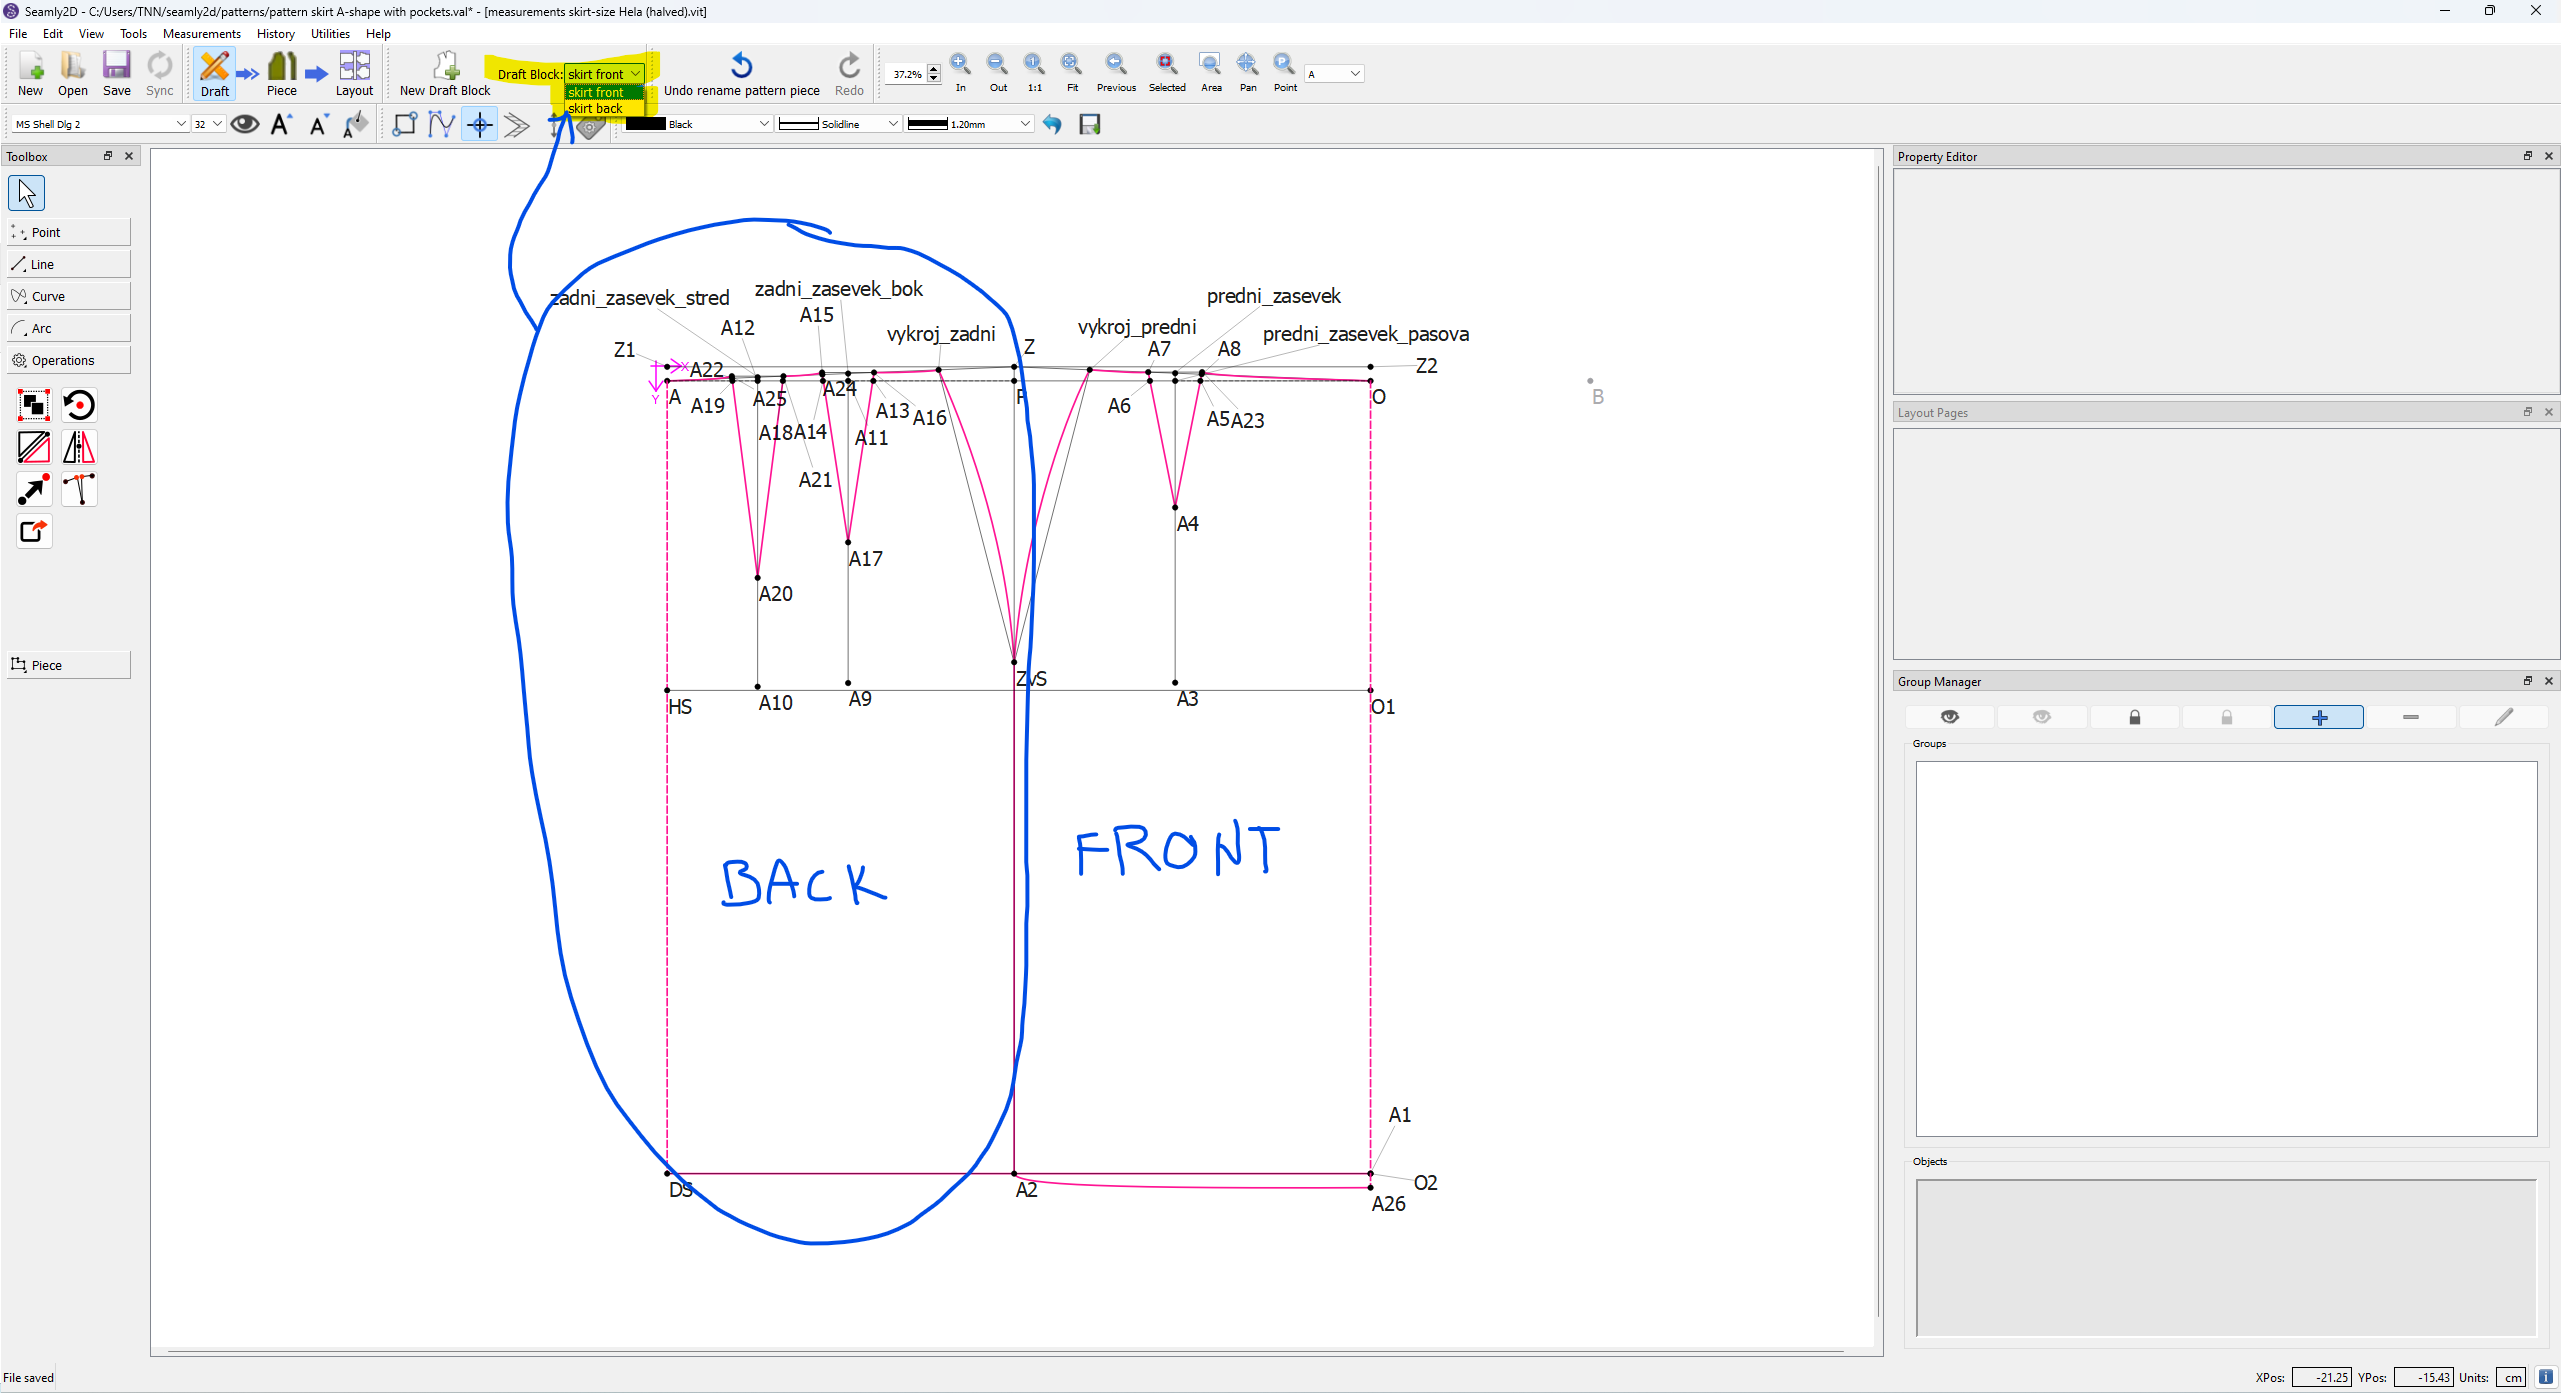
For example, I would like to adjust the front part of the skirt by adding side pockets, so I would like to separate the back and front parts to different draft blocks. I would think copying the back part and pasting to the new draft block should work, but I can’t find a way to do that. Is there a way how to do that, please? Or is there another way that would allow me to proceed with my intentions? I include screenshot for better imagination.
Thanks a lot and looking forward to be part of this community and learning new things!
In the open source pattern file, select the block containing the back of the skirt.
Right-click on the block and choose “Copy” or use Ctrl+C to copy the block to the clipboard.
Create a new rough block where you want to place the back of the skirt. To do this, right-click on an empty area in the editor window and select “Paste” or use the Ctrl+V shortcut. You have now copied the back part into a new draft block.
You now have separate draft blocks for the front and back of the skirt. You can edit them independently of each other.
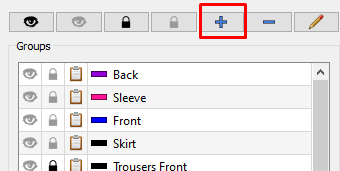
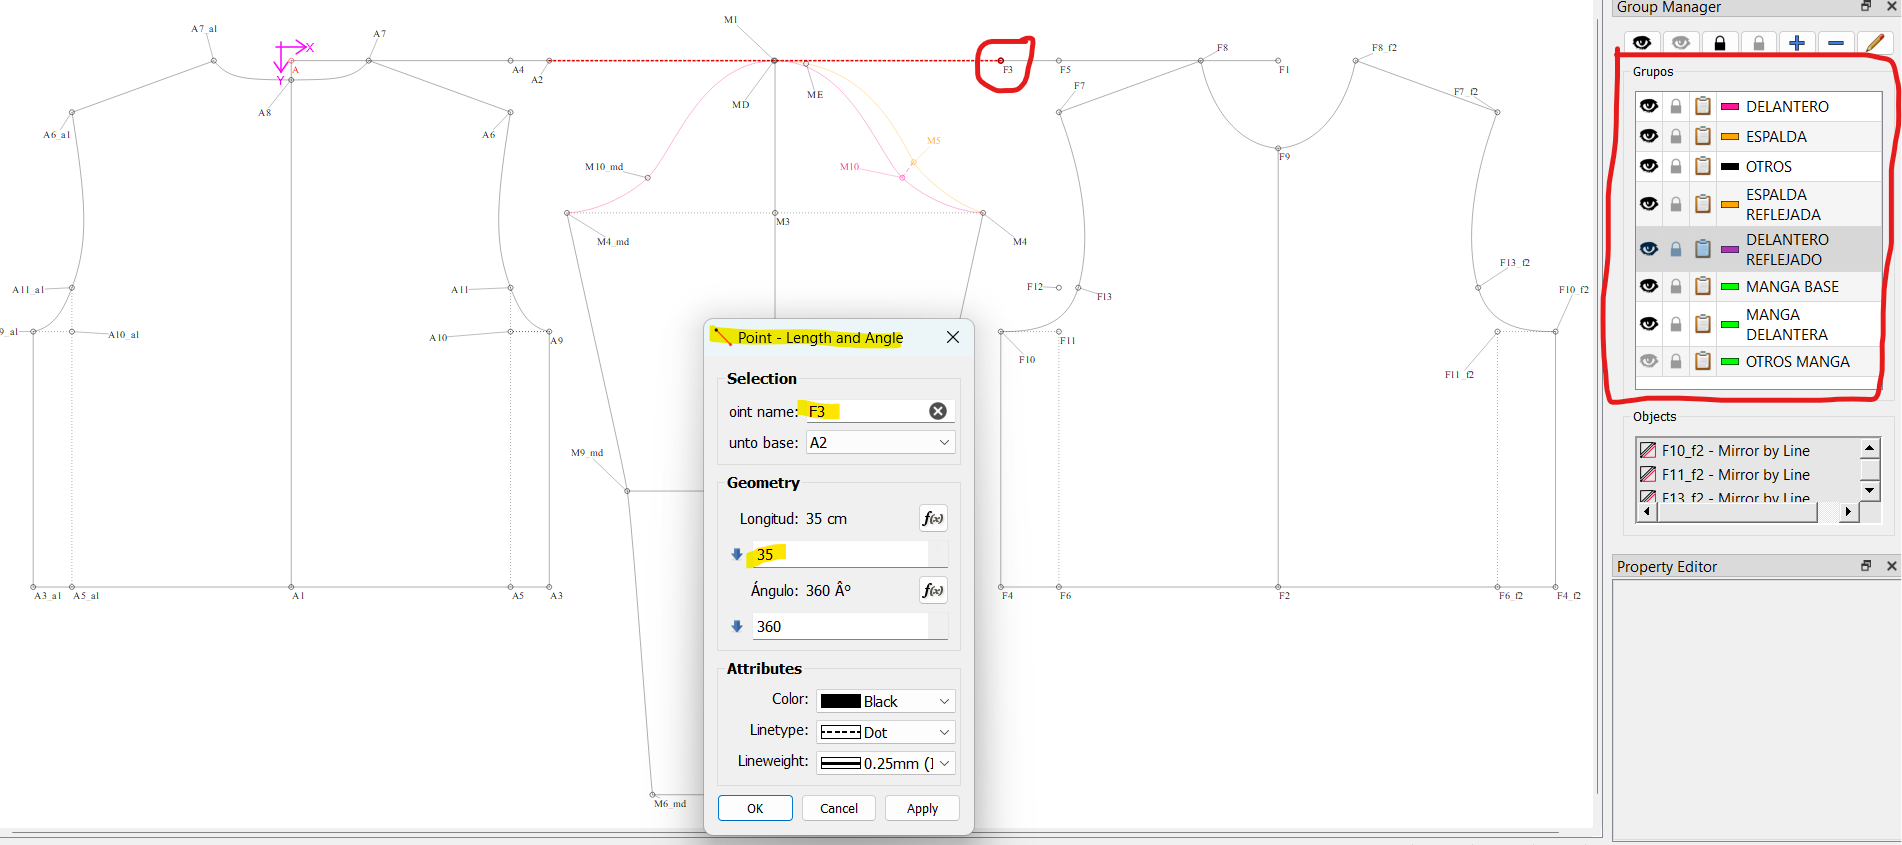
I would put all of the objects on the back skirt, including the shared objects, into a Group and name it “Skirt Back”. And then I’d do the same with the front skirt, naming it “Skirt Front”. Because it’s me, I’d probably also have the whole pattern in a group named “Skirt”. You will need to click on the + to create the groups before you can add items to them.
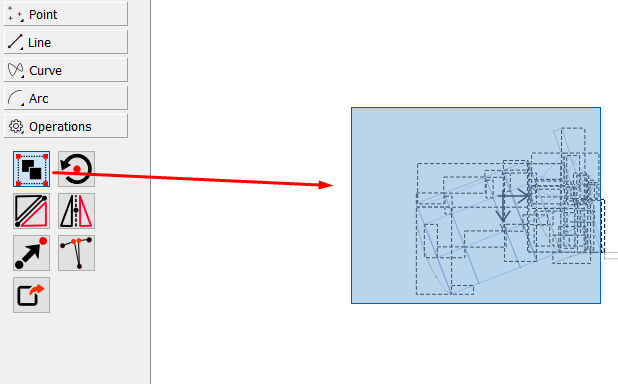
And then use the Group tool to allocate the objects to each group:
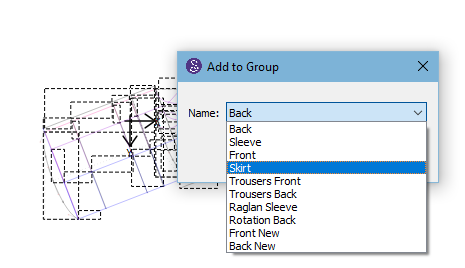
Once you have the objects selected, press Enter and select the group that you would like to add the objects to:
Close the ‘eye’ on the skirt group and the skirt back group and you will only have the objects for the skirt front visible.
(You may want to create another group called “Skirt Front Additions” or something like that to put all the new items into or you can just add them to the “Skirt Front” group.)
Now you can add extra nodes, the pockets, do a rotation or 2 to flare the skirt, add the waist band… Whatever you want. Just don’t change the original draft objects.
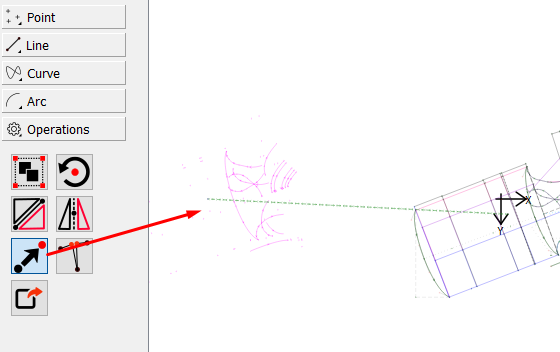
Another way would be to use the Move tool to move the front section away from the original drafting and add, rotate, etc. on the moved section.
Ok, so there is no way of decoupling the two parts of the pattern? Grouping and hiding them works fine and does more or less what I wanted but it is not exactly what I meant.
I guess I would seek solution for that again in the future, when I am more advanced.
If anyone knows how to do that, it would be great.
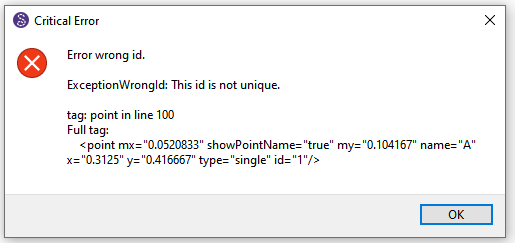
Not really. But there is no need to seperarate them, as the draft blocks are not pattern pieces. The blocks are just a construction outline, where you can then create any number of pattern pieces from a single block. The reason why we can’t cut and paste blocks or parts of a block is due to the nature of the point names and formulas. Each point has a unique name, and if you copy and paste it - now you have two copies of it. Then there’s an issue where the point names clash, and you get the Error msg I previously posted. To be able to cut & paste we’d have to program the app to say “That point name is taken - what do you want to name it?”. Now you have to figure out what name is not taken yet. If you copied 10 points, you’d have to go through that 10 times. More if you tried using a name that was already existing. Kinda of like trying to come up with an unused email address. If there were no point names and formulas there would be no problem, but then you wouldn’t have Seamly2D - just another vector drawing application.
In many cases it’s easier to draft everything in 1 block. That way you will not run into the problem of not being able to access across blocks. Also there’s no reason why you can’t draft different styles within the same block. That’s why Grace brought up the groups… you can place objects in groups so you can hide those that don’t apply to the what you want to see.
There is another trick, but it will be very finicky and will require that you keep all of your faculties around you while you do it. It will probably be better to redraft the pattern from scratch.This involves inserting a node next to the Z node at a very small distance horizontally and to each node going down the side seam with a formula referring to the distance between the Z node and the 2nd node.
Once you have that 2nd node in, you will need to change the formula for either the back or the front to measure the lines from the 2nd node to the center seam. and then editing the curve on that panel to go from the 2nd node.
This should isolate the 2 panels.
If you wish to seperate the 2 panels by, say 50cm, then you only need to adjust the distance at the 2nd node next to the Z node to 50cm and it should adjust all of the other nodes by the same distance.
If you wish to place the panels on different drawing boards, then it will be really difficult, as @Douglas said, and could throw your whole pattern out. Personally, I advocate doing all the pattern pieces on one drawing board so that all the lengths and angles are available while you’re redesigning your basic pattern into what you require. This is where the groups come into their own.
Just looking at the image of your pattern, you have a lot of shared information between the back & the front panels which will need to be seperated as I mentioned above, to do what @HowardMathis suggests, but it is possible, if you know how to edit the source file.
In all of the suggestions, I’d suggest that you save the pattern to a new name (and work on the new file) until you have successfully done what you would like to do. This way, you won’t destroy your original and can always go back to it.
Hola @Grace creo que hago lo que explicas en este punto. Muestro una imagen.
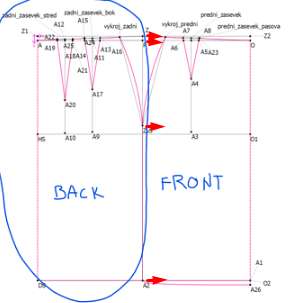
Separo mi patron delantero de mi patron trasero con una linea. A la cual le pongo el largo deseado y lo cambio cuando quiera. La herramienta Grupo es mi gran aliada, como puedes ver. Y siempre hago mi patron base en un solo tablero, me facilita mucho las cosas. Este es mi patron base sin pinzas para todos mis diseños.
Es la forma mas facil que encontre para resolver este problema. Pero me alegra saber que no era mala la idea.
Hi @Grace I think I do what you explain at this point. I show a picture.
I separate my front pattern from my back pattern with a line. To which I put the desired length and change it whenever I want. The Group tool is my great friend, as you can see. And I always make my base pattern on a single board, it makes things much easier for me. This is my base pattern without darts for all my designs.
It is the easiest way I found to solve this problem. But I’m glad to know it wasn’t a bad idea.
Oh, well done! @Damay, that is exactly what I was suggesting in the previous post and is how I also prefer to work I see that you have a node to the right of your side seam node to seperate the 2 pieces as you wish without affecting the pattern. Very nice.
Gracia muchas gracias. Estaba con el mismo problema y gracias a tu explicación lo solucioné y he aprendido más funcionalidades de este maravilloso SEAMLY2D. Nuestro Padre Celestial les siga multiplicando en bendiciones a ti, a Douglas, al resto de desarrolladores y a todos los integrantes de esta maravillosa familia.
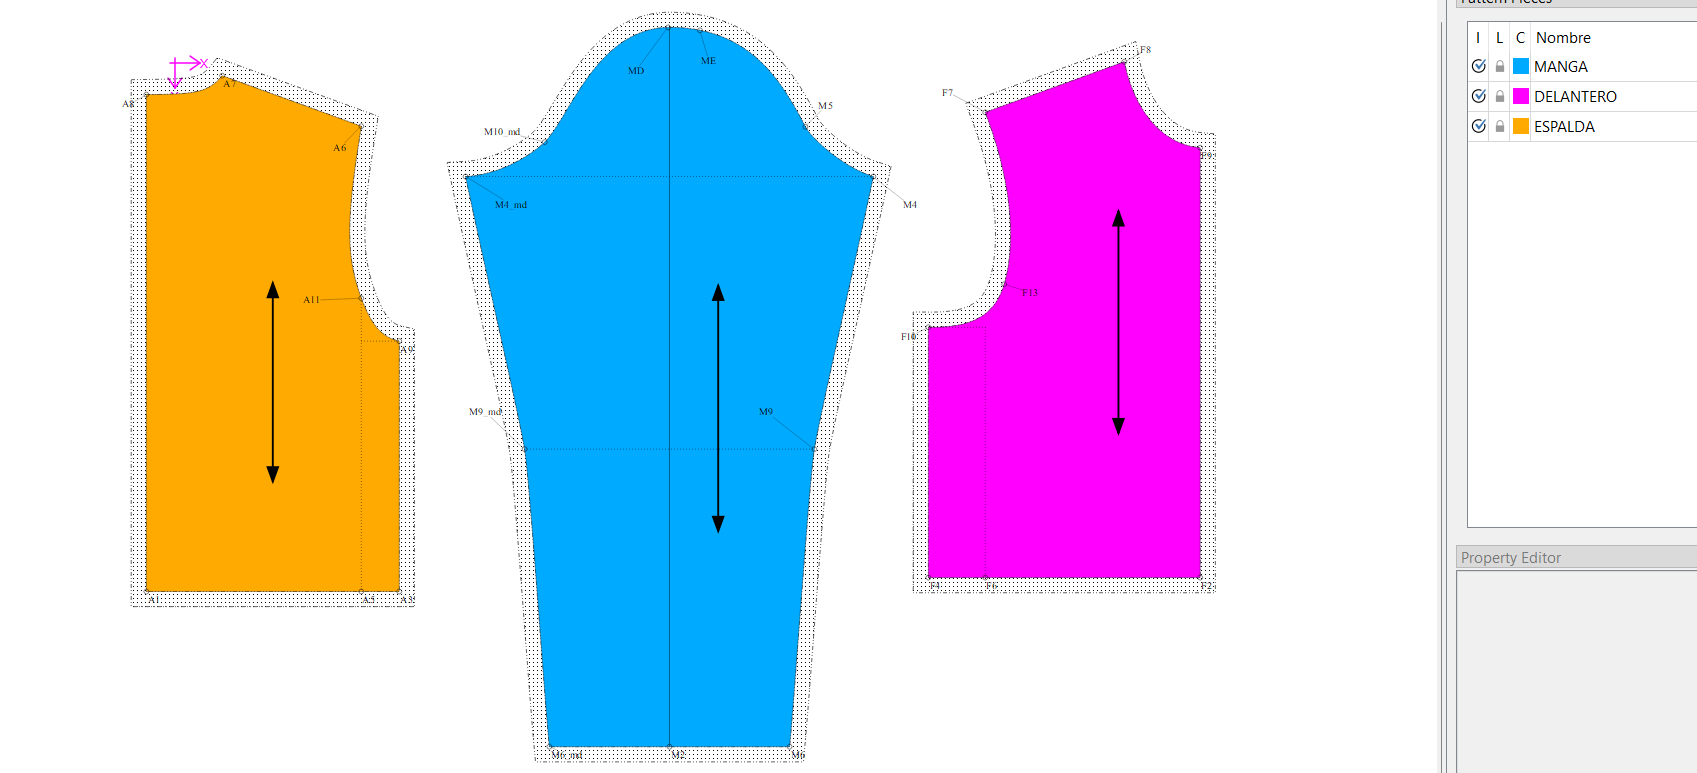
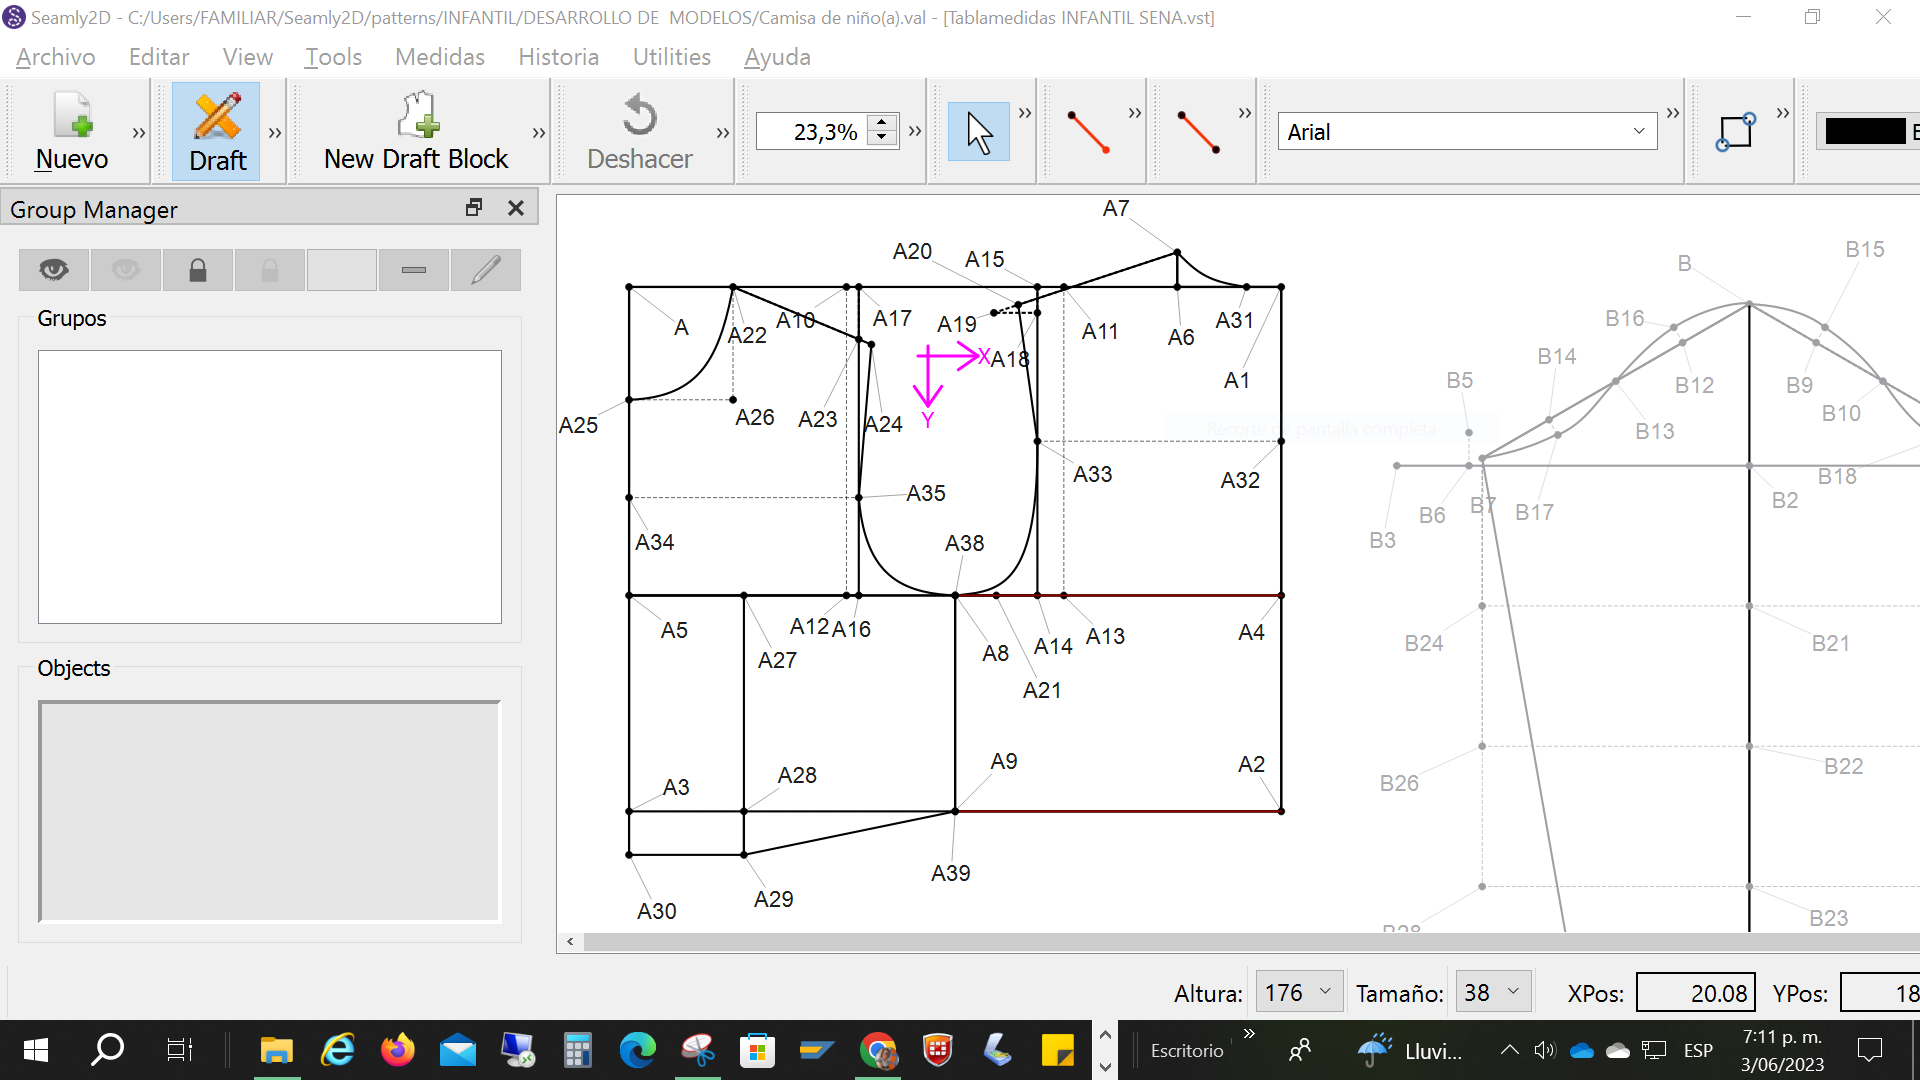
Por el método de grupos, pude dividir un básico de camisa infantil que había hecho en un sólo bloque (delantero y espalda).
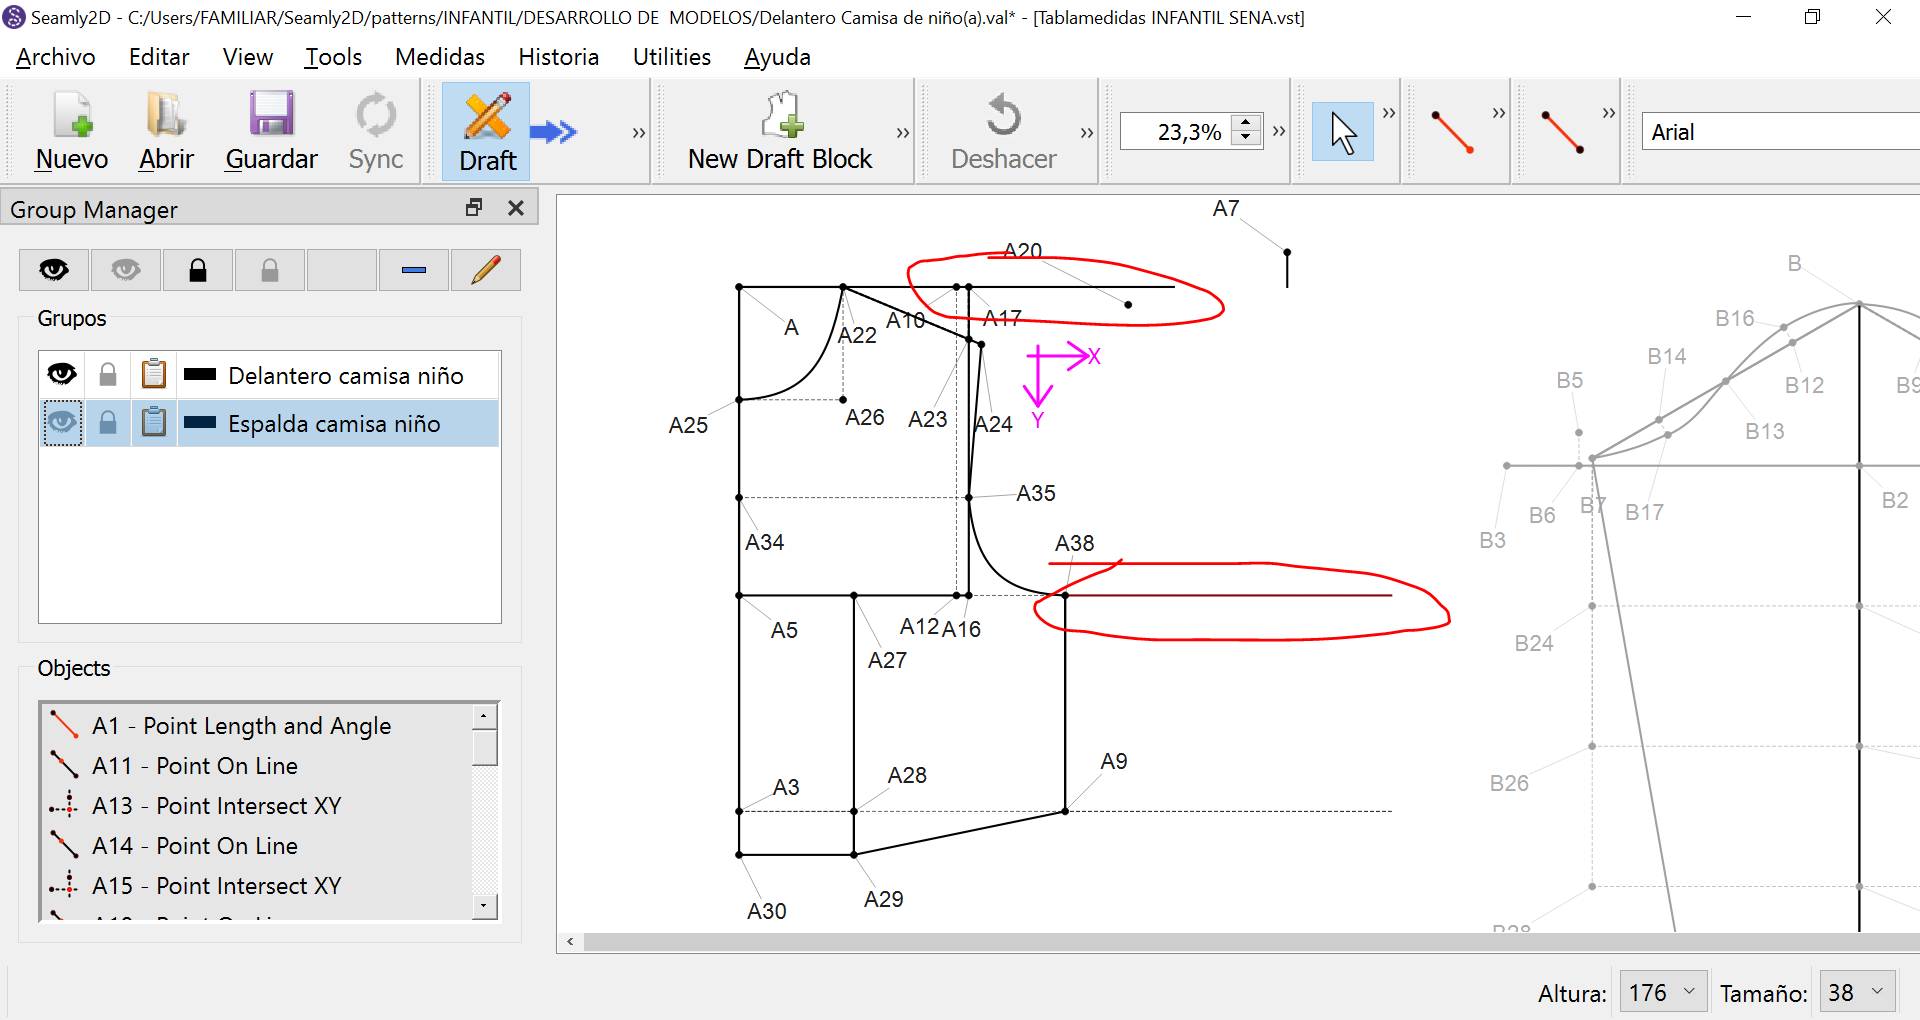
Pero ahora cuando dejo sólo abierto el ojo del delantero, para poder hacer un diseño sobre ese básico de camisa, toda modificación que hago se hace automáticamente en la espalda.
Estaré haciendo algo mal? Me faltará hacer algo?
Disculpen la molestia, seguramente será por mí falta de conocimiento, pero si no es así, quedo con la tristeza de pensar que para hacer el desarrollo de un modelo sobre un básico tengo que empezar de ceros.
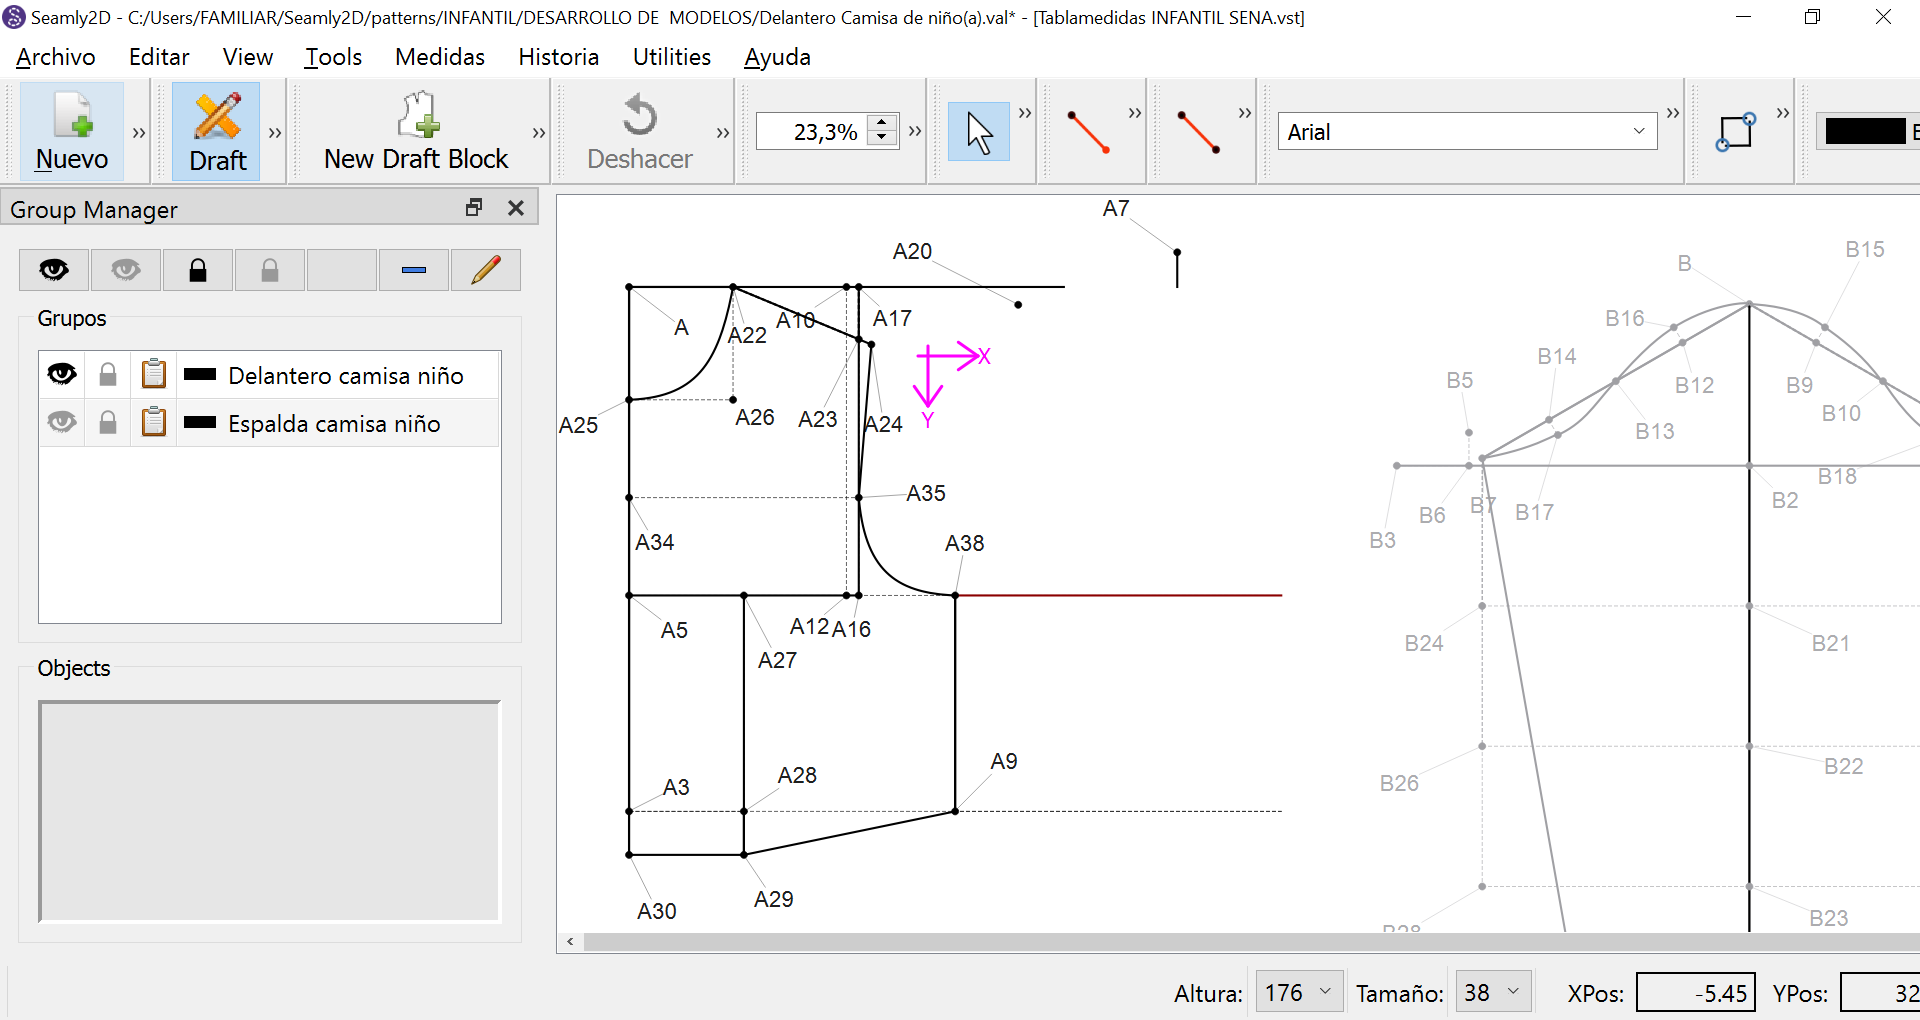
Muchas veces, con la ropa de niños, se modela la parte delantera sobre la espalda, ya que no tienen mucha diferencia entre el pecho y la espalda. Si este es el caso, aunque utilices la herramienta Mover para separarlos, entonces sí, al modificar uno se modificará el otro. Te sugiero que vuelvas a crear la espalda a cierta distancia del patrón principal, utilizando las instrucciones de medición originales y la coloques en un grupo aparte. Entonces podrás seguir modificando la parte delantera sin afectar a la nueva espalda.
Often, with children’s clothes, the front is modelled over the back, since they don’t have much difference between the chest and the back. If this is the case, even if you use the Move tool to separate them, then yes, modifying one will modify the other. I would suggest that you recreate the back at a distance from the main pattern, using the original measurement instructions and place it into a group on its own. Then you can continue modifying the front without affecting the new back.
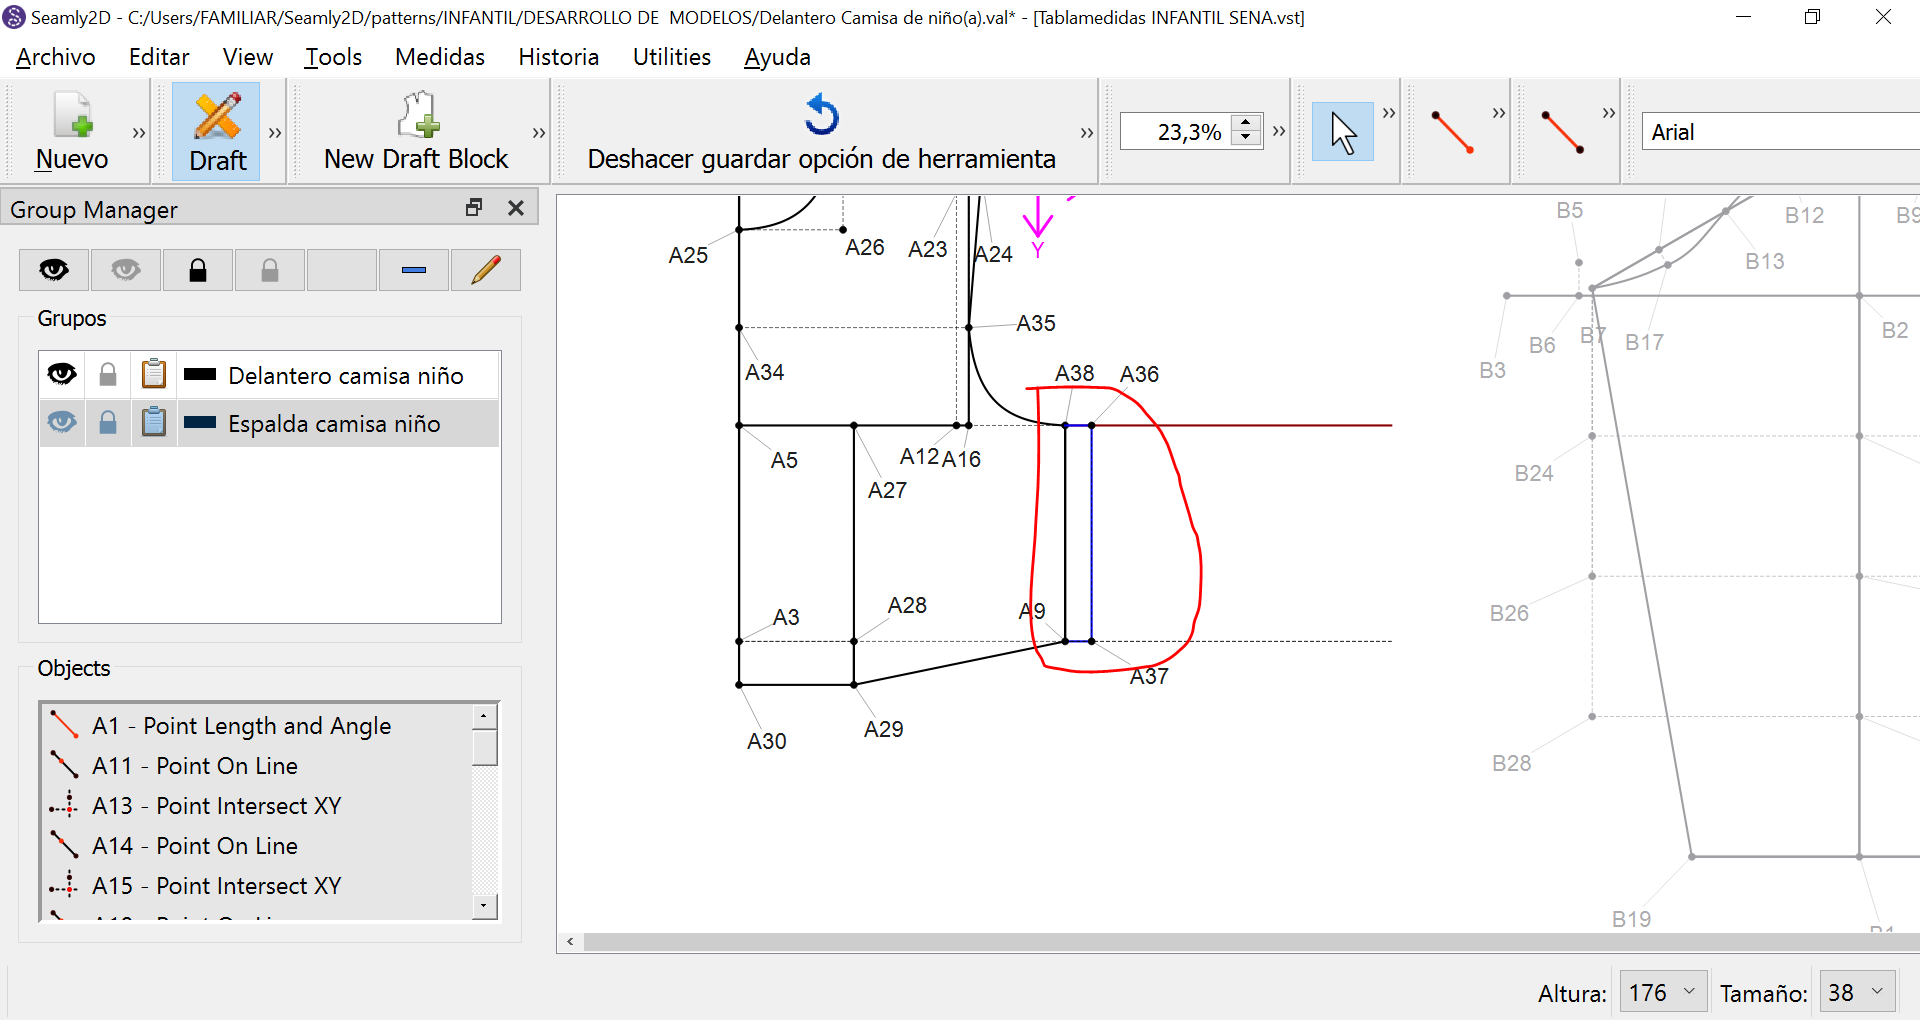
Entonces cada modificación que hago sea en espalda o en delantero, SEAMLY2D me la lleva también al trazo que no estoy trabajando. Ejemplo: Si le doy holgura de 1.5 cms por costado al delantero, SEAMLY2D me lo lleva a la espalda así:
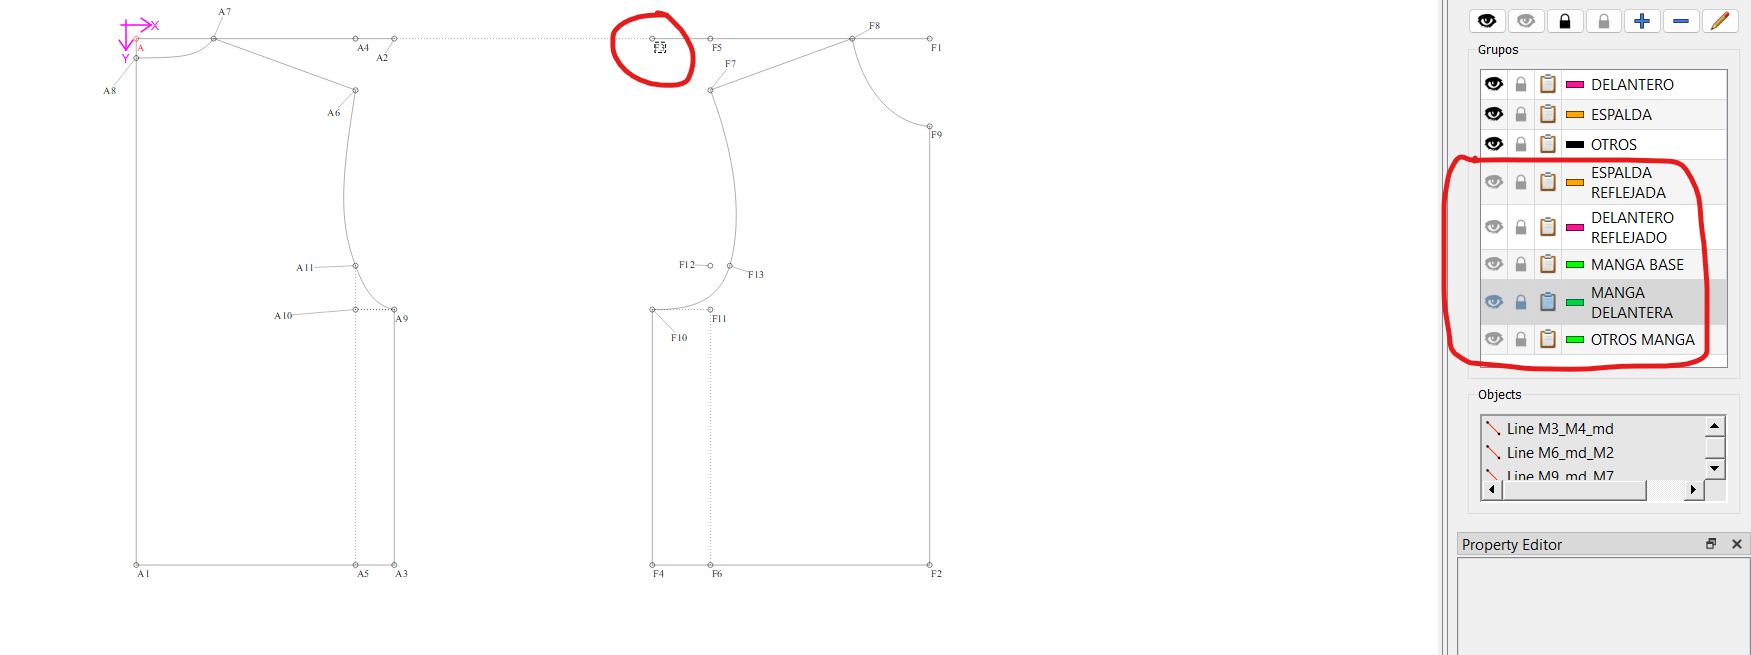
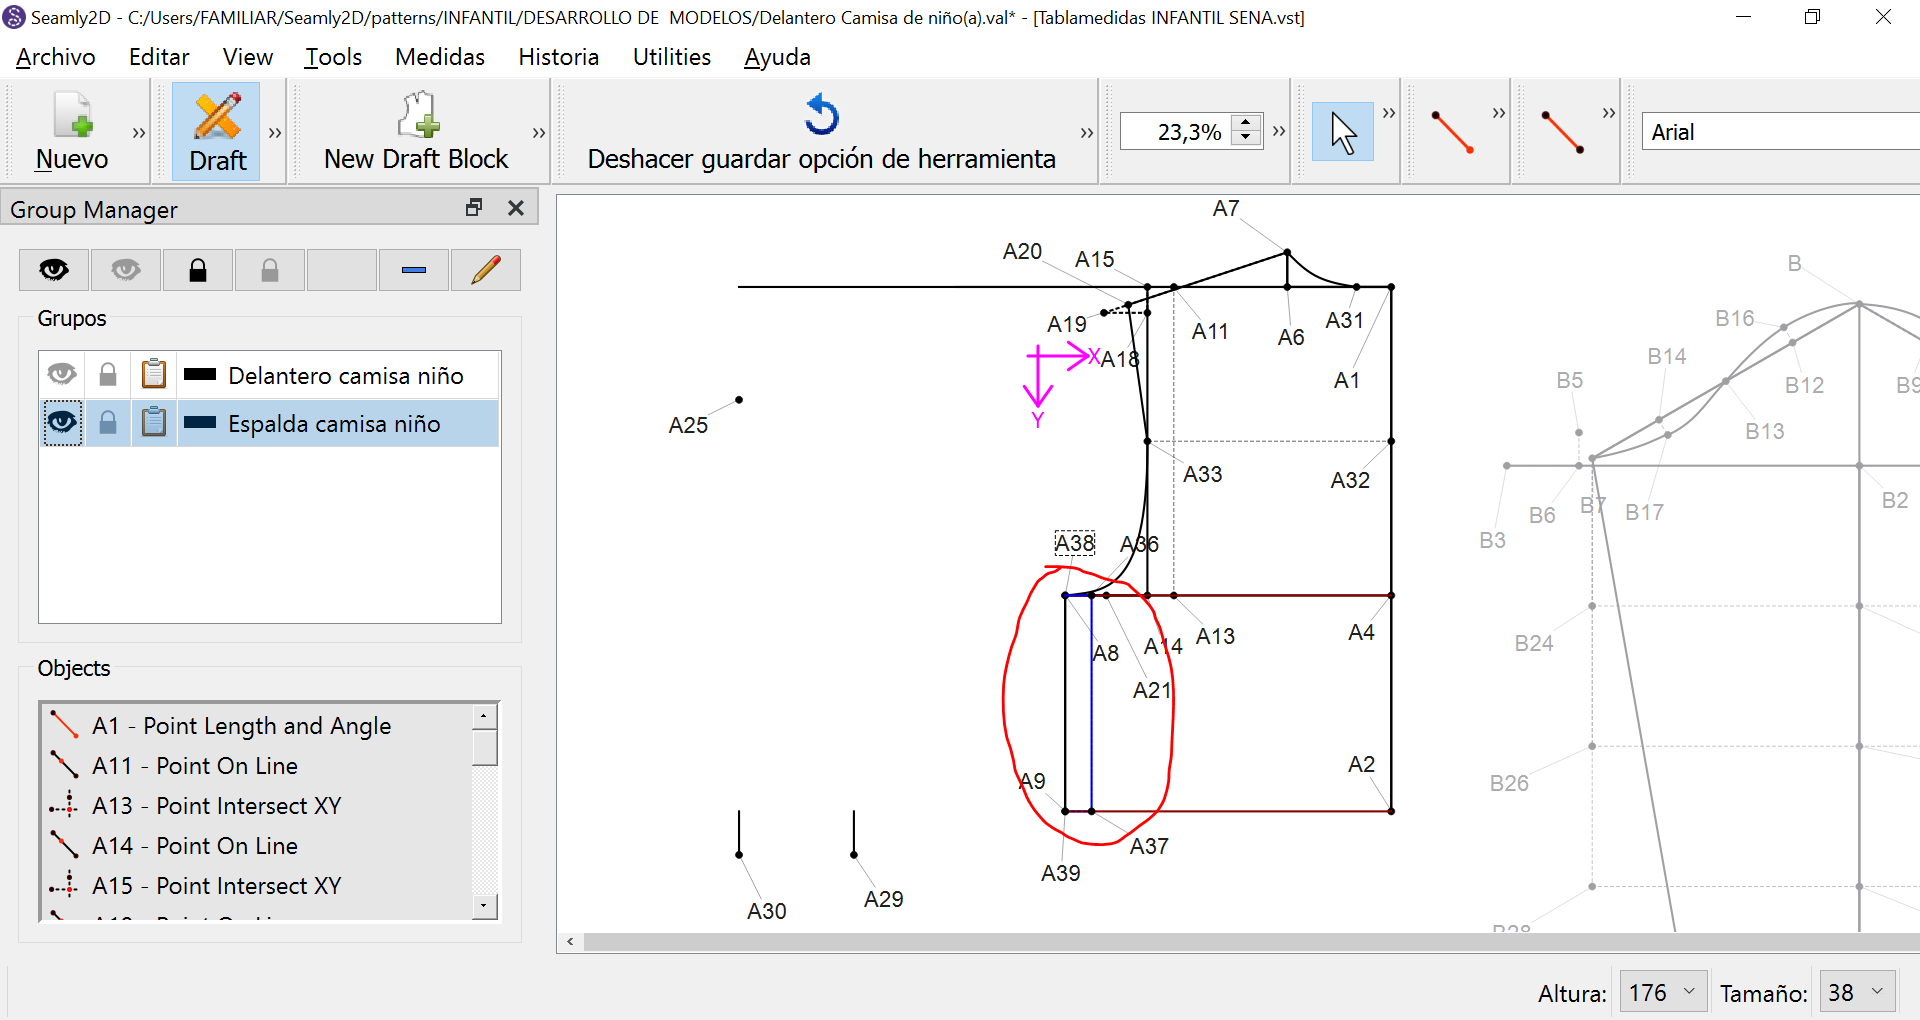
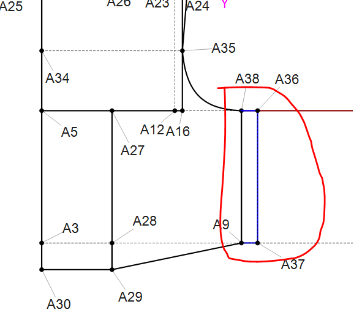
Adicionalmente cuando separo las piezas mediante el método que Gracia gentilmente indicó, quedan líneas que aparentemente no he seleccionado como se ve en la siguiente imagen:
Si cierra los dos grupos, probablemente verá que la extensión que hizo sigue abierta en la pantalla. Si este es el caso, no ha sido añadida a ningún grupo. Así que si la añades al grupo anterior, no se mostrará en el grupo posterior.
If you close both of the groups, you will probably find that the extension you made is still open on the screen. If this is the case, it hasn’t been added to any group. So if you add it to the front group, it won’t show on the back group.
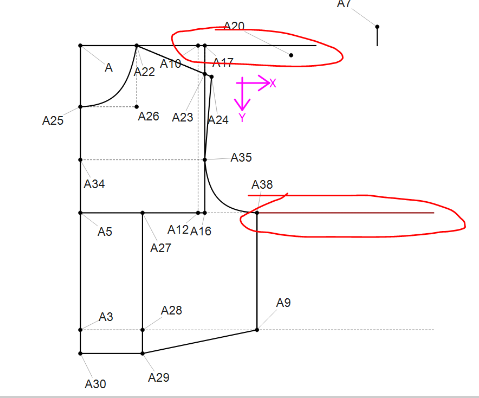
Es un poco complicado dividir los 2 paneles porque tendrás que volver a la Historia justo después de crear A9 y colocar un nodo a una pequeña distancia, y luego cuadrar hasta el nivel de A6 y A, y desde estos puntos crearás el panel trasero. A continuación, tendrá que editar las fórmulas del panel frontal para que se detengan en los nodos existentes y no continúen en el panel posterior.
It is a bit complicated to split the 2 panels because you will need to go back into the History to just after you created A9 and place a node at a small distance, and then square up to the level of A6 and A, and from these points you will then create the back panel. Then you will need to edit the formulas to the front panel to stop at the exist nodes and not to continue on into the back panel.