I have put the grainlines, label… in the draft mode. In the layout mode, the grainlines are outside the piece. their rotation is right but it looks like they ignored the pin. Their are at the right place on the draft screen though. I have read a post in the forum saying that it works fine. did I do anything wrong?
Add labels to your detail pieces. Then you can add your pins to the correct piece. This can affect the grainlines when they are associated with the wrong detail piece.
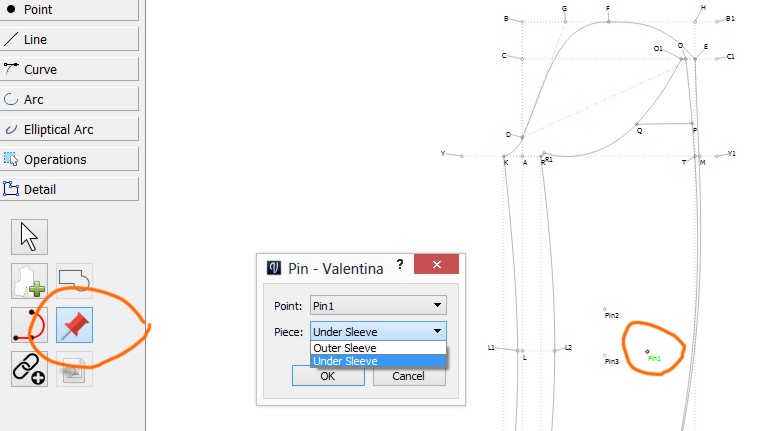
What is the pin for?
You add pins in the draw mode… then when you add labels or grainlines you “pin” them in place so that as the pattern is graded they remain in the same relative spot. For grain lines you can pin it to just one pin at the center, or 2 pins - top & bottom… or each end of the line.
I can post an example for you later when I am at home.
Here’s an example of using pins.
First create a point using the tools of your choice where you want a pin to exist. I always name the points Pin1, Pin2, etc. Then select Detail -> Pin Tool followed by the point you want to be a PIn. A dialog will pop up allowing you to select which Detail piece you want to add a pin to. Note that you can add the same pin to multiple Detail pieces.
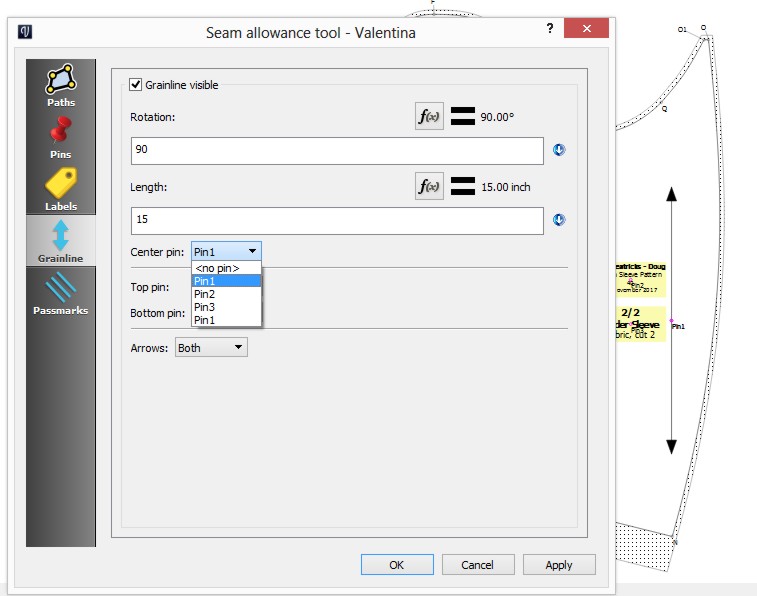
Once you’ve added the pin, goto Detail mode, then select the detail piece you want to work on… from there select options and you can then choose to add a grainline or labels using pins you’ve created.
Here I have added a grainline to the under sleeve piece using the “center pin” option.
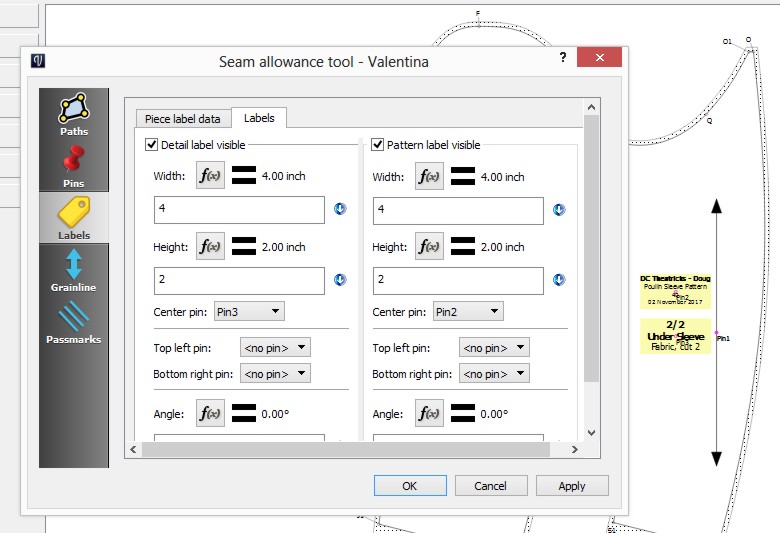
Here I have added labels using Pin 2 & Pin3.
Also I like to to keep things clean, so I will group Pins when working in Draw mode so that I can turn the pins visibilty on/off.
Poulin Sleeve Pattern.val (14.0 KB)
Wolf40.vit (2.4 KB)
3 Likes
I do all that. but the grainlines remain outside the piece at layout.


the pins are the same as for the text.
Your pin points are associated with wrong detail pieces.
Give each detail piece a name before you add pin points (points that are not along a seamline).
If the drop down list contains four detail pieces named ‘detail’, then you can’t choose the correct detail piece! So give them a name in Detail mode, THEN go back to Draw mode and add pin points, THEN go back to Detail mode s d add
Can you post your files?
I have checked everything and the pins and detail labeling seem fine.leggings.val (32.1 KB)
there is something weird at the back crotch too. it comes up with an extra 1 cm which doesn’t show imeasurements-Lavigne.vst (2.1 KB) n the draft mode
Ok… a few things… while the parser is case sensitive, I would suggest using more unique names for the pins that are less confusing… so instead of crotch & CROTCH something like A_CrotchPin and B_CrotchPIn .
That said, there seems to be no issue with the grainlines, labels, ane the pins… it all works on my end.
Also I suggest trying to keep the draft clean by placing the point labels where it’s easier to identify what point is which…
Which leads to the back crotch… there’s an issue.
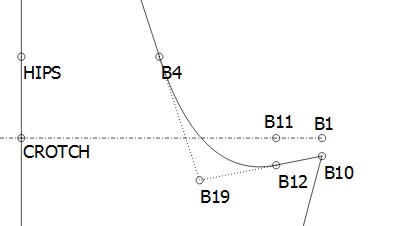
As you can see the curve goes from B4 to B12 to B10… but in the path point B1 is used instead of B10 leading to the extra length you noted.

In Draw mode you can use the Detail->insert node tool to add point B10… goto Details and open the options to show the path list. Move the inserted point B10 up in the list to where B1 is, and delete B1. Voila. crotch fixed.
2 Likes
I was using 0.5.0.1 and the grainline was a problem.
I was guided to another version 0.6.0.504a and it works fine. all the grainlines are at the right place. thanx to whoever gave me the link to that version. I am a bit lost with all the versions, builts and other stuffs and where to find them.
2 Likes
Does this still work the same way? I can’t for the life of me figure out how to getting any of the text to appear on the pattern piece
1 Like
Perhaps this will help you with the labels: Labelling pieces
You can also look at the current banner which features a Quilt Square tutorial which describes the process: Tutorial for beginners in English & French
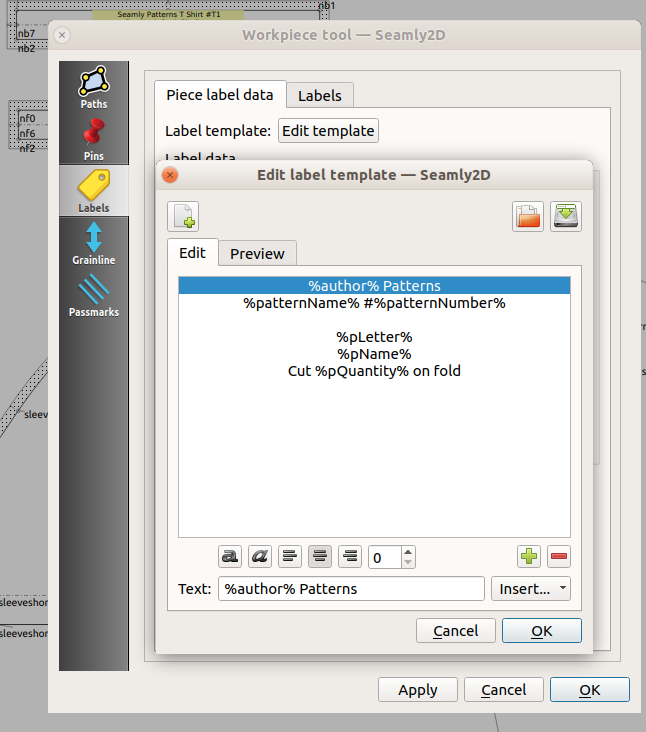
The method changed, and you define a label template. Click on Edit Template button. and add text for your label. The Insert button let’s you insert variables which contain your info from File/Pattern Properties and the label data fields below the Edit Template button. Save your label so you can use it for other patterns and pattern pieces. Here’s an example:
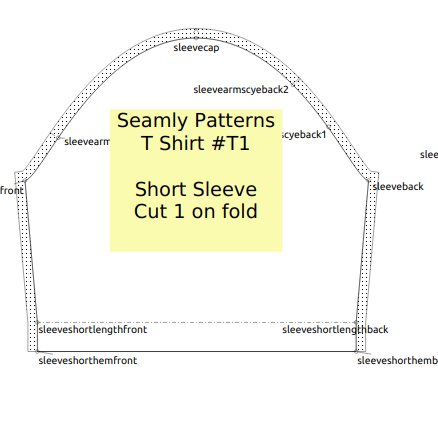
 Results in this label:
1 Like
Ahh ok, got it. Thanks
1 Like