Based on my (somewhat limited) experience with V, here is what you need to watch out for:
Always do curves last. They depend on control/reference points and lines that must be in place before you place your curves. It’s an issue with V itself, which needs to be dealt with at some point.
Never do freehand curves. Use formulas for setting the position of control/reference points. If you don’t, they won’t be nearly as easy to make work, and won’t work at all with different measurements.
Unless you are doing something fancy, all curve ends must be at ninety degrees to the lines that they attach to. This is to ensure that when you sew the other half of the garment together, where the two curves meet forms a smooth line. (i.e. 90° + 90° = 180° - a straight line.)
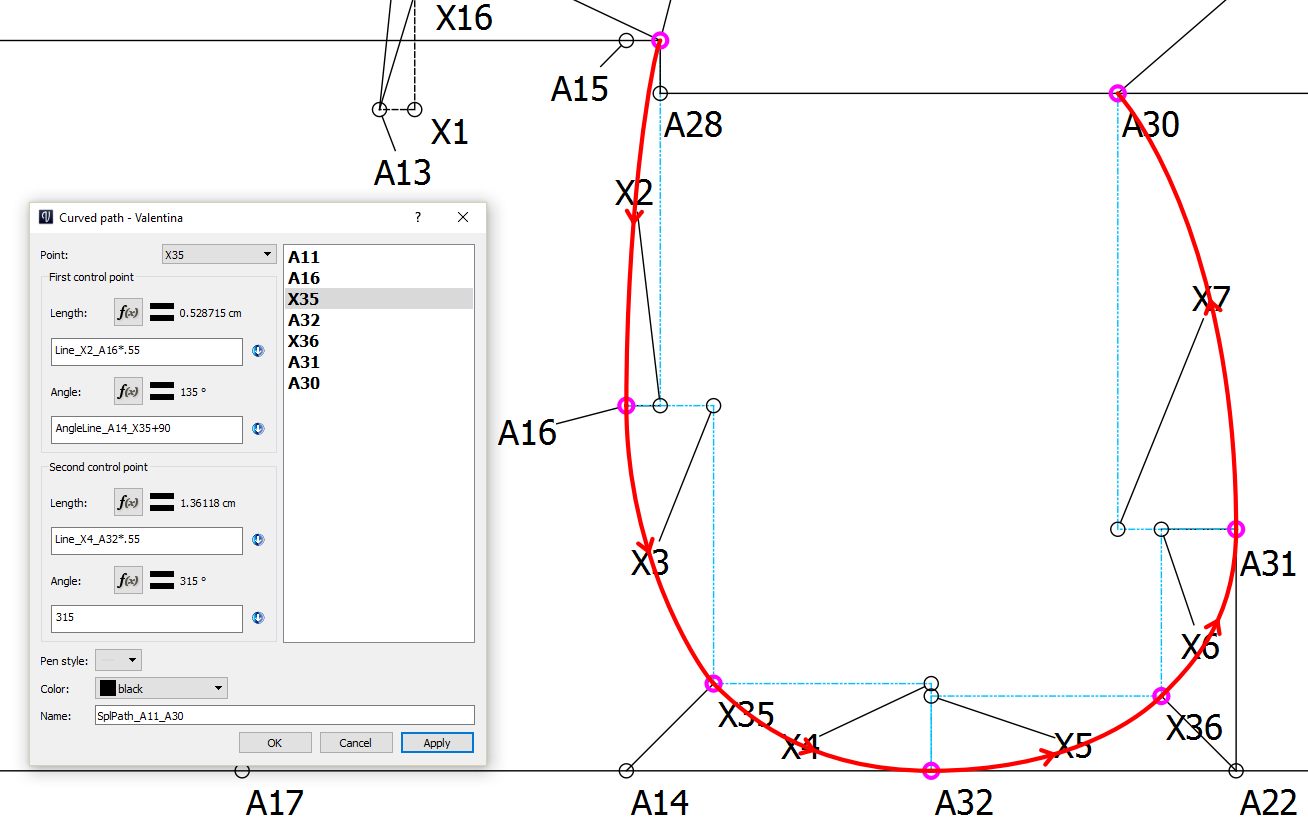
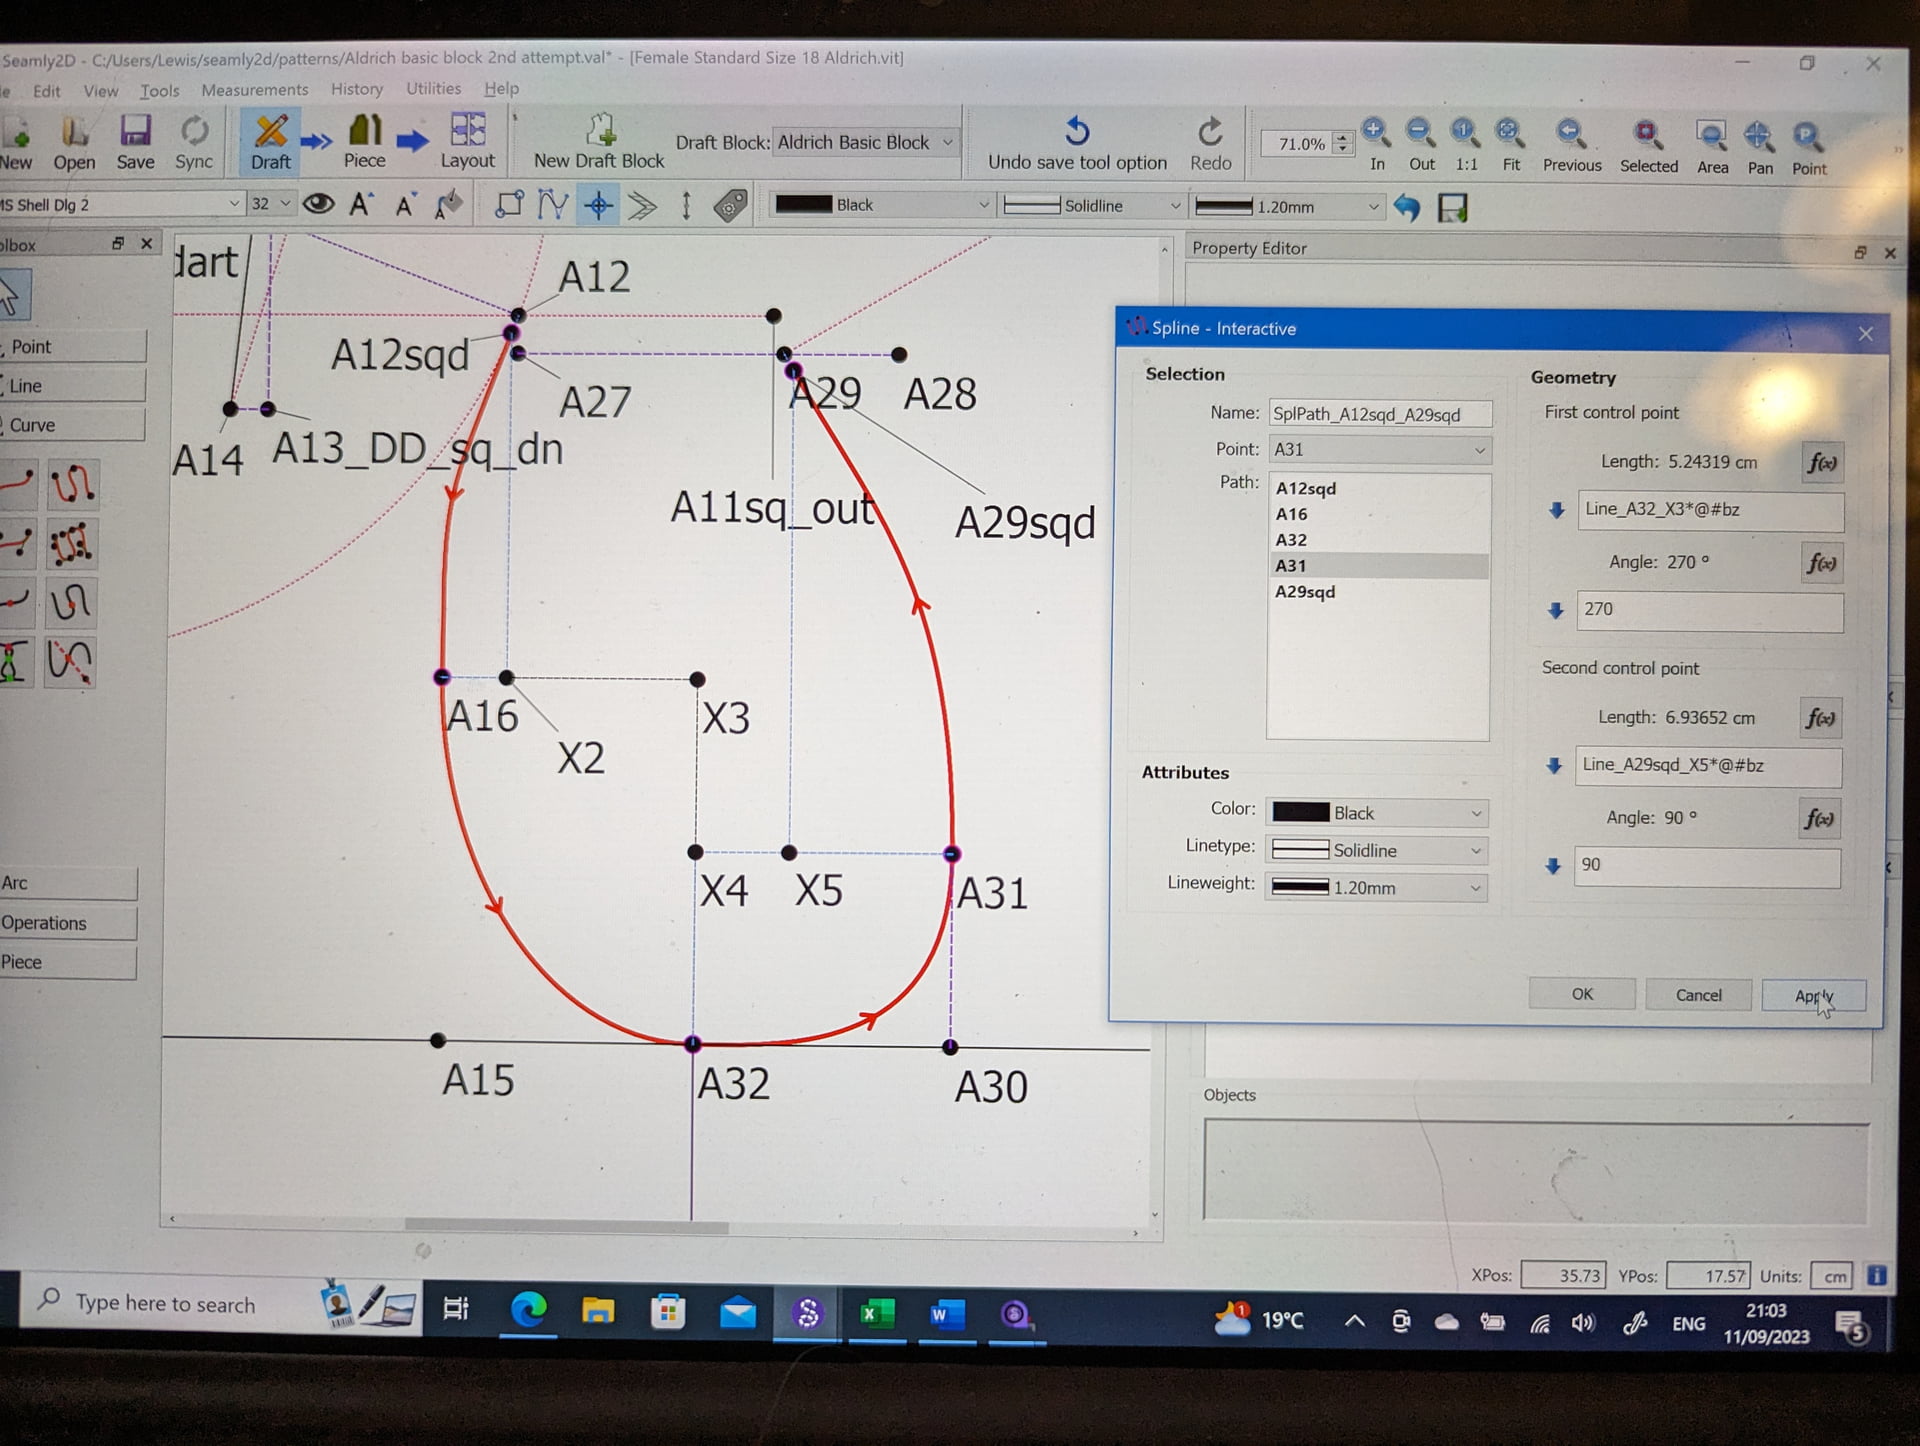
Setting up a curve using reference points like I do in the example isn’t hard. (I used X as a prefix for control/reference points to keep my main numbering simple. You’ll also notice that I drag the point labels around to make things neater.)
Use the ‘Point from X and Y of two other points’ tool based on adjoining points on the curve (X2-X7).
Create lines between the reference points and the curve points (light-blue, dashed lines).
Use the ‘Curved path’ tool to lay your curve. (Don’t worry if it looks like crap, to begin with.)
Right-click the curve and select ‘Options’.
For each curve point, make sure that the control point angles are at right angles to whatever lines they are attached to. (If a line isn’t attached to a point, see if it makes sense to be oriented horizontal or vertical, like A16 in my example.)
For the length of the first control point of each curve point, use the line length from the previous reference point (X3 in the example) to the previous curve point (A16 in the example) and multiply by .55. (The proper value is 0.551915, but that much precision isn’t needed; just remember `.55’. This value makes bezier curves come closest to approximating the curve of a circle, which makes for the smoothest curves.)
For the length of the second control point, do the same thing, but with the next reference and curve points. (X4 and A32 in the example).
As you can see by my example, even odd armhole curves can turn out very smoothly, and changing any measurement won’t bother their result in the slightest.
[Update 1: I will be editing this first post as needed over the next few days. I just finished walking through the process in V. and took four dozen screenshots(!) to support the text. I’m taking a break now, but plan to get at least the images up and some of the text later today.]
That is something I came to realize. …which is why I’ve spent a couple of hours already making sure that it will be as complete and as easy to understand and translate as possible.
More importantly the two sides of a seam should add up to 180. There’s dozens of examples where seams are not at 90 and that’s doing nothing fancy… for EX: the armhole & 2 piece sleeve of any men’s suit.
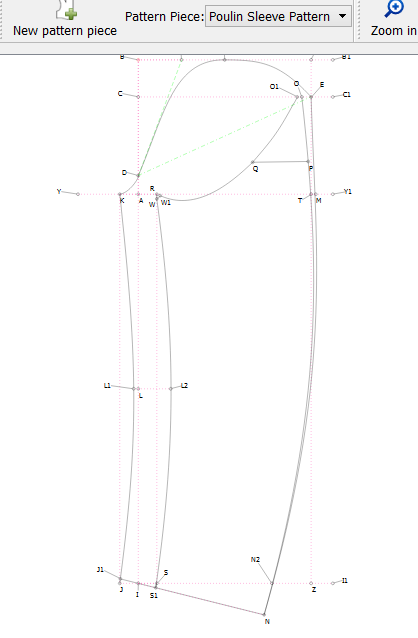
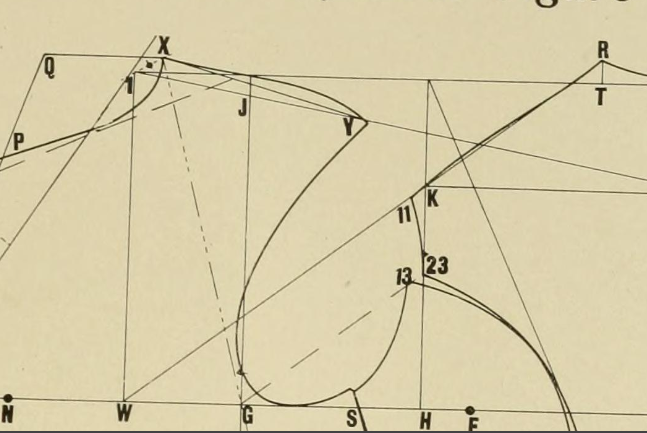
Here’s a draft of a typical 2 piece sleeve… as you can see most of the seams are not 90… the only place that is at a 90 is the back seam at the cuff - point N.
In any case… I think it’s an important point you brought up, in that most curves should vary with the measurements.
Thank you for your input. I’ll change my tutorial to stress that what is important is that the angles of the two sides of a seam add up to 180 degrees in most cases.
Hi!
I’ve just upgraded S2D and I’ve noticed that the curved path tool it’s very slow (every time I make a change I need to wait few seconds before the curve starts to bend) while before it was immediate.
Have you come across this problem?
The curve angle leading up to the point, & the curve angle leading away from the point are always 180 degrees apart, so the curve should always be smooth. If it’s not, your control points are probably either too long, or going in the wrong direction.
That is only true in the case of points within a spline, where the control points are automatically set 180 degs apart. If you have 2 “curves” one after the other, you can set the control points at whatever angle you want… although they should be 180 degs apart to make a smooth curve.
I should note that if you change a spline control point 1, control point 2 will automatically be changed to 180 apart… and vice versa. If for some reason you don’t want this behavior, use 2 curves instead.
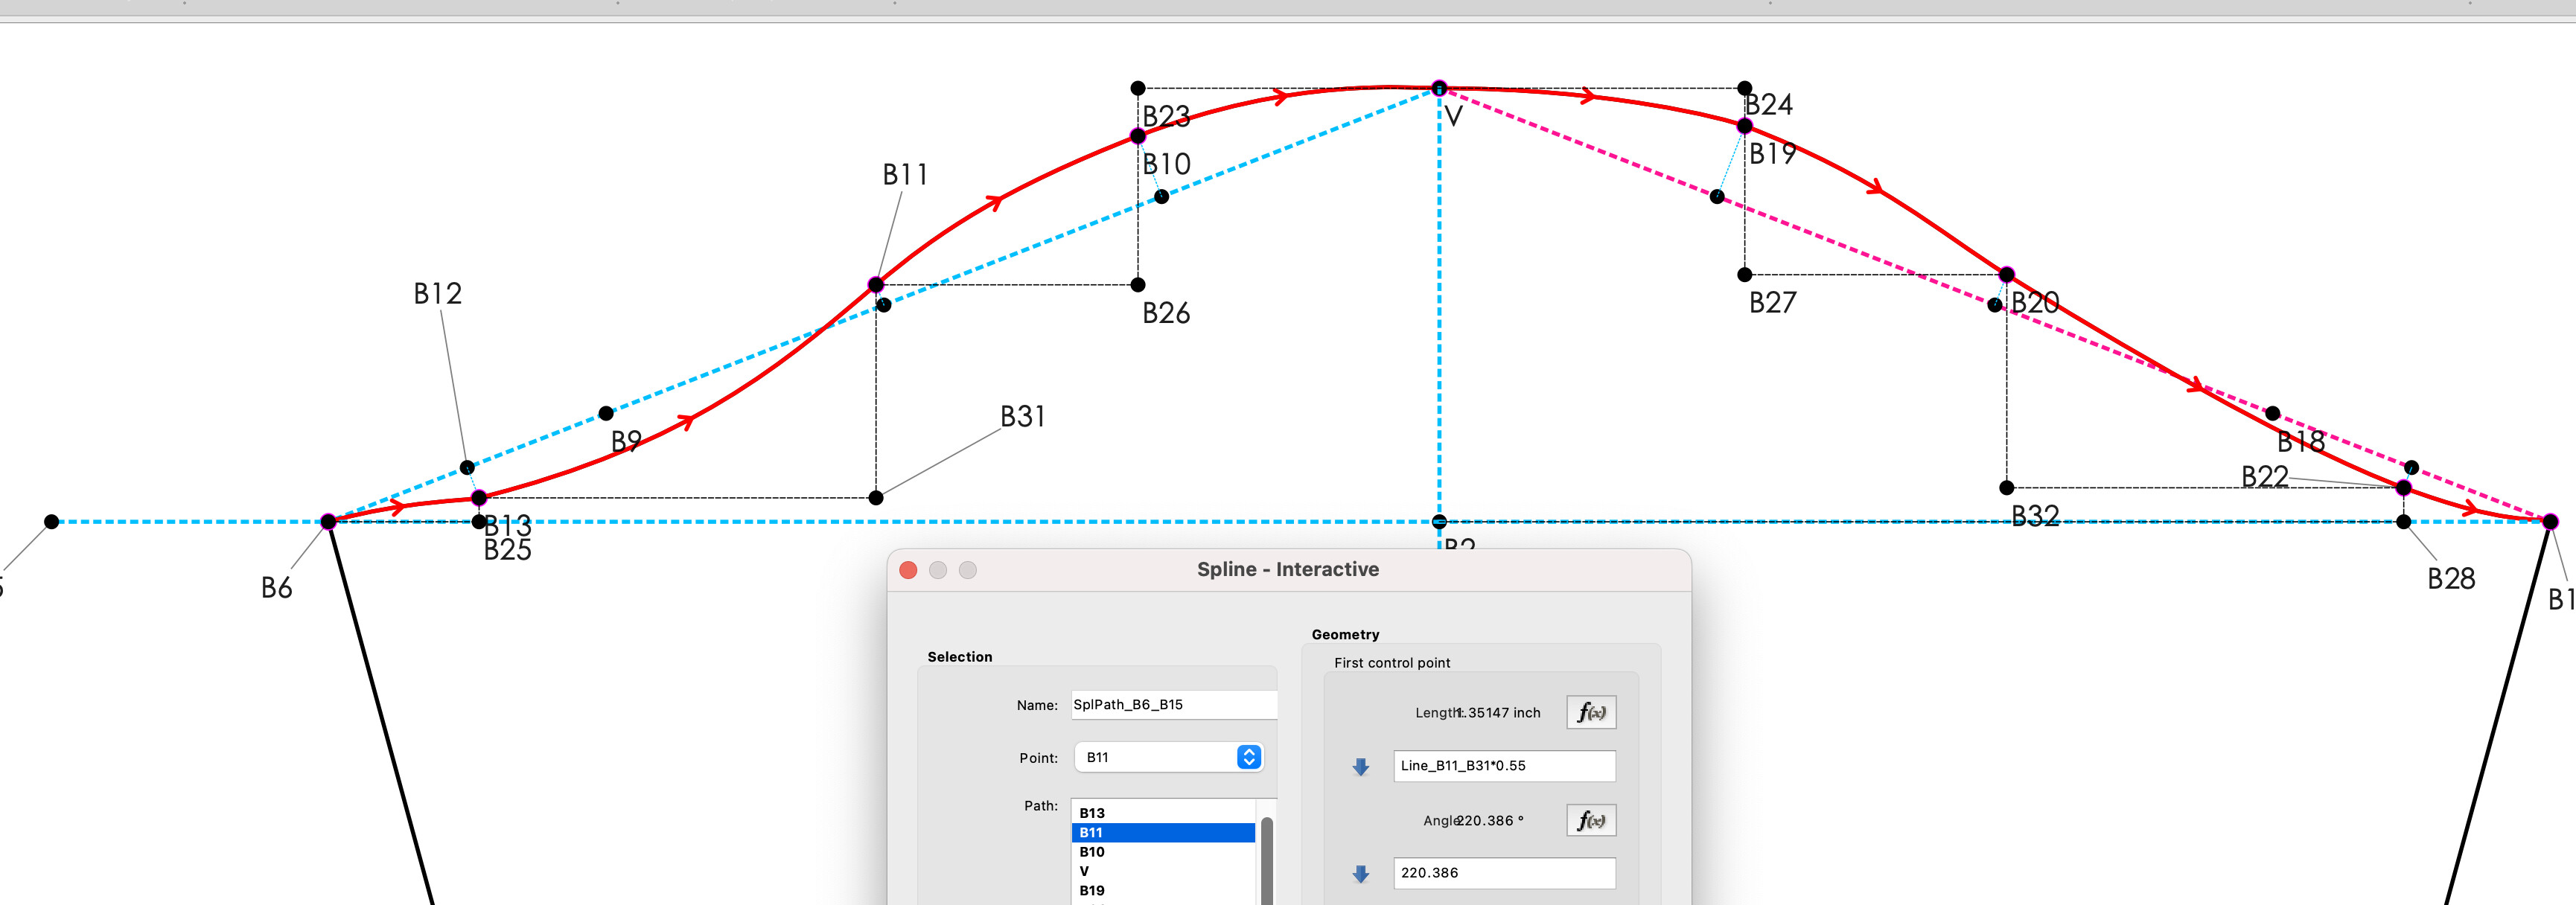
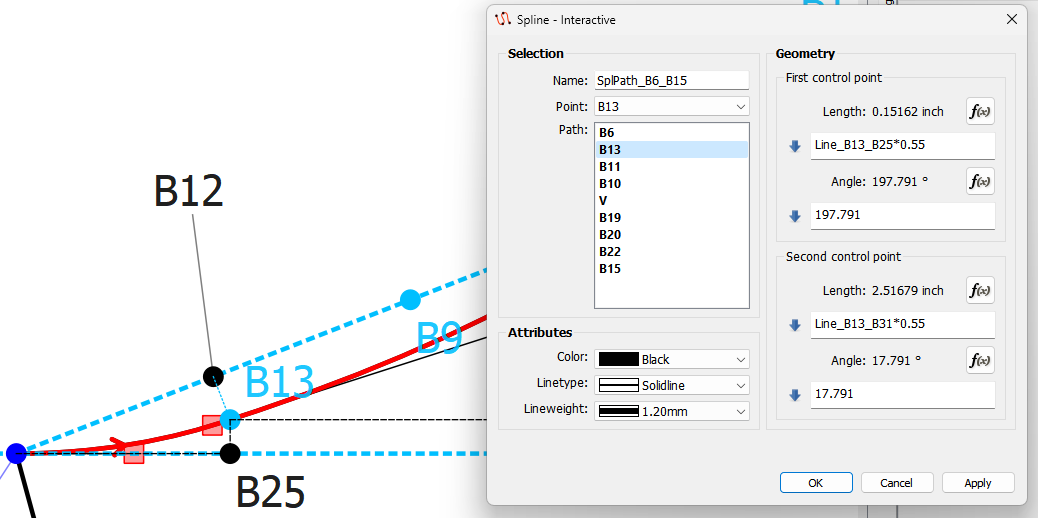
I can see though in your screencap that the control point for point B6 is off… you probably want it at 0 degs… the other end B! should probably be at 180 degs.
First off… not sure why the points B13 and B22 are used? The curves would transition better if they were not there and went from B6 to B11, and B20 and B15.
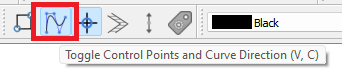
That being said… the control point lengths are incorrect for B6 and B13’s 1st point. You want to use the length of line B13_B25*.55 for B13’s 1st CP, and the length of B6_B25*.55 for B6’s CP with an angle of 0. I had to then grab B13’s 2nd CP to move the angle until it looked right. BTW… I don’t know if you know you can show / hide the (square) control points?
They are interactive, and set the CP angle. They can also be used to set the length, but only if you have not set a length formula for the point. I only looked at point B13, but I suspect the length of some of the other CP’s may be incorrect.
I just wanted to say thank you to all the people who have contributed to this thread and the wiki for these curves.
I am someone who struggled a lot with maths at school, have grown confident with arithmetic and basic algebra since (some accountancy background) but nothing else over the past 20+ years.
From these instructions I have understood the principle of a Bézier curve (well as to the extent as to why those intersecting lines make curves in the animation on the wiki), slowly understood where to draft the construction points (I feel the wiki could emphasise that they are placed using the intersect tool, I had a vague memory of reading it somewhere, but it would be helpful to have that (re)stated on the semi circle walk through).
After a few false starts (realising I needed other lines / control points etc), the first time I made it through the spline I got to this and I am thrilled.
P.s. this may be in slight contravention of the Kolson method but I added a 0.5 cm right angle to the seam line at each edge of the curve, so they will really have a decent straight line when they meet sewn up, in the same way I’d add that when drafting on paper. I know my curve angles end at the correct angles but any errors in cutting would throw those out.
Anyway, thank you again, I’ve really enjoyed this aspect of the learning process.
You don’t have to do that. What you’re actually doing is putting a kink in the curve. For the control points for the curve end points use an angle formla to make the angle perpendicular to the shoulder seam. In your case you would add or subtract 90 from the angle of the shoulder seam… I can’t see all the points and don’t know which way the line is going to be specific… but it would be something like Line_A?_A12 + 90.
Also just a note… not all armhole / shoulder seams end at a right angle (or for that matter any seam / seam or seam / hem)) … especially with period jackets with drop shoulders. For ex:
What’s important is that the angles on either side of the seam add up to 180 degs NOT that they both have be 90 degs.
See, I had read and understood this previously but for some reason had the voice of my sewing teacher in my ear.
I moved the start and end of the spline to the proper points and I was very grateful that the software made it so easy to fix the formulas when I moved the control points.