Hi there,
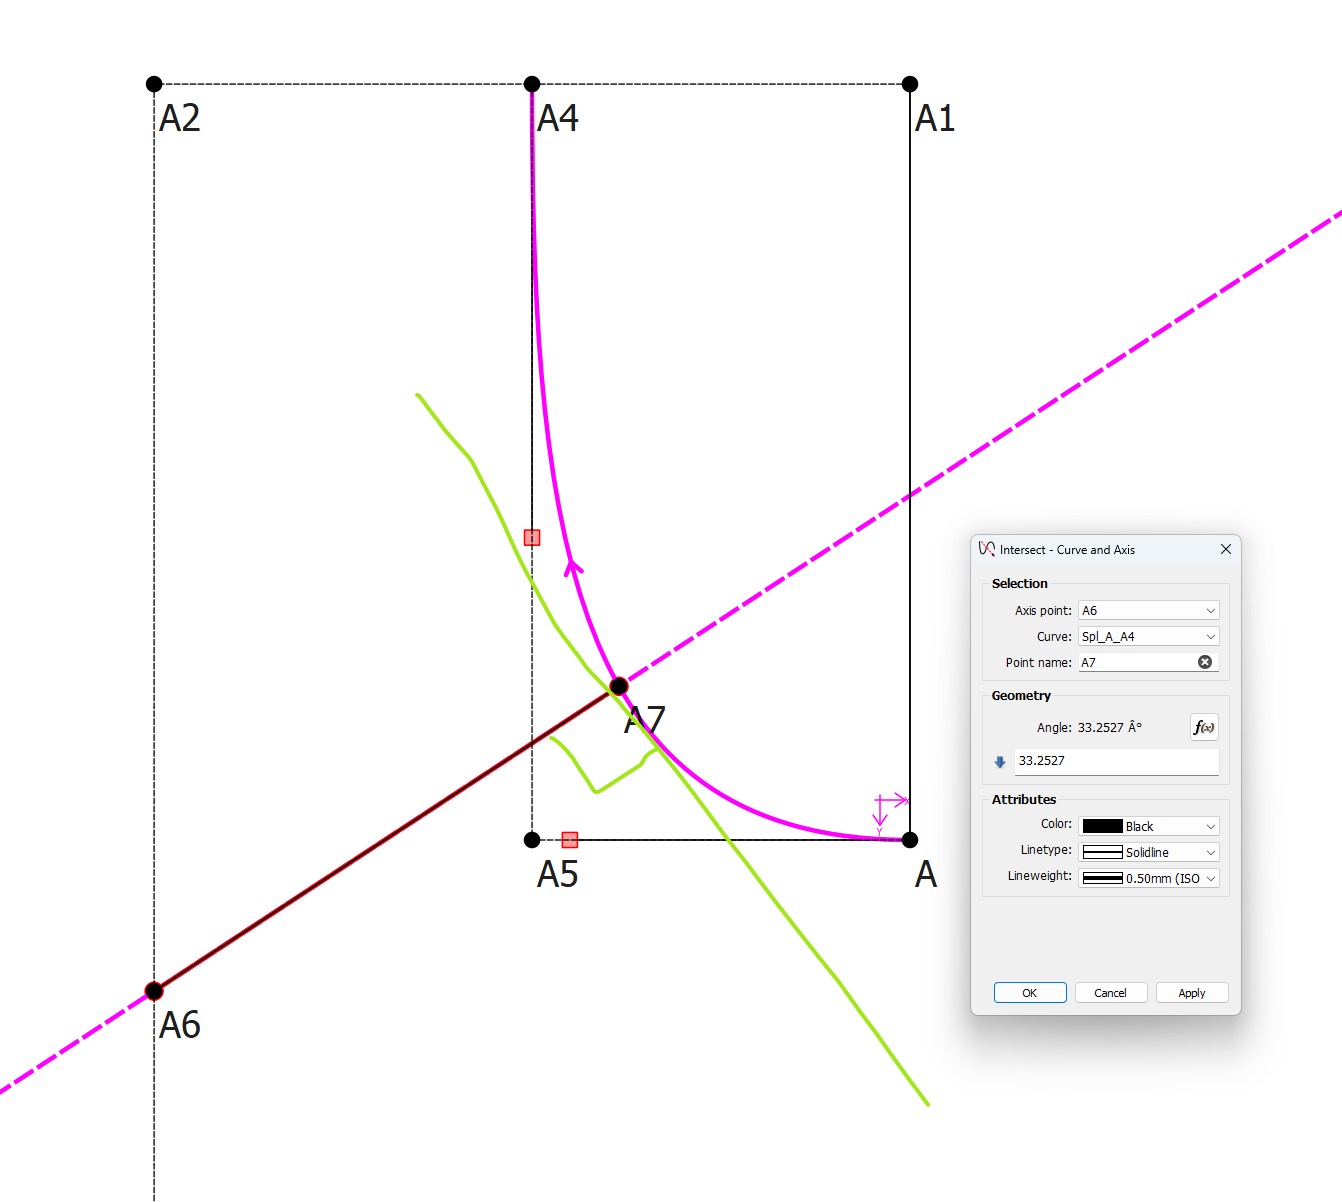
Something I’m stuck on. I’ve had to eyeball it so far. I’ve used the Point Intersect
Curve and Axis tool so far to eye ball a point on the curve, but would like to have the point on the curve perpendicular to the tangent of the curve. I was hoping for a formula to find this so it would move with resizing of the pattern.
My head is currently mush trying to work this one out, can any one help?
I assume you want to use point A6 as the Axis point?
Hmmm… well, mathmatically the line from A6 to the A7 in which A7 is perpendicular, should be the shortest distance. Offhand not sure how to put that in a formula - or which other tool may provide the result you want.
Thank you for the quick reply,
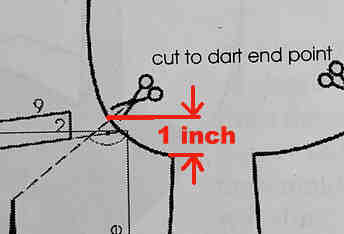
Yes, use A6 as the axis point.The Muller and Sohn book asks you to rotate around a pivot point which is the top of the darts and over lap at the arm hole by 5mm along an axis perpendicualr to the tangent of the armhole curve.
It’s basically the last step of the draft, but as I want to project my patterns, I need a way to do it… Happy to use the eye ball technique for now, but a more precise solution would be better.
I’d thought my way round the shortest distance but haven’t found a solution. I’ve tried using arcs, pythagoras, messed around with loads of the tools. But seem to come up short, as I can’t define the curve as the place to locate the point. The only tool I’ve discovered that does this is the “intersect - curve and axis” tool, but I’d need to define the angle and I can’t figure out how to do that.
If you come across anything please let me know.
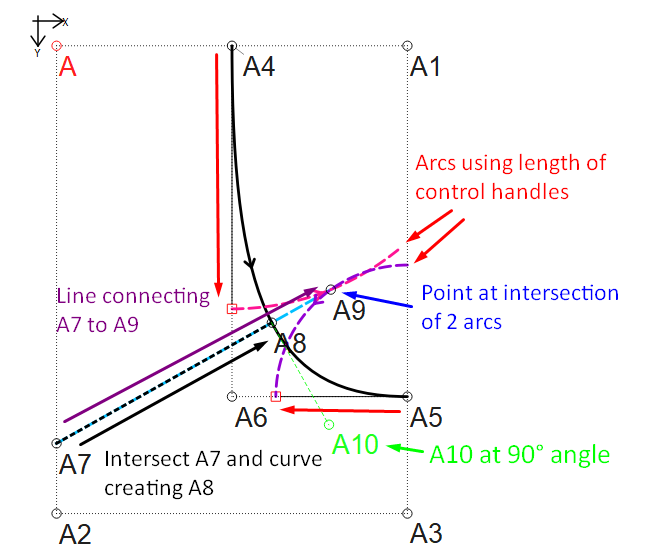
I can think of a rather convoluted way to get the the result… if you mirrored the curve, moved the mirror so the curves overlap, then using the Point of Intersection Arcs to find the 2 intersection points, make a line between the 2 points, you can now use the angle of the line to find the perpendicular angle to use in the Intersect Arc and Axis.
I tried myself… I’m not sure we can do this with curves as they can change shape and there is no clearly defined center, and there’s no access to the internals of the curve that we could put into the angle formula. Unless there is some combination of existing tools that I’m not thinking of, it’s going to take a new curve and perpendicular tool to find the point on the curve.
If you use references to actual lines in your pattern when making the curve handles, as I have in the test file attached, it should resize very nicely.
Thanks both, I’d read as many of the posts about curves as I could on the forum and came to the conclusion that the method of creating a shoudler curve with arcs would allow me to get the tangent as I’d know the centre of the arc.
But Grace, the way you have found it is brilliant. What a great solution. Thank you both so much.
I will let you know how I get on once I have had a play with it this afternoon.
On 2nd look… It may work in some / most cases, but it depends on several conditions. The position A7… move it up or down and it will start to drift from perpendicular to the curve. In other words there is only 1 angle from point A9 to the curve that is perpendicular, and thus only 1 angle from A7 to A8. that is perpendicular. Problem is it’s curve that is not linear like an arc / cricle.
Also if A4, A6, and A5 are not squared, and A6 starts to move up / dn, or lt / rt the point at A8 also will start to drift from the perpendicular.
Ideally, like I said we would need a new tool - like the Line and Perpendicular, only a Curve and Perpendicular.
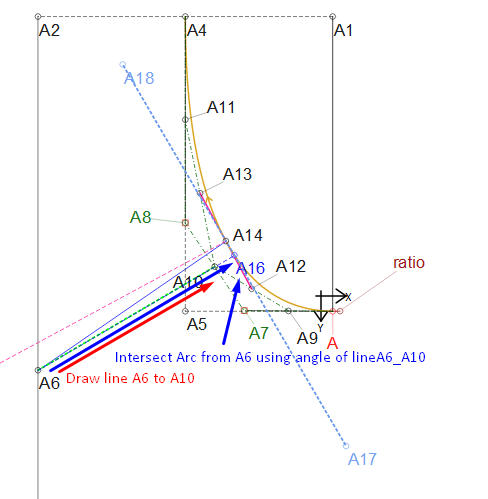
I had play last night and this is as far as I could get. It helps me because I can now really dial in my “eye Ball” technique! I haven’t had time to test it in a pattern and see how it resizing effects it though.
Changing the line distance “ratio” between (well it should be zero but that isn’t allowed so) 0.0001 and 1 will change the geometry of the normal to the curve. Based on de Casteljau’s algorithm that I read on the Bezier primer linked from the forum. So point A15 is always a normal for the curve. I linked the line lengths A-A7 and A4-A8 to the length and angles of the curve so if you change the curve in any way from the handles all the geometry moves with it.
But as a newbie that’s as far as I got and couldn’t figure out a way to link the ratio back to the required angle to make the normal pass through a specific point. I think the linear way Seamly2d operates may be a stumbling block as I think you would need to create a loop back in time to get it to work.
I also created the ratio as a variable but this worked the same way except that it was harder to adjust as I needed to pull up the variables table to change it.
We’re dealing with floating point math, so we can’t evaluate if 2 values are equal, or equal to zero… or as the case may be does a point lie on a line or curve OR not - so fuzzy math is used. Sometimes it results in anomalies such as using .0001 is enough to make things intersect OR not.
Or as we call it the “Back to the Future” feature. Lol
Just out of curiosity… referring to your original screencap - what is the purpose of point A7? Why does it have to be a perpendicular tangent from point A6? I’m just trying to evaluate if there is a real need for a Curve and Perpendicular tool.
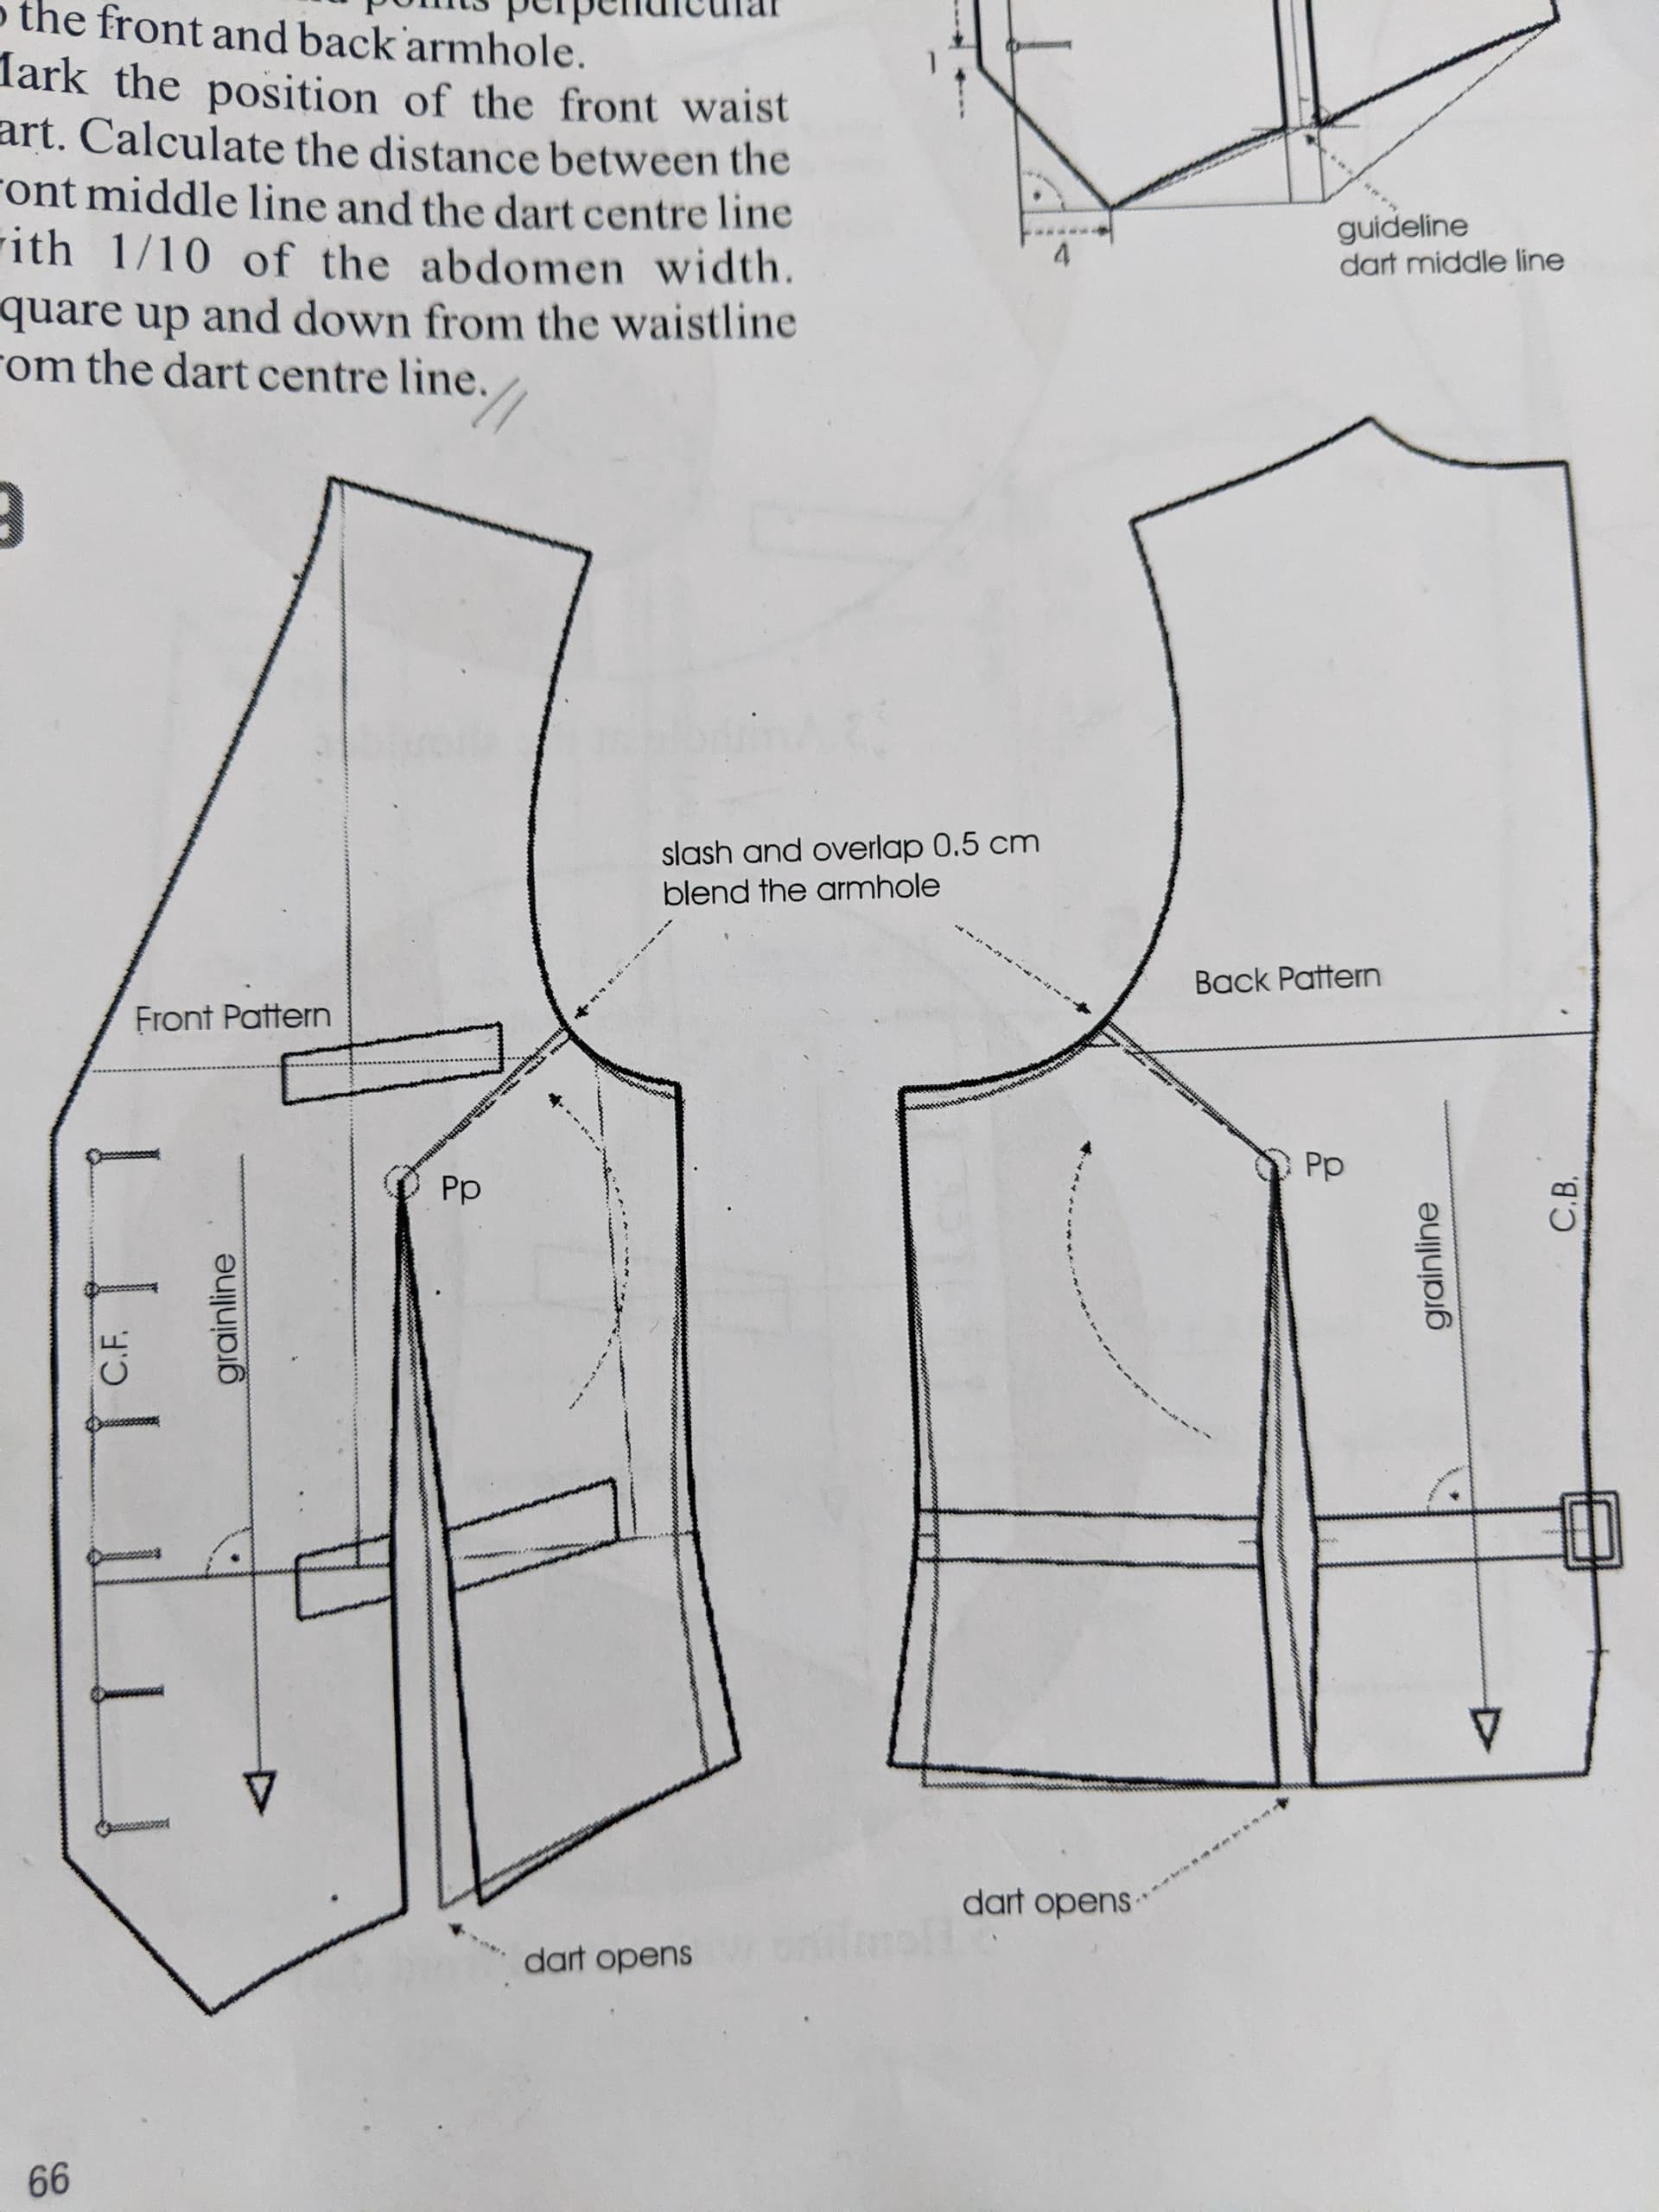
Ahhh. OK. I can see the idea behind it. To be honest though the angle of the cut from the dart point to the arm hole is not that critical… that is, what matters is the amount the cut is rotated and the resulting point of the botton of the armhole and the top of the sideseam. Besides… once you open or close the cut, the seam across the cut at the armhole will not be straight. The armhole (which in a vest is just a style line - vintage vests having a tighter armhole) needs to be trued up regardless if the cut is dead on perpendicular or not.
Personally if I was to do this I would place the point on the armhole curves 3/4" - 1" above the chestline where you would normally place the notches.
Then just connect it to the dart point. A lot less work - assuming no Curve and Perpendicuar tool.
A very pragmatic view. You’re probably right there … I was redrawing the curve post pivot any way so it was a smooth transition between the points.
I was going to do a mk4 draft tomorrow so I’ll give it a go. All good practice. Thank you.
Using your test pattern, I think you’ve done all the work, anyway. I’ve only used your A10 as the direction of the line to connect A6 to the arc/curve:
And I also think this is a much more elegant way to go in the long run
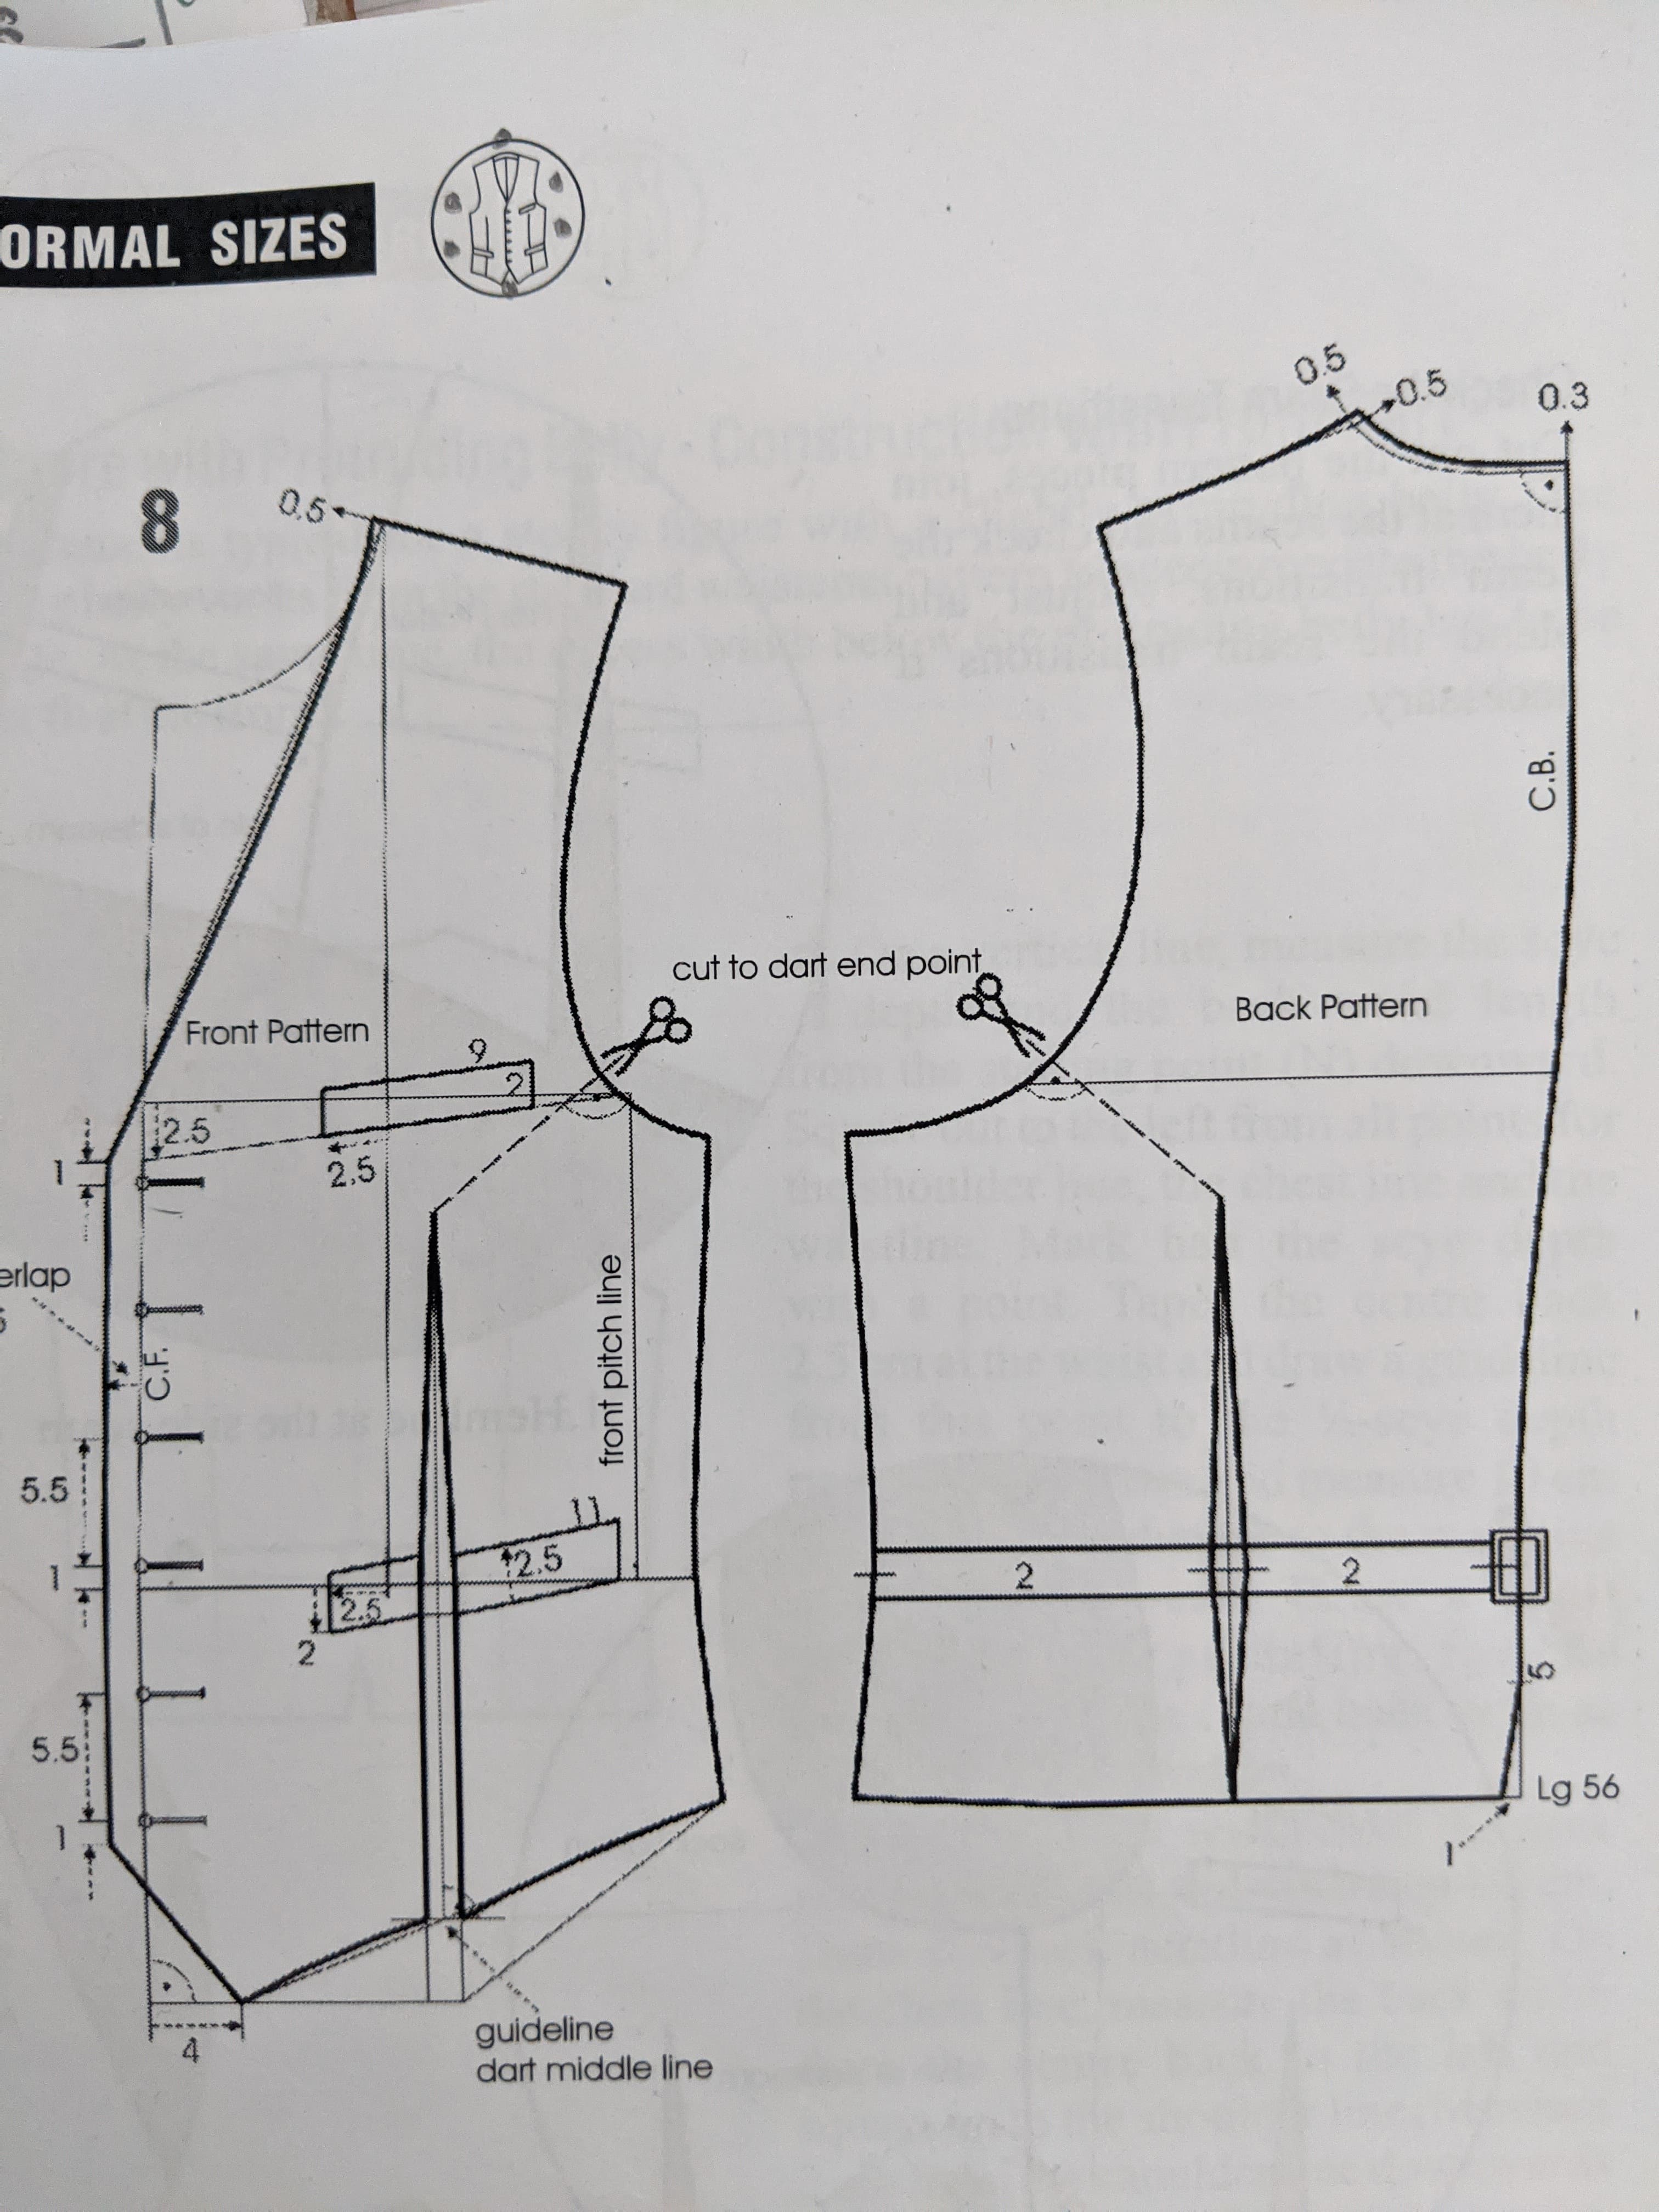
Hi All, just to let you know, finished off my draft of the waist coat over the weekend. I drafted it in a muller and Sohn size 50, and then loaded in my measurements and everything shifted really nicely.
Also projected it onto a paper pattern I made to my measurements a while back and it matched up. Super happy with that.
Thank you. A