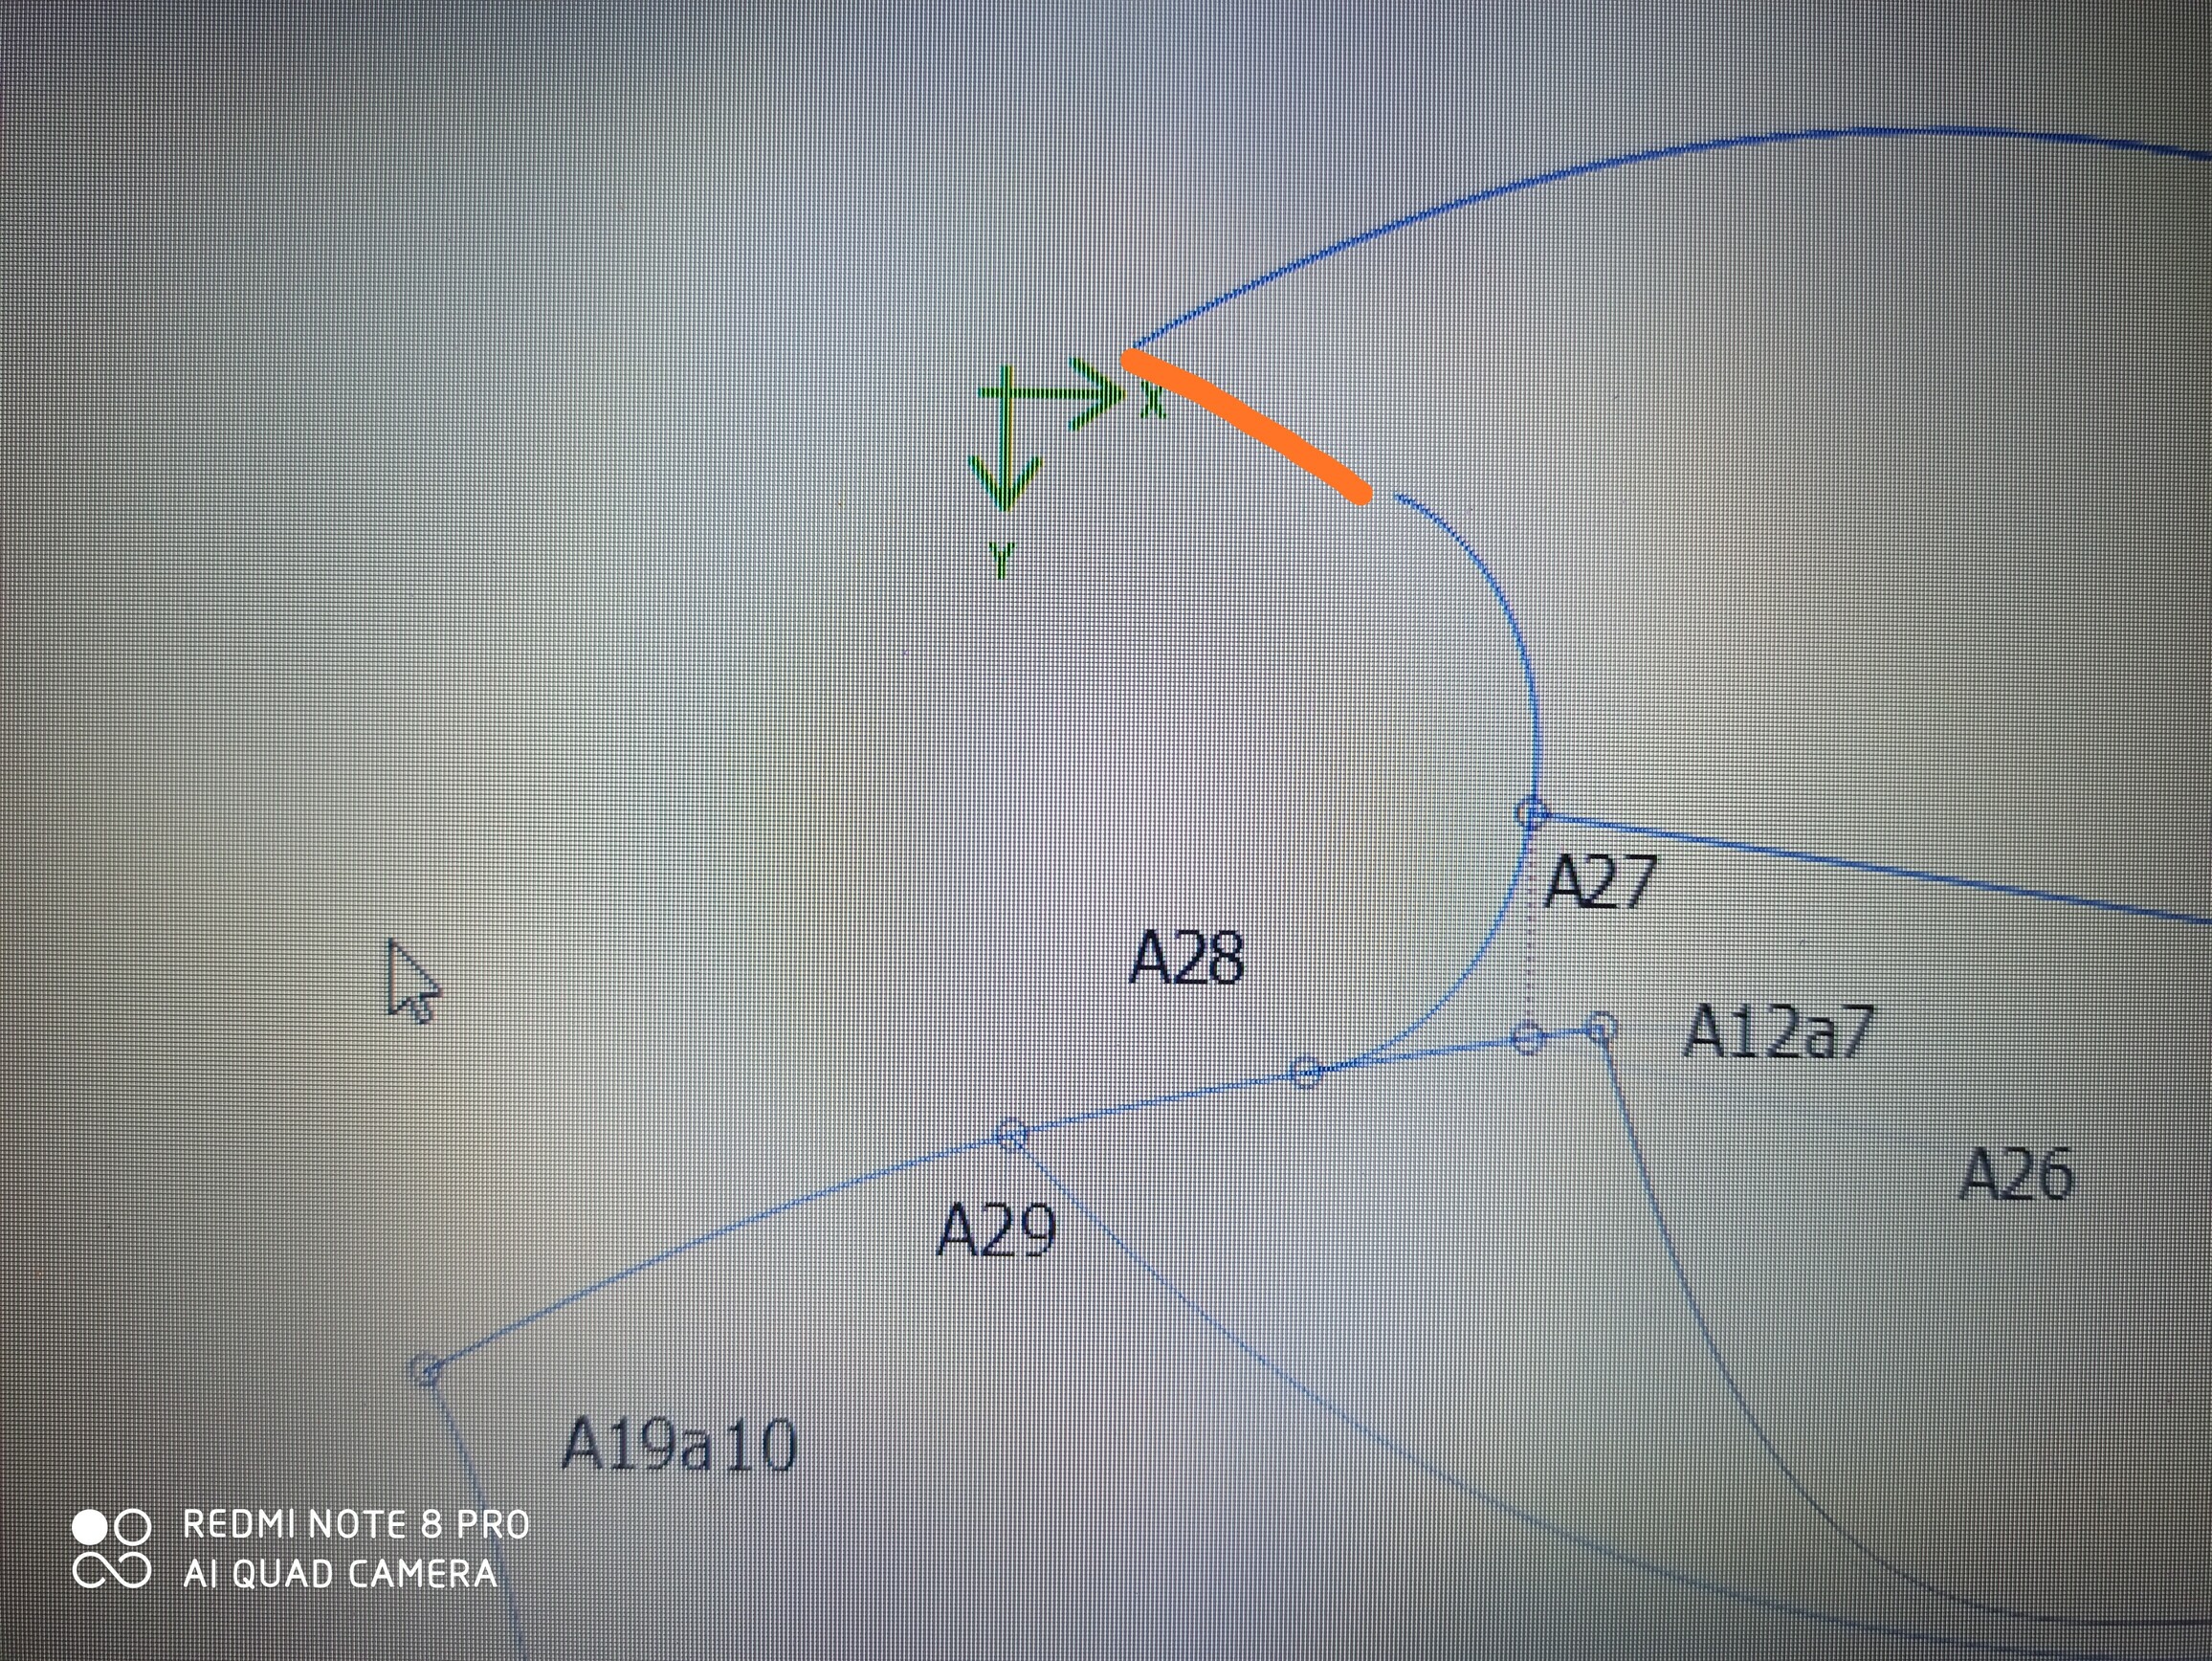
How do I copy part a curve or draw a curve slice? I added two points on the previously drawn curve and would like to copy the arc segment between the points. I want to copy curve from A28 to A29 or draw exactly same curve.
1 Like
Hello and welcome to the Seamly2D Forum, @Alicja
It would be easier to add nodes to the ends of the 2 curves and create a node at the distance required with lines to the 2 new nodes and to create a new portion of an arc between the 2 end nodes using the 3rd node as the axis and the 2 lines as the from/to angles.
1 Like
I do not understand. Can you explain more? I use the program for a short time, it’s complicated for me. I would like to transfer parts of the curves (marked in red) in a mirror image. I try but I fail. Will you help me?
bluza z psem.val (16,9 KB)
1 Like
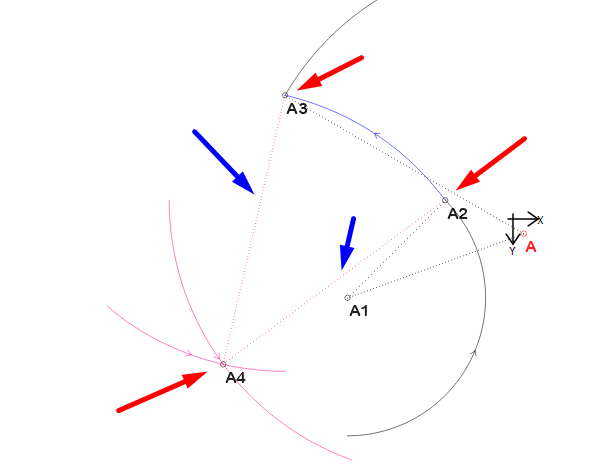
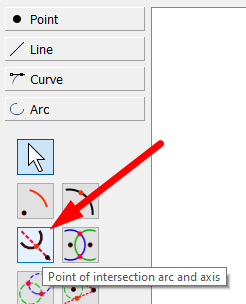
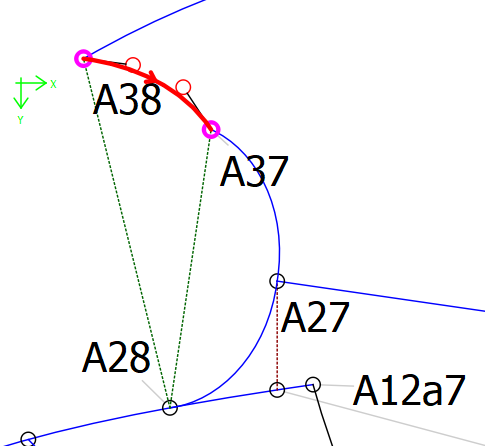
I see that you are working in Valentina. Our programs are really growing apart now and, although you have the nodes in the image, I can’t see them when I open the program, so I’m using the tool point of intersection arc & axis to create these points.
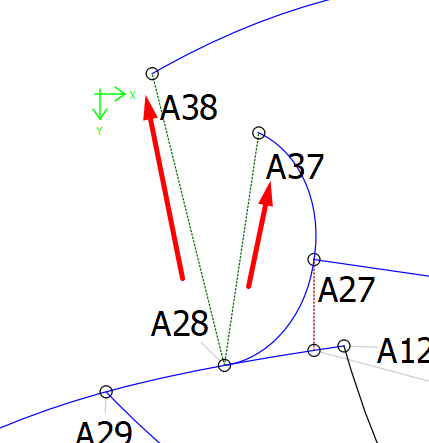
Once you have the 2 points in, then you can either just draw a curve in using the normal curve tool, or you can flip the curve using the flip tool and then rotate the curve to meet with the new point at A38 from A37 - but I don’t know if this will work because I’m not too sure about what you are trying to achieve and the distance between A37 and A38 isn’t the same as the distance between A27 and A37.
1 Like
I moved the curve with the flipping objects by line tool, but it moves the whole curve for me, and I just want part of a29 a28.
I don’t want the parts marked in red.
2bluza z psem.val (15,1 KB)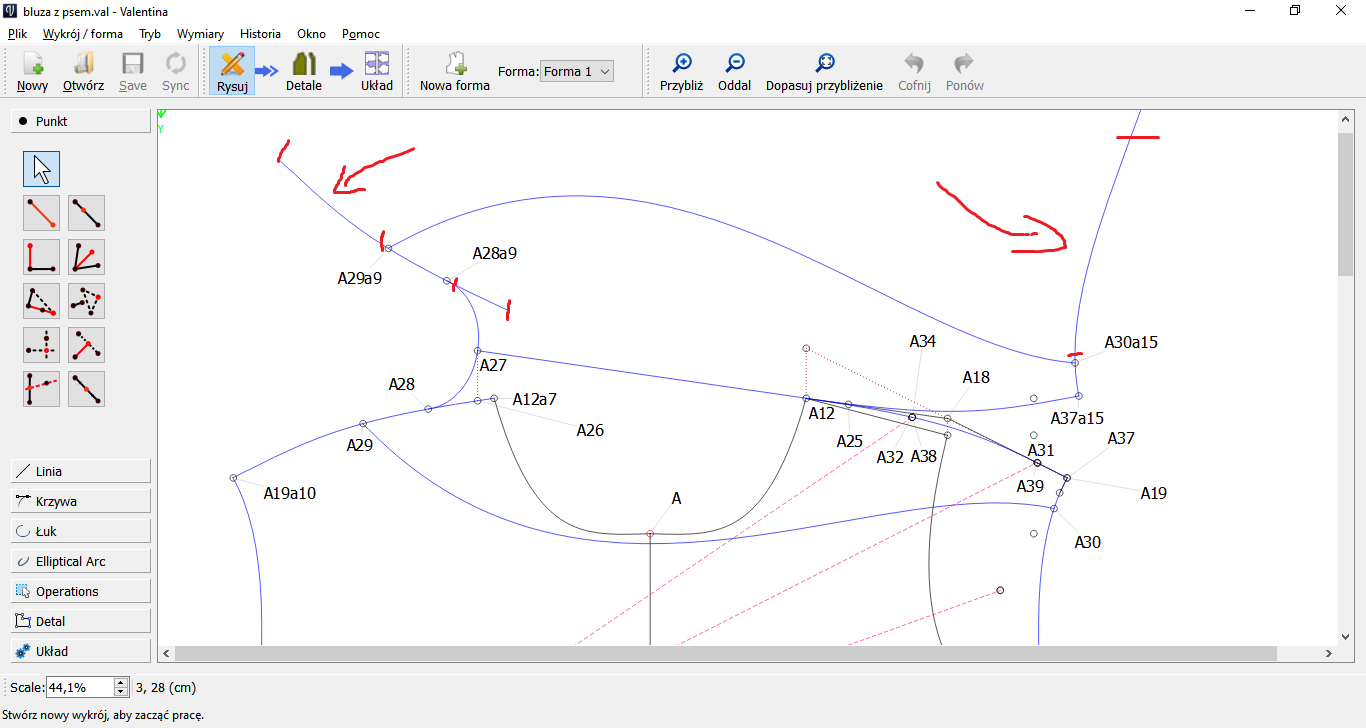
1 Like
You can’t mirror (flip) just a part of a curve in either program… the mirror tools will duplicate the whole curve.
I suggest instead of creating a spline (curved path) , create multiple separate curves (simple curves). That way you can select just the part you want.
BTW… a spline is nothing more than (simple) curves placed end to end. There’s nothing you can do with splines that you can’t do with multiple curves. It’s just that using a spline is easier to deal with the handles between curve sections as it automatically places the handles 180 deg apart for a smooth transition.
2 Likes
Is it possible to draw part of this curve using the formulas and calculations of the program?
1 Like
I would just mirror the points A28 and A29… don’t include the curve. Then just draw a second curve between A28a9 and A29a9.
1 Like
One more question about the entire curve. How to draw a mirror image curve using a formula? I don’t want to use a move tool, just formulas with calculations. I tried the formula AngleSpl -180o but it doesn’t work.
1 Like
The mirror tools (incorrectly named flip in Valentina) have nothing to do with moving per se… nor can you use a formula to define a set of mirrored objects. The mirror tools simply make a mirror copy based on a line or axis as the center line. What ever you did to create the orginal objects, will be duplicated in the mirror copy - only 180 degs opposite along the line or axis depending on which tool. You can however use a formula to define the angle of an axis used to mirror around. Plus, you can further use the move or rotate tools to make more copies to position the mirrored objects elsewhere.
1 Like
What is the formula to define the angle of the axis used for mirror around?
1 Like
Hi again, @Alicja
I’ve been looking at your latest image and looking and something just didn’t make sense, so I’ve been reading the conversation and looking again. And finally, the penny has dropped 
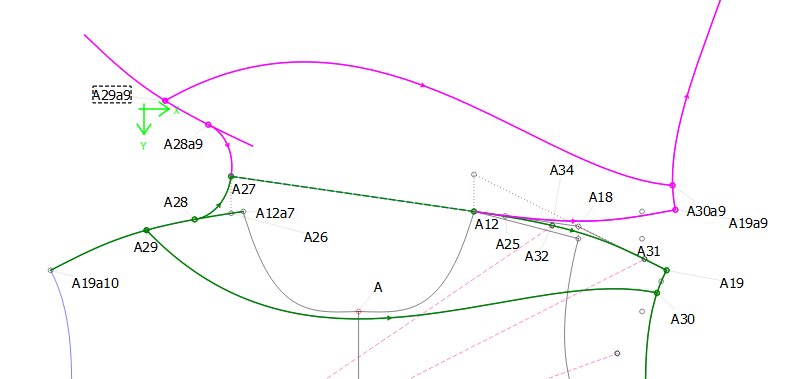
It seems to me that you are trying to replicate a mirror image of the portion below on top of it!
The common line is A27 to A12, so this should be your flip by axis line.
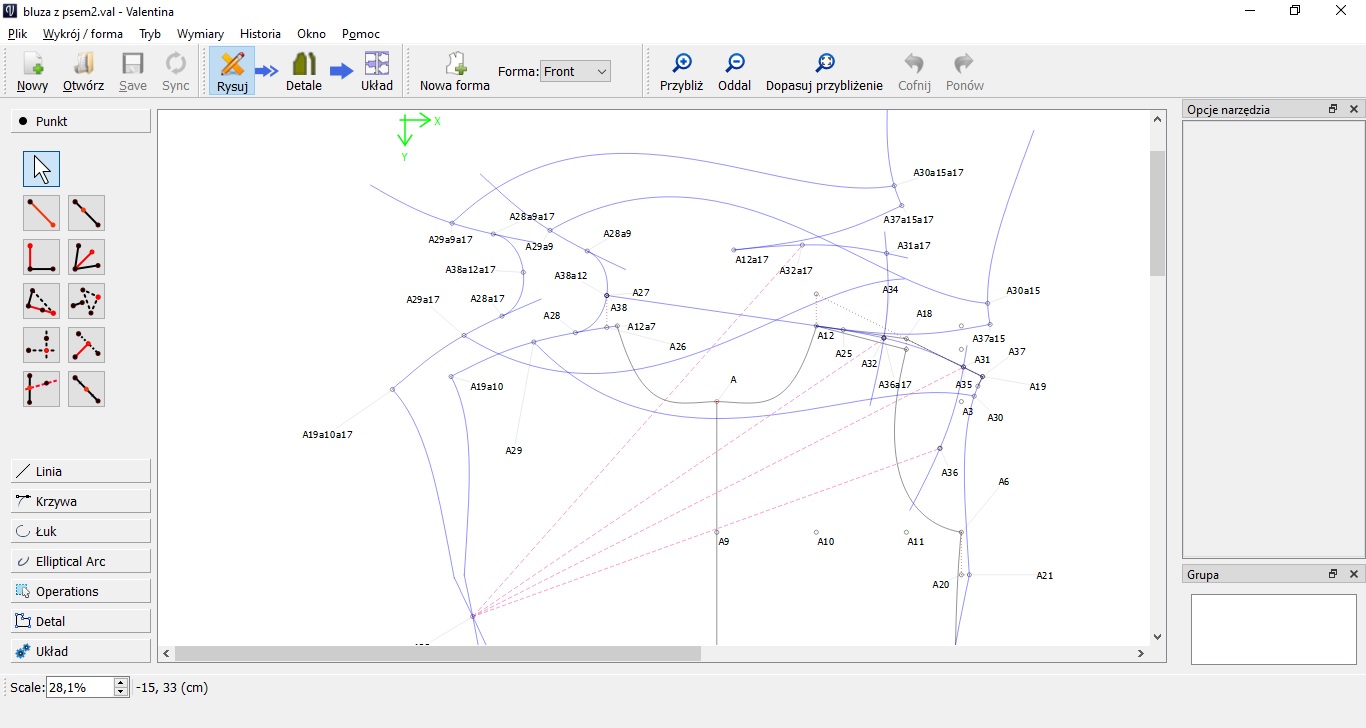
So using that tool and holding down the Ctrl key, select the curve A27 to A28 and then the node A28,then the curve A28-As9 and then the node A29, then the curve A29-A20 and node A30, then curve A30-A19 and node A19, and lastly the curve A19-A12. Then press Enter.
Select A27 and then A12 as the 1st & 2nd points of the axis line.
And your whole section should be mirrored exactly.
There may be extra bits of curve, but you can ignore these, they are only because you bisected the curves instead of creating sections of curves between A12 and A19, so they’re unavoidable.
As far as I know, there is no exact formula, it all depends on the angles that went before.
You could draw a line from one node to the other node and use it in a formula in one place as “angle of line plus degrees” and a line on the mirrored object curve with the formula “angle of line minus degrees” where degrees is a set number to achieve the shape you want.
The handle lengths should be the same in both curves to get the same shape.
Like Grace said… the formula is whatever you define it as… which in this case you would define the angle of an axis as the angle of an existing line plus or minus anything else you put in the formula - which could be a fixed value (+90 deg would rotate the axis 90 deg) or another variable like the angle of some other line.
It should be noted, and this topic always pops up in the forums… the line has to exist BEFORE you use in another tool. You can’t (normally) add a line after you’ve already created some other tool and try to reference that line. It won’t show in the variables (increments in Val) In other words - tools don’t know about other tools created in the future. This particularly applies to curves, where you might for example want to make sure the curve ends at a right angle to a seam so you would create a formula for the angle of handles using the seam line angle + or -90. So while the point nodes may exist, you need a line between the nodes to be able to use an angle of that line. I’ve learned it’s best to create any necessary points or reference lines before creating your curves. This way you won’t get stuck needing a line that isn’t there yet. It’s not always fun trying to delete objects back to some point in the history or worse starting the pattern over.
1 Like
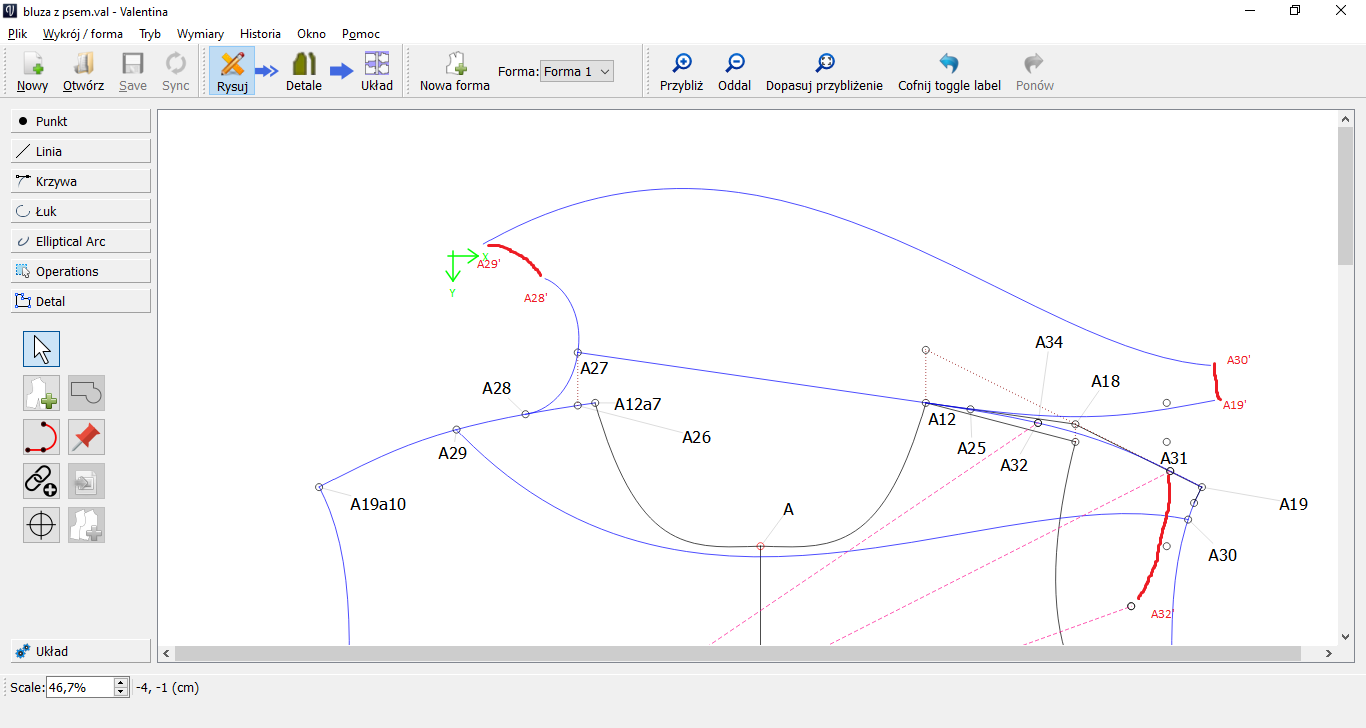
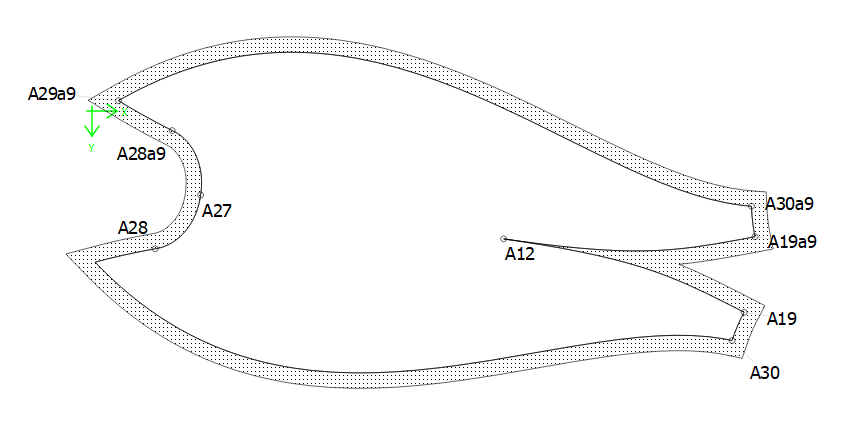
Here is the piece flipped:
Later when you create the Details of the pattern, it won’t show the extra lines of the curves, so you don’t need to worry about them showing on the drawing board.
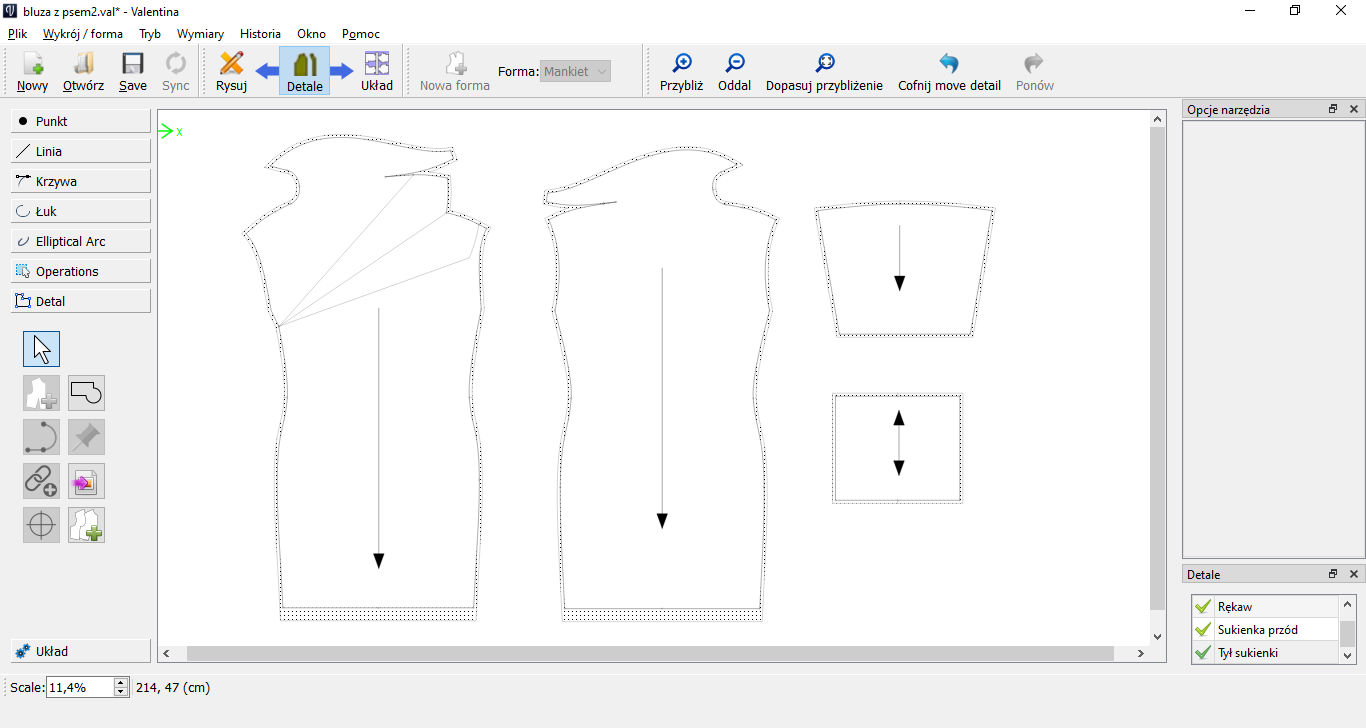
This is what the pattern will look like:
1 Like
Thanks for the answers. I thought the program allowed curves part to be moved, but unfortunately not. As a result, there are a lot of lines in the drawing and it’s hard to find anything. I was able to get the effect I wanted.
2 Likes
You can use the “Move” tool to move selected objects - including curves. You can also use the “Rotate” tool to rotate objects… or you could move then rotate the move copies.
In that regard I name the point copies like A1_Mov or A1_Rot… or A1_Mov_Rot so I know that a point has been moved, rotated, or both.
1 Like