Grace, I have several family members in the direct path of Hurricane Irma and they woke up today to assess damage and check to see that they are alive. I don’t see a picture either, but I hope that the eliptical tool will be in the list of issues once they are back on the repository. I have not yet checked today to see if any issues are there. If I can tear my attention away from the weather long enough today I will try to figure out how to build the TAPE tool (not make changes, simply build a new version of what is there). I have a great deal of immunity to getting overexcited about anything today
1 Like
See? It’s so ugly that the forum software won’t even allow me to show it!
2 Likes
forum software can be a bit buggy with showing uploaded images. should work if you use a couple of extra “enter key” entries before you use the upload icon for the image
1 Like
Just an FYI… I use Lightshot for taking screen shots. You can add arrows, circles, squares. The text is very small so I haven’t used it before, but once you have your picture setup, you can copy it and paste it to the forum without having to save it to your computer. You can just google it.
@Grace I use Lightshot exactly that way and have this trouble too( That’s why my posts are edited so many times  It looks like it gives less trouble if I save the picture in a folder first
2 Likes
As I said, I made arcs my ally in the battle with the bra drawing. Looks like we are winning 
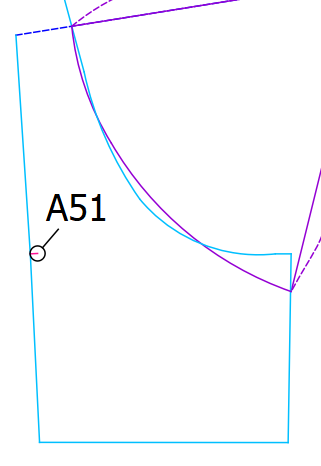
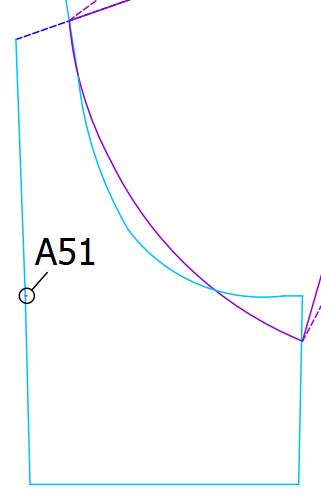
Here is how two corresponding curves scale in different sizes. See this little pink thingy with A51 mark? That’s the difference between their length. It’s less than 0.15 cm in every size I tried
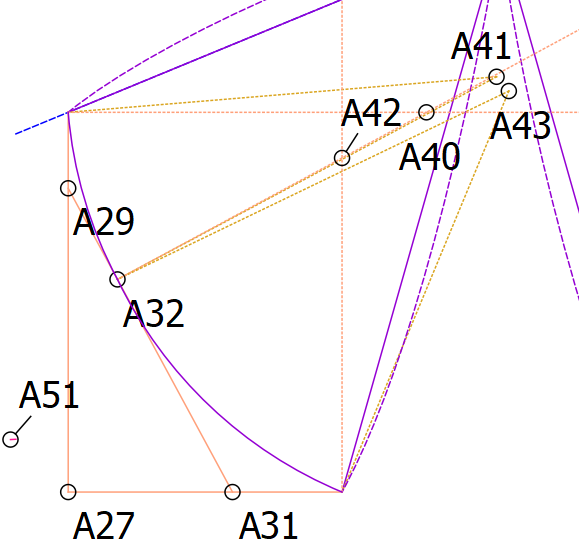
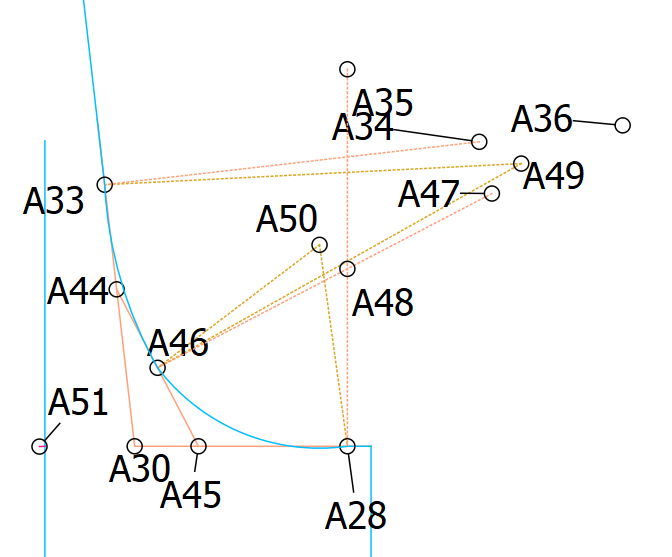
I don’t think I can make a step-by-step tutorial of how to do this with any curve. It is a creative process. You make tangents and points on them, then you draw perpendiculars and see where they cross, use the distance from points on curves to crossing points to find arc centers. Something like that. You also use Line * x type of formula a lot.
I mastered this so I don’t even need a Bezier curve to start with 
It’s very flexible too, the only thing I can’t change freely (without history tab and lots of caution) is number of arcs in each curve)
4 Likes
I never noticed a problem with elipses. (granted I was not thinking like a tester… I did THIS while I was making a peplum as part of a costume for Evita. peplum.val (19.6 KB)
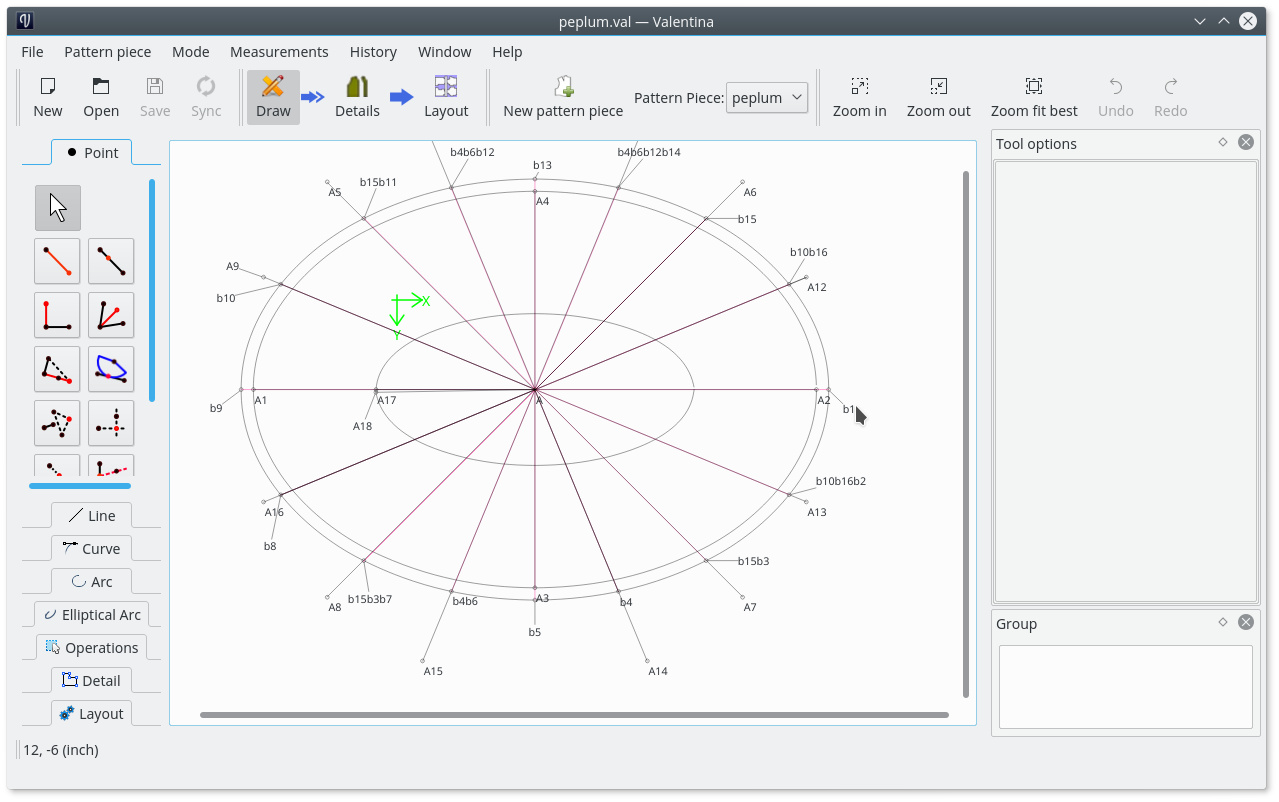
As you can see it has several “good enough” elipses and I was able to ignore the fact that they were less than a complete 360 degrees.
@KeithFromCanada it would be really good to have your .val file as part of the description of the issue. The person who ultimately tries to fix the problem needs to be able to reproduce the problem.
2 Likes
I guess that’s why Dismine just fixed it 2 days ago.
Exactly… the reality is nothing is EVER perfect when dealing with fabric cutting, pressing, and the sewing there of… there’s always a certain amount of fudge factor - especially when humans are involved. ![]()
Can you add Valentina’s files of your examples, so that we can better understand the process?
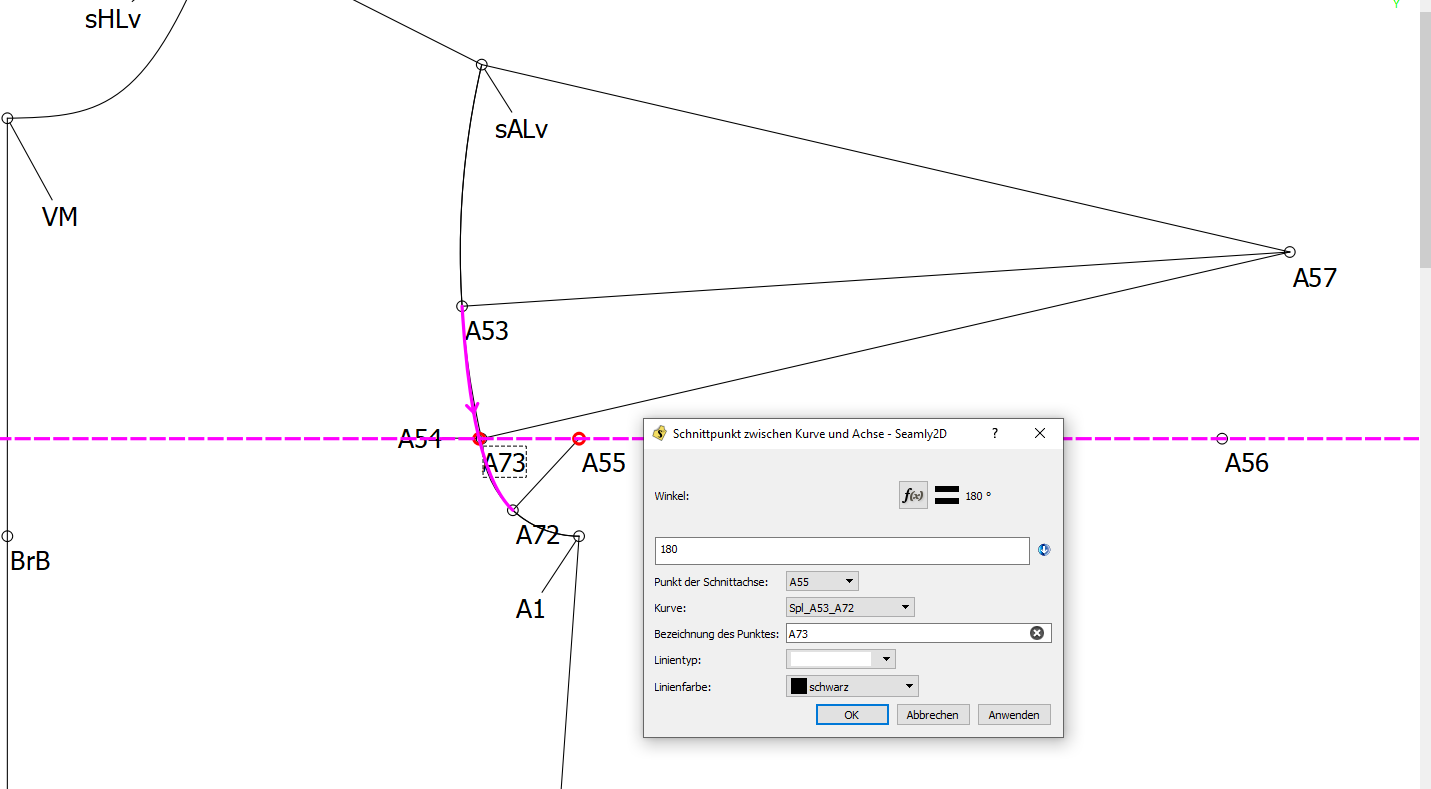
@Krolich: Ich habe mir deine Armlochaufstellung näher angeschaut und an einem Grundschnitt erarbeitet. Sie ist aufwendig bringt jedoch ein sehr gutes Ergebnis. Gestört hat mich jedoch der Knick in dem Armlochausschnitt, der sich an deinen Punkten H11 und H2 gebildet hat. Da ich ausschließlich mit Multisizetabellen arbeite ist dies noch extremer aufgefallen. Ich habe versucht daran weiter zu arbeiten und bin jetzt zu einem für mich tollem Ergebnis gekommen. Ich habe deine beiden Kreisbögen um Punkt H11 etwas kleiner gemacht und eine Kurve dazwischen gesetzt, indem ich Punkte auf den Bogen gesetzt habe. Bei mir Punkt 53 und 72. Anschließend habe ich Hilfslinien zum Kreispunkt 57-53 und 55-72 gezogen. Diese Kurve habe ich in den Winkeln fixiert. Dadurch ist der Übergang immer fließend. Ausgangswinkel waren die neuen Linien.
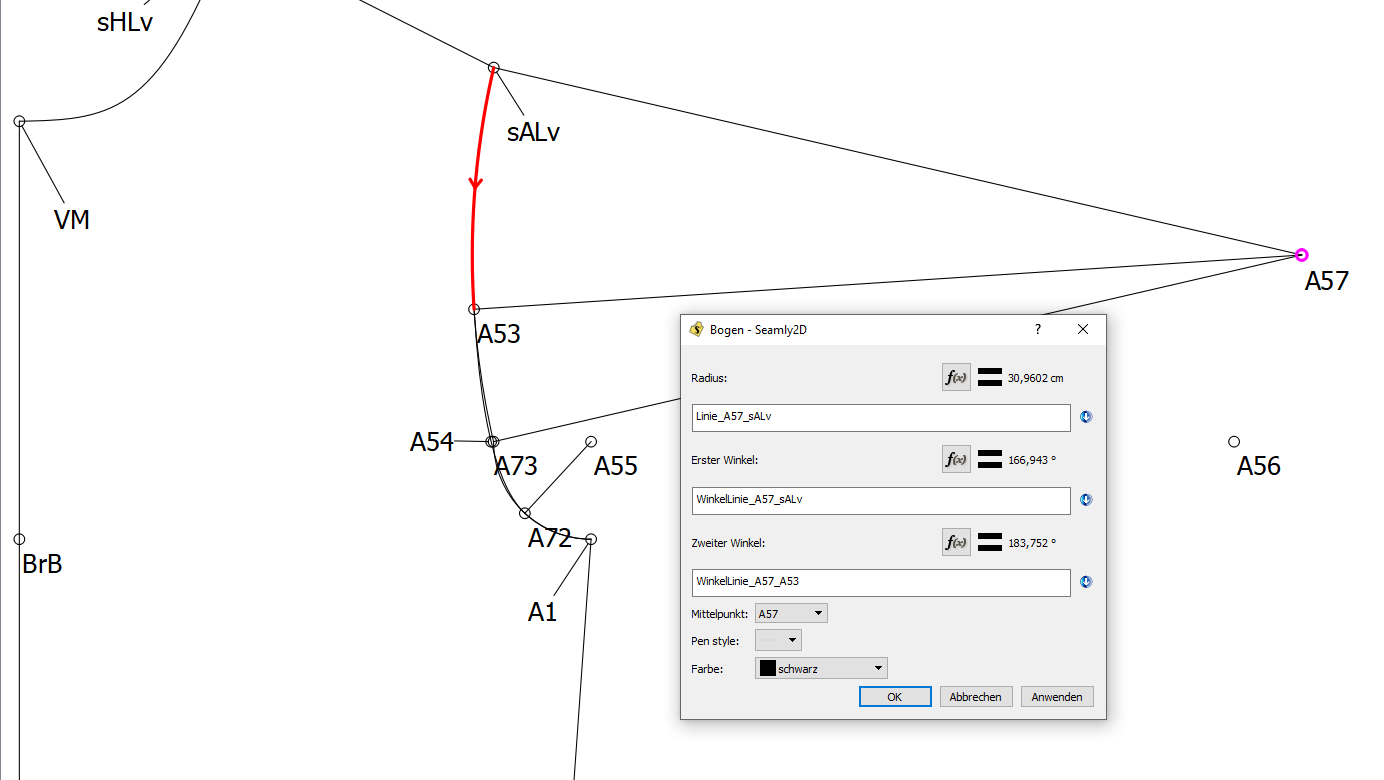
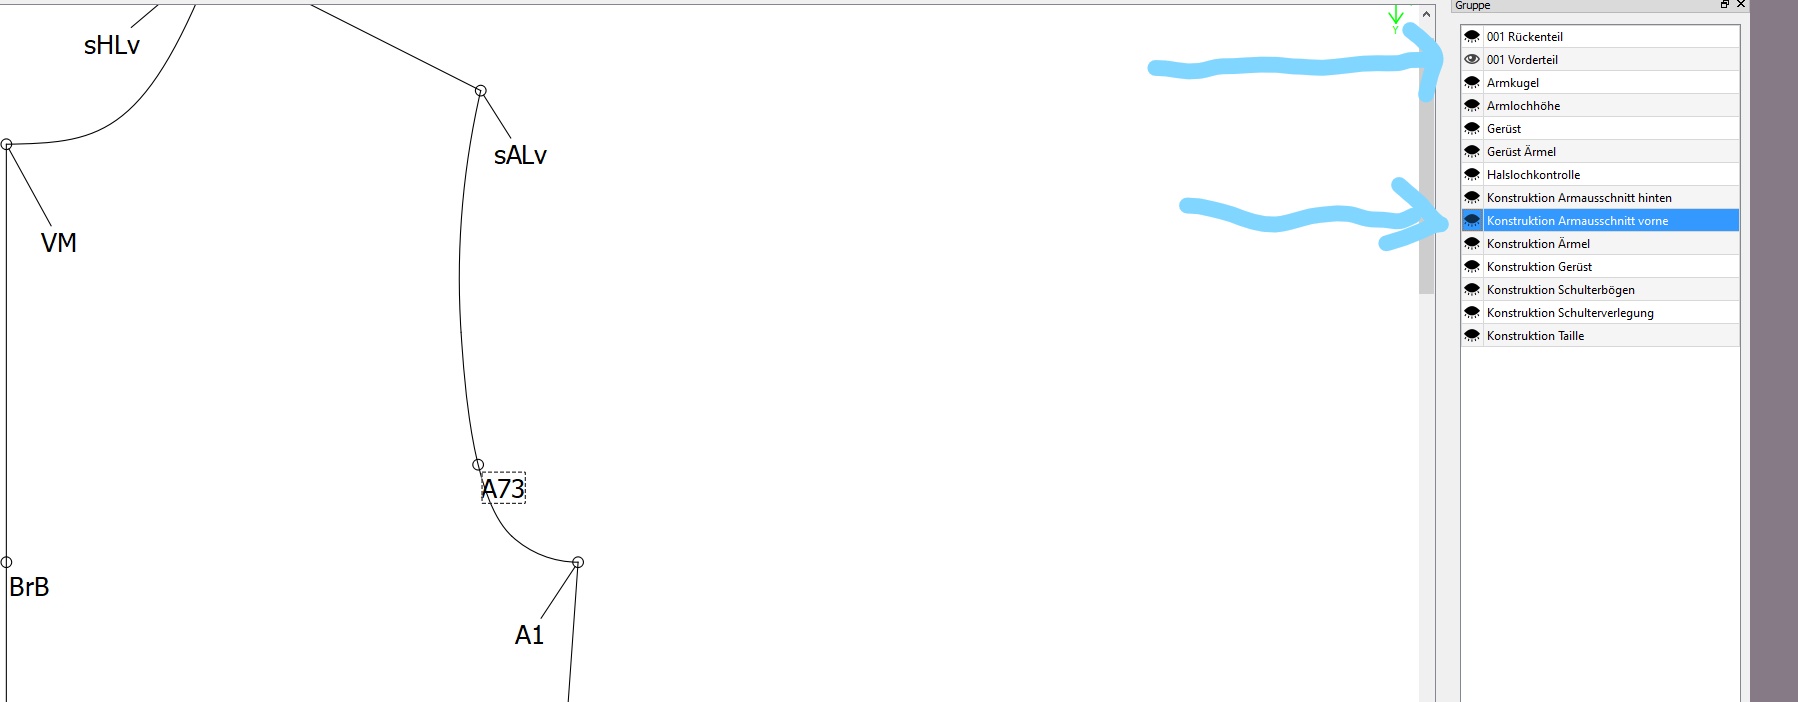
Danach habe ich dann die Kreisbögen vom unteren und oberen Armloch neu ausgezeichen. Deinen Punkt H11 bei mir 54 nehme ich immer als Ärmelpunkt. Da dieser jetzt nicht auf der neuen Kurve muss er dort noch gesetzt werden. Ich lege von Punkt 55 einen Punkt auf die Kurve. Bei der Armkugel nehme ich dann die Strecke vom ersten Kreisbogen 54 -1. Diesen Vorgang habe ich in einer Gruppe versteckt so dass ich zum Schluss nur mein Vorderteil mit dem Armeinsetzzeichen sehe.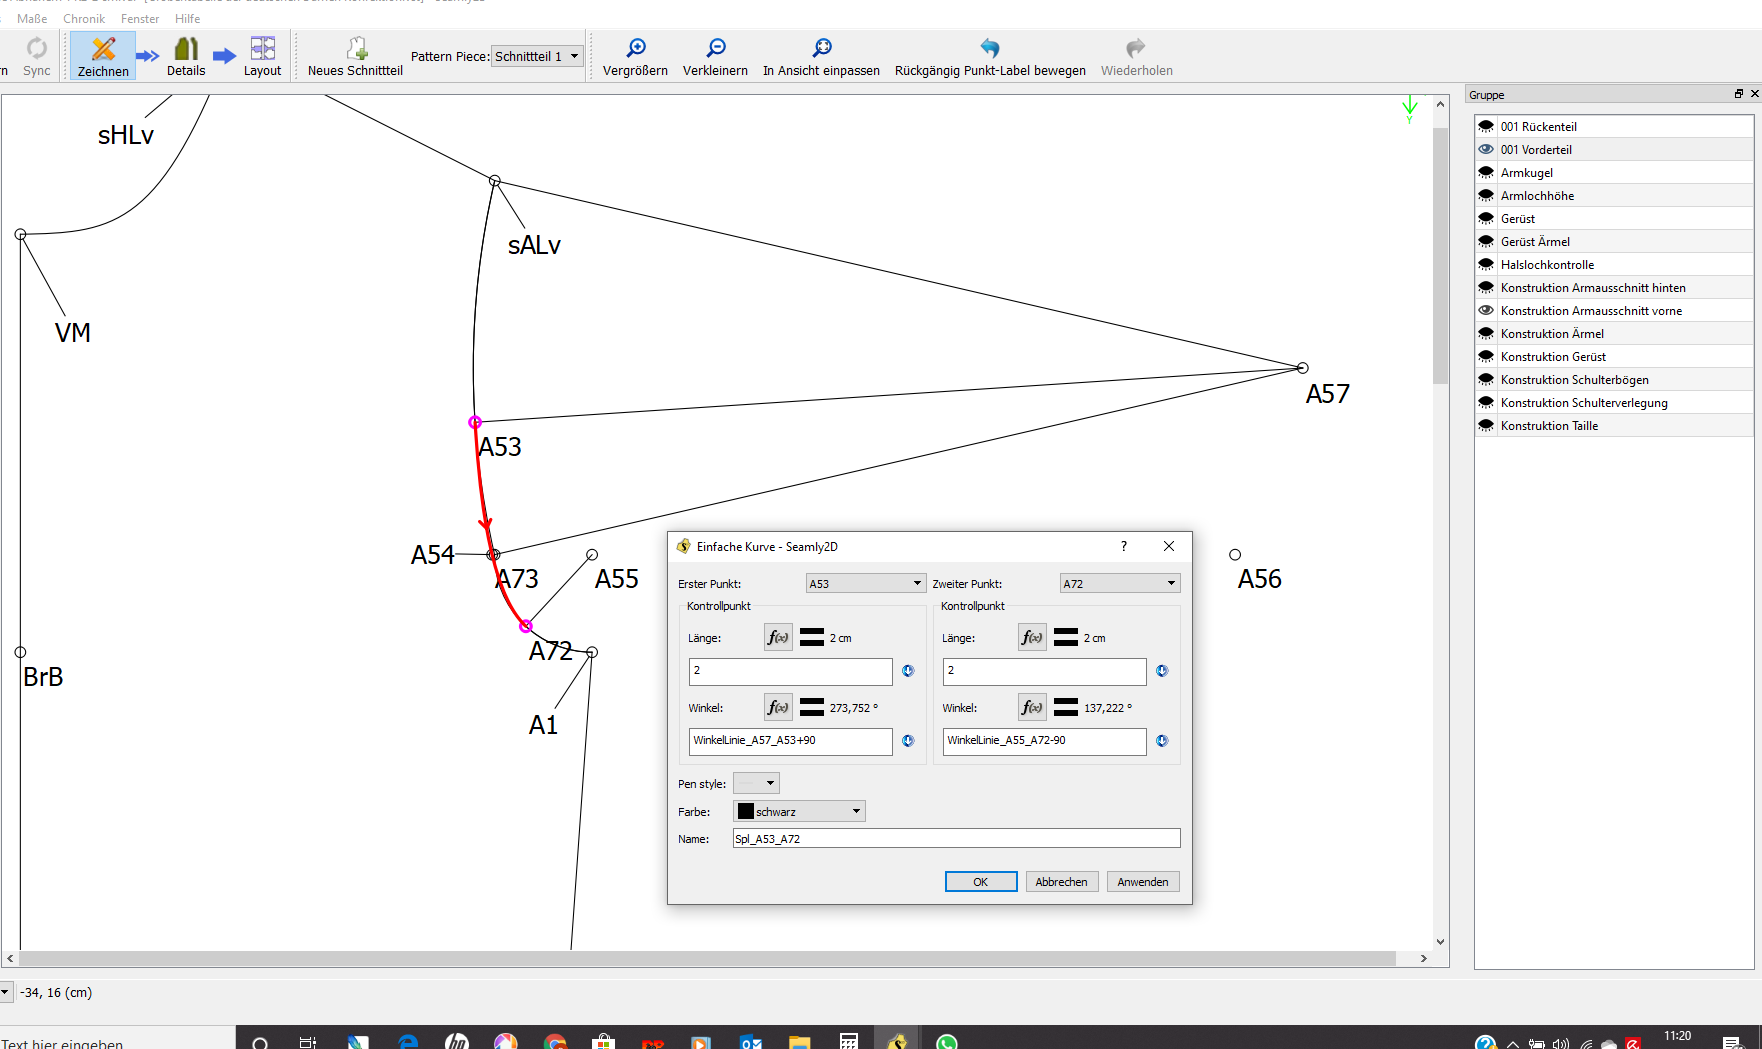
4 Likes
 I’m going to try this.
That’s a very nice result! The basic technique I showed is only for jacket-type armhole and I see you have something more loose-fitting here, like a t-shirt, so no wonder it needed some modification! You did a great job out of it!
I myself only use arch for the bottom part of basic armhole before all the modifications (and even then double it as a curve because detail mode is not great with arches) but I’m happy my experiments help people!
2 Likes
Out of interest, which pattern was the original piece made from? I started using Aldrich’s “Metric Pattern cutting for Menswear”, but this has more darts etc, so the H03 (on yours) is parallel with B21 on the Aldrich pattern.
1 Like
This pattern was my own salad of different russian/soviet methods. And it’s womenswear, so it seems right to me that shoulder point is moved more to the left because of the bust dart
3 Likes
Fair enough. Just struggling with arm curves etc without a French Curve, when I’m following a book that explains pen and paper process.
1 Like
I find that using quarter-circles for the bottom part is enough to get the right shape, the top part – just curves with needed angles. Also helpful to set curves’ “handles” with formulas as a part of armhole depth – so that is scales properly in grading
1 Like
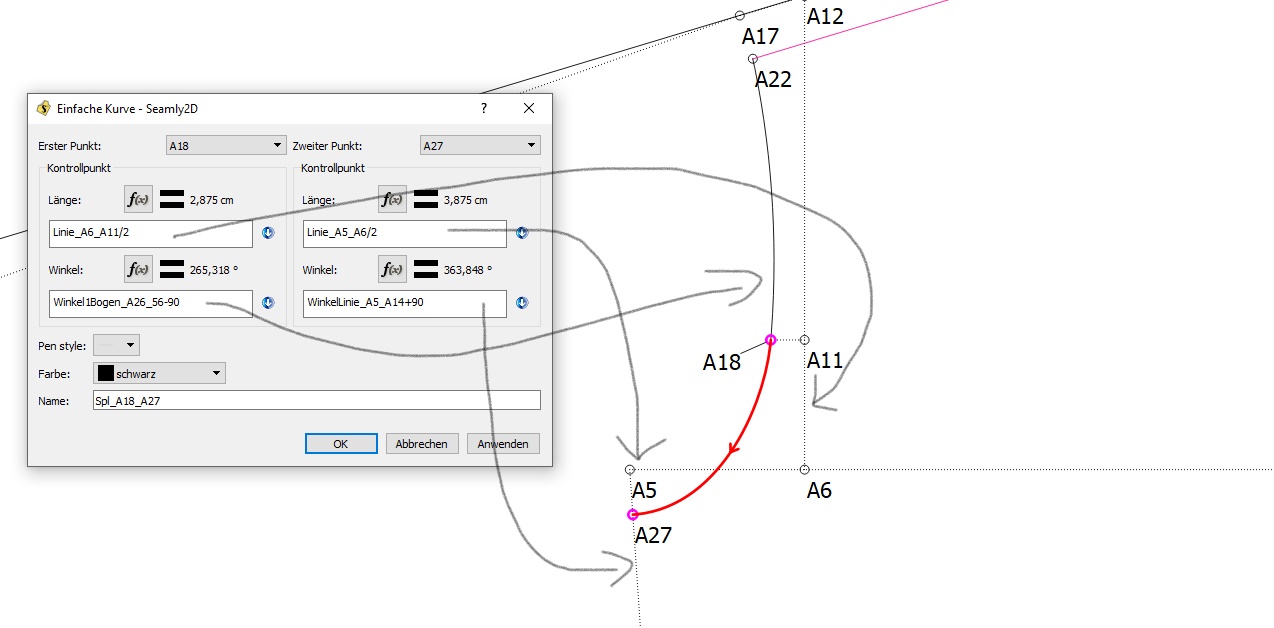
Ich habe an dem Thema weiter gearbeitet und einen einfacheren Weg gefunden. Ich habe nur für den oberen Teil ders Armloches Krollich’s Methode benutzt. Für den unteren Teil des Armloches habe ich eine einfache Kurve benutzt und in den Optionen an allen vier Punkten Formeln benutzt, die Auswirkung auch in der Gradierung haben.
4 Likes
Punkt 18 in der Kurve: Winkel ist gleich Winkelbogen. Bei der Länge habe ich mich auf die Linie A6_A11 bezogen, weil die sich auch in der Gradierung ändert. Sie steht in Verbindung mit der Armlochhöhe. Das Gleiche Prinzip habe ich auch bei Punkt 27 angewendet. Mich dort aber auf die Linienlänge des Armlochdurchmessers bezogen. Da sich bei der Gradierung beide Punkte Armochhöhe und Armlochdurchmesser unterschiedlich verändern, gab es an dem Punkt A18 immer einen unschönen Verlauf wenn ich mir die unterschiedlichen Größen angeschaut habe. Jetzt hat alles gut gepasst
3 Likes
Thank you, @Scholli . This technique is most useful to me. I am currently fitting a pattern to 5 different women for costumes in a play and though guessing works for many measurements, a proper fitting armscye is critical.
Danke, @Scholli . Diese Technik ist für mich am nützlichsten. Momentan passe ich 5 verschiedenen Frauen ein Muster für Kostüme in einem Stück an, und obwohl das Erraten bei vielen Maßen funktioniert, ist eine genau passende Waffe von entscheidender Bedeutung
2 Likes