I also LOVE this method 
Here are my test files:
Close Fitting Bodice Block3.val (21.1 KB)
Women 12 measurements.vit (1.1 KB)
There’s absolutely no way the curves can go out
of whack .
I also LOVE this method
Here are my test files:
Close Fitting Bodice Block3.val (21.1 KB)
Women 12 measurements.vit (1.1 KB)
There’s absolutely no way the curves can go out
of whack .
@KeithFromCanada Haha thank you! Can I tell everyone I’m a certified witch now?
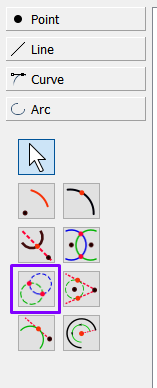
@Grace you don’t need to draw every circle separately, there is a tool “point of intersection circles”, check it out! You have to pick two points, write in two radiuses and pick which of two resulting points you need
Looks interesting! I think I may later try to re-make curves as arcs using this logic on my bra base pattern (those curves where the cup is to be sewn in the main part are a pain)
Now I’m reading into how sleeve capes are made with the arc method so this whole thing makes more and more sense to me
UPD my dad is drunk and trying to convince me that it’s a theme for Ph.D. thesis 
I think you definitely can ![]()
Bleh! definitely ![]() a witch
a witch ![]()
Haha! how cool would it be if we could have the same interactive curve tools in Valentina ![]()
@Krolich, I checked your system, and there is a (soluble, I think) issue with it. For curves to join smoothly, they have to add up to 180 degrees where they meet. This means that both centers must line up with the join. In your example, H12 & H22 line up with the join at B4, so the join is ‘rigorously smooth’, so to speak. H131 & H12, on the other hand, do not line up with the join at H11, so the join angle is not 180 degrees. (This can be seen as the ‘bulge’ to the left of A3_B11.)
The solution requires that
H01 & H12 not move. (Obviously.)H01_H131 & H11_H131 have the same length. (Again, obviously.)Arc H01_H11 must stay within bounds.H11_H131 MUST travel through H12.H11 can only ‘slide’ along the curves.…and there is the rub. How do you define such an arc in a formula or two?
(Maybe it should be your thesis!)
To be fair, as long as the shifting of the centers is small, it won’t really make much difference in the real world. On the other hand, if you can come up with a method for fairly easily creating such a series of arcs, you would win much applause.
…and I’ve solved it after a good power nap with a bit of trig. I’ll explain the diagram below.
Basically, any two points on a circle (A & B) plus the center (C) form an isosceles triangle, where the CA & CB radii (and therefore the outer two angles) are equal.
Looking at the diagram, we know the angle at B (…and therefore the angle at A) and the length of AB. The angle at C is simply 180 - (A + B). What we don’t know is the length of lines AC or, FAR more importantly, as it determines the center of the arc, XC
Doing a bit of Googling to refresh my memory, I was reminded that sin(B) / AC = sin(C) / AB. As XC = AC - BX (and what we want is to place C on the line that travels through both B and X, moving things around gives me the formula XC = (AB / sin(C)) * sin(B) - XB.
As the angles are absolutes that must be turned into relatives, creating variables that do so in the background keeps everything nice and tidy, and so the formula for the length of XC is ((Line_A_B / sinD(#c)) * sinD(#b)) - Line_X_B
…except the variables table seems to explode when you use measurements to calculate things, so what I have to use is a rather unwieldy
(Line_A_B / sinD(180 - (((AngleLine_A_B - 180)) + ((AngleLine_A_B - 180))))) * sinD(AngleLine_A_B - 180) - Line_X_B. 
(Oh, yes. You MUST use ‘sinD’ instead of ‘sin’, as, while Valentina uses regular degrees for angles, the trig functions use radians by default. The ‘D’ after a trig function means it uses degrees for calculations. Forgetting the difference made me want to pull out my hair for a while there.)
It works VERY well, but, considering what a right royal pain it was to figure out and then put the formula together, I propose a tool is added to create an arc from A to B with the center along the line that includes X. (i.e. ‘Pick three points.’)
(Of course, there is still the issue that the ends of the curve(s) won’t necessarily be at the proper angle to the adjoining lines.)
Hope this helps!
good find. i used to know all that when i aced geometry about a million years ago
If you want arcs to line up at 180 АND angle in point H1 to be 90 (which is the usual requirement for patterns) there is just no such point that might be a center of that circle. Somewhere here we must lower the bar of how perfect geometry of the pattern should be 
Yup. That was my conclusion, as well. My thought was to use yours when I know that the angles work out, and mine when they don’t. Another thought was perhaps creating a short line at 90 (or w/e), then attaching the arc to the end of it.
SINES ARE WIZARDRY
Here is how I transformed a “custom” curve into arcs (and lines) using tangents and perpendiculars. All points on lines are made with CurrentLength / x type of formula so they should scale nicely when measurements change
Bezier curve (green) and arcs+lines (pink) comparison
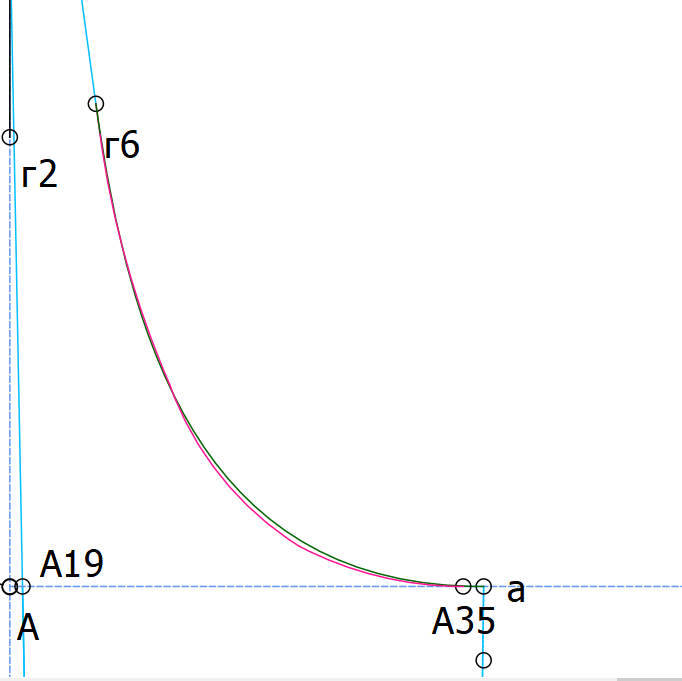
The process

Of course, they don’t all meet at 180 but I think the result is excellent for practical patternmaking. Now I’m going to check how corresponding curves will… well, correspond if measurements change
This is getting very complicated
Have you tried playing with the Elliptical Tool?
If it’s possible to solve what we have here with Elliptical arc, it will require some superior wizardry 
As I see, It will work easily (put in two radii and have a nice arc between points) only for 90° arcs
The elliptical tool is badly broken. This is what a 5x20 ellipse looks like:

(…and yes, I reported it.)
Hmmm, I don’t see a picture 
Grace, I have several family members in the direct path of Hurricane Irma and they woke up today to assess damage and check to see that they are alive. I don’t see a picture either, but I hope that the eliptical tool will be in the list of issues once they are back on the repository. I have not yet checked today to see if any issues are there. If I can tear my attention away from the weather long enough today I will try to figure out how to build the TAPE tool (not make changes, simply build a new version of what is there). I have a great deal of immunity to getting overexcited about anything today
See? It’s so ugly that the forum software won’t even allow me to show it!
forum software can be a bit buggy with showing uploaded images. should work if you use a couple of extra “enter key” entries before you use the upload icon for the image
Just an FYI… I use Lightshot for taking screen shots. You can add arrows, circles, squares. The text is very small so I haven’t used it before, but once you have your picture setup, you can copy it and paste it to the forum without having to save it to your computer. You can just google it.
