I saw your post asking how to flag a moderator to delete your post and I accidentally deleted the post asking the question. I am relatively sure you are able to delete any post of your own. Please look at the bottom of the message for “…”. if you click on the dots it should expand to show additional options for that post. one of the options should be a trash can
1 Like
o.k thank you  I was selecting the garbage can icon and it wasn’t working.
How would I do a 90 degree angle off a curve and flow off the curve?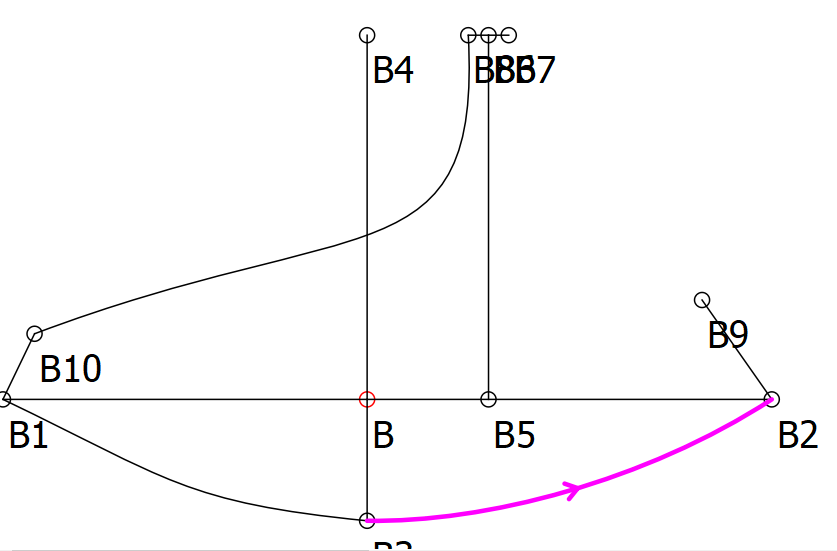
1 Like
can you post your questions on the forum, please so others can see them. this one is a private message to me and I do not have an answer right now. I am traveling on family matters and do not have my computer with me. I am going to invite @slspencer and @Grace to this message in the hope that one of them can help you more quickly.
1 Like
I’m thinking that you would like line B1 to B10 to be at 90 degrees of the angle of the curve B1 to B3. In this case, I’d enter the angle formula of B10 to be the angle of curve of the 1st handle of the curve B1 to B3 plus 90 degrees.
By ‘Flow off the curve’ I take it that you want the curve to move off line B1 to B10 and then to curve away. I’d enter the formula on the 1st handle be the same angle as the line B1 to B10 with a length of perhaps 1cm. This will extend the line and ease immediately into the curve to the right.
I have to go to work now, but if you don’t understand, I’ll do images this evening for you.
2 Likes
Hi @AmandaClarice - did you get your answer?
I tend to create curves by defining the angles with a formula so that I can use (angle formula +180) to do exactly what you’re asking about. It’s extending a line using the tangent at the endpoint of a curve. Does this help? If not, please post your pattern and your measurement file and I’ll see what I can do to convert your curve so you can extend the curve along its tangent.
1 Like
If you could please do the pictures/video.I’m more visual. I am at a loss with reading the instruction. I apologize for the delay, we had long weekend and I am just catching up now the kids are back in school.
1 Like
If you let us have the .val and .vit files, then we can create a short video or images to show you how to do this. I don’t have anything that will serve the purpose at the moment.
1 Like
Simple Example of the concept:
Create a Bezier curve using the ![]() Curve tool which uses control handle tool, and then create a line along the tangent at the end of the curve using the
Curve tool which uses control handle tool, and then create a line along the tangent at the end of the curve using the  Point at distance and angle tool.
2 Likes
Complex Example:
Find the angle of the tangent at the end of a multisegment curve created with the ![]() Curved Path tool (the control handles are not created with separate control points).
Curved Path tool (the control handles are not created with separate control points).
- Confirm you know which angle to use: Select your curve. Go to Measurements and select Variables Table. Select the Angle Curves tab. Then locate your curve and the segment within your curve.
- Then create or update your line extension and for the angle use the formula option
 . Select the Angles of curves radio button then choose your curve segment’s angle.
2 Likes
If you want to upload the document, please convert it to plain text (.txt) or to pdf and try again.
1 Like
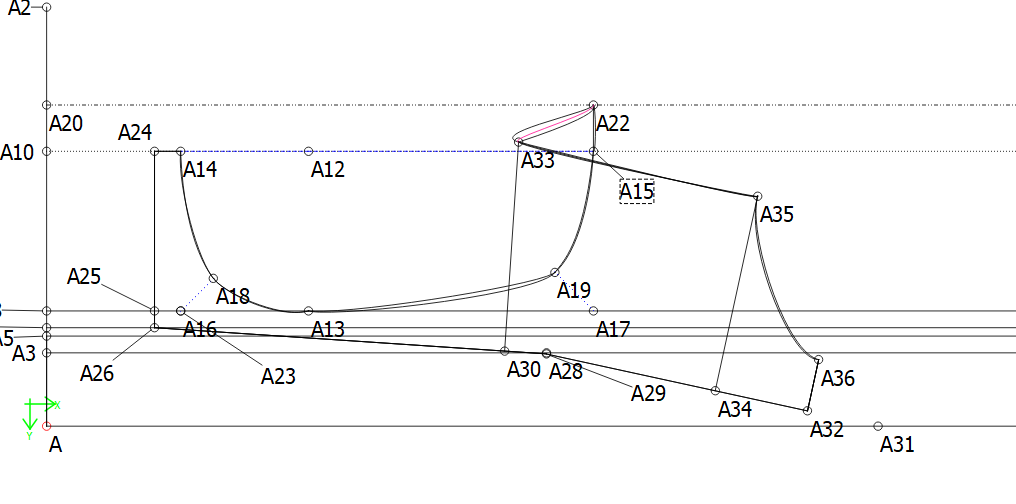
When grading i decided to try going out point A15. How do you keep the lines from going distorted and matching the cup lines to the cradle lines. Or will this not be possible?
1 Like
I am hoping for @grace to answer this one because she is so much more practicid with curve shaping than am I. There is a time difference for her, since she lives in Africa. I will look again tomorrow and spend some time on your concern if she has not been able to
1 Like
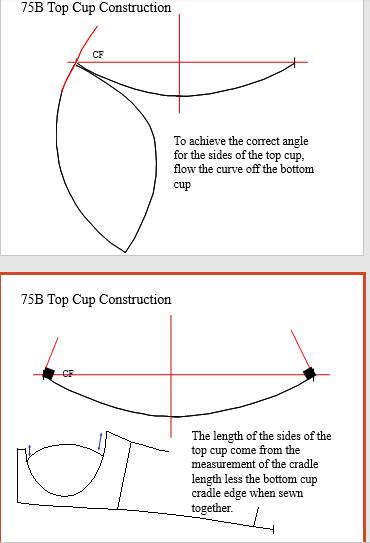
This is way above my head. I have watched it numerous times trying to figure out how to apply this to the top cup center front and top cup breast root and then angle them both 90 degrees.
1 Like
Thank you, I’m looking to input my measurements and make a pattern for trial.
1 Like
Ok, I’ve had a quick look and the first thing that I see is that you have ‘hard-coded’ the measurements. It would be a lot quicker and easier in the long run, if you created a .vit (measurement) file using SeamlyMe. Then you could create one for the tutorial pattern so that you could follow the tutorials and then copy that .vit file by Save As and add your name or something. Edit the values to your own measurements.Then you can just change the measurements file to resize your pattern and all the points should move according to the measurements.
You may need to tweak the curves a bit, but the basic layout shouldn’t cause what has happened in your image above unless you have made a small error in the measurements.
As it is, you’ll need to edit or redo the pattern using references to your measurement file instead of exact measurements.
If you check out this topic, I did this tutorial that @AVI posted & added my files for comment: Kristina Shin Basic underwire bra tutorial - #6 by Grace
1 Like
Goodmorning
Would I be able to see how the go 90 degrees from a top cup draft? Much appreciated, sorry for the inconvenience. https://forum.seamly.io/uploads/db1488/original/2X/2/2c62e058fac25a5001cc4706b6d22a004672a64a.mp4
Question 2.
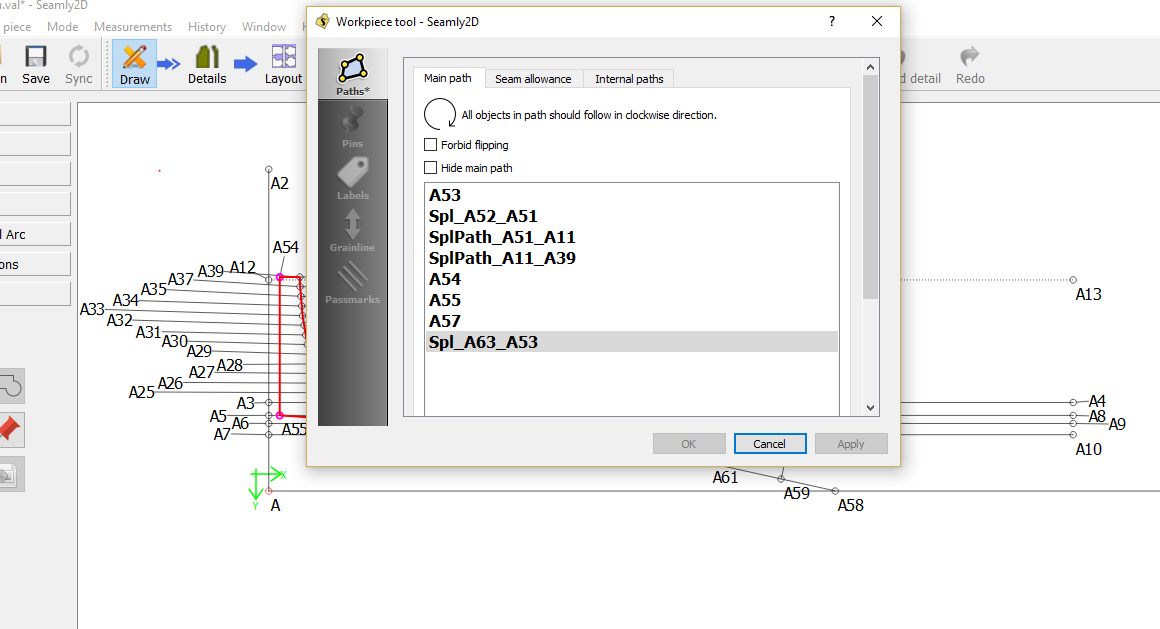
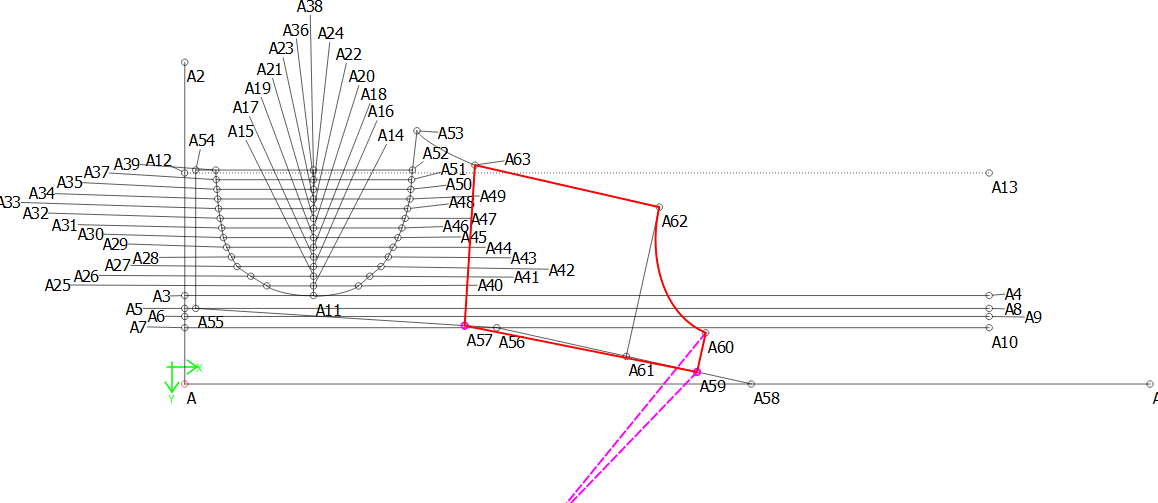
How do I group the lines for the cradle more efficiently?(workpiece tool) is there a way to update the software so that the workpiece tool does not have to go clockwise? There is an error, it won’t let me group
Here is the pdf of the exact steps I have taken when drafting this cradle
 !
!
1 Like
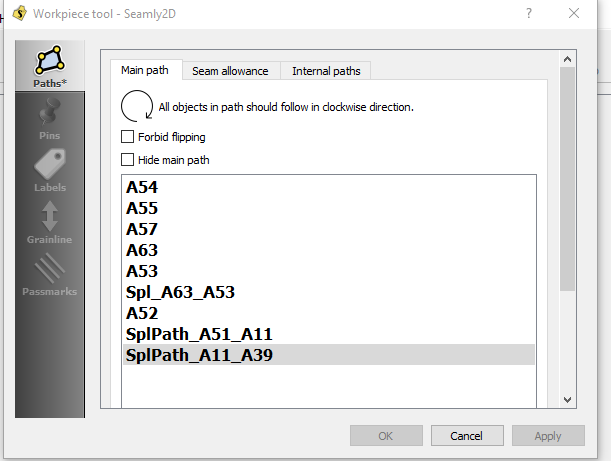
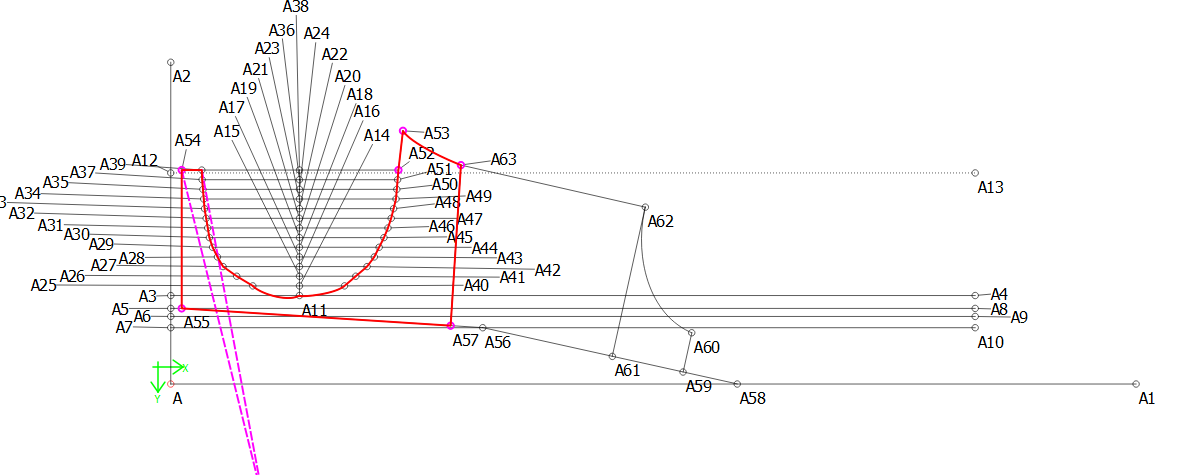
Actually, you can do this without requiring a change to the tool. I have created the workpiece that I think that you want in this file. 34B softbra.val (26.3 KB)
Here is a screenshot of the elements I used.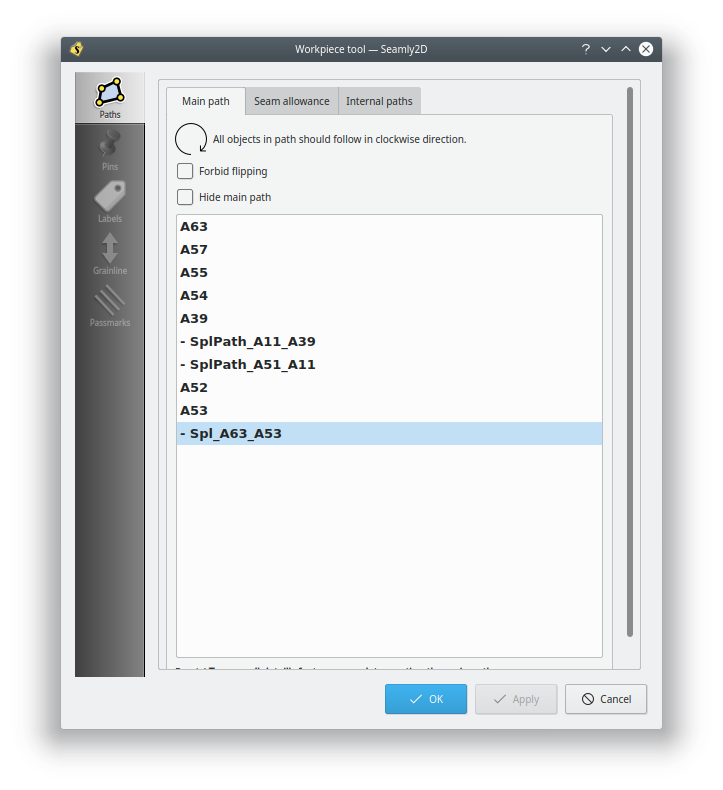
1 Like